These Sourdough Scones are light and flaky with crispy crumbly edges.
They make a delicious breakfast treat or pair beautifully with your favorite tea.

Eat them plain or top them with your favorite jam and cream. Try this Roasted Strawberry Balsamic Jam or this Small Batch Blueberry Jam.
Here are a few other scone recipes you will enjoy: Apple Cinnamon Pecan Scones, Sourdough Cheese Scones, Brown Butter Pecan Scones, and Sourdough Blueberry Scones.
Jump to:
Why You Will Love This Recipe
- Sourdough Scones are so quick and easy to make and a great way to use up sourdough discard!
- These scones use simple everyday ingredients common to most sourdough bakers. Just toss some flour, sugar, baking powder, and salt into your food processor or blender, blend in some butter, stir in the sourdough discard, egg yolk, and heavy cream, shape the dough, and bake.
- Easily customize this scone recipe by stirring in your favorite add-ins.
Recipe Ingredients
You will need the following ingredients to make these light and flakey Sourdough Scones.
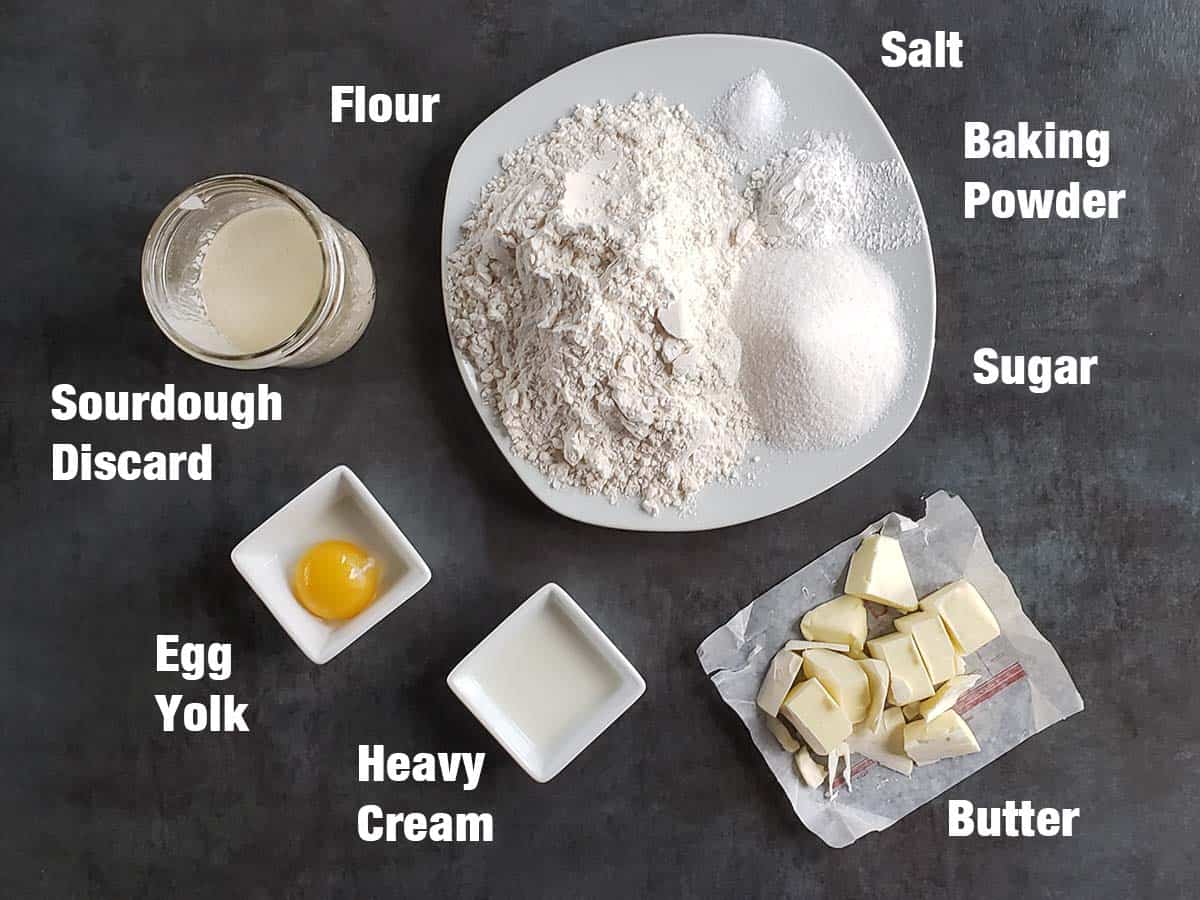
Butter and Heavy Cream: Make sure the butter and heavy cream are chilled. Keeping the scone dough as cold as possible prevents over-spreading and preserves the scone's flakiness.
Sourdough Discard: By reducing the amount of heavy cream and flour and adding sourdough discard we are able to turn a basic scone recipe into an excellent way to use up extra sourdough discard.
Egg Yolk: The addition of an egg yolk is nontraditional. But I think it adds richness and creates a lighter less dense scone. The additional fat will also help stop the scones from drying out.
Save the egg white to make this Lemon Swiss Meringue.
Salt: I add at least a pinch of salt to all of my recipes. Salt complements and intensifies the other flavors. For all of my recipes, I use Morton Kosher Salt which packs more densely than Diamond Crystal Kosher Salt. If you are using Diamond Crystal Kosher Salt you will want to double the amount of salt you add.
See the recipe card for full information on ingredients and quantities.
Are you new to sourdough? I have plenty of information to help you on your sourdough journey.
- How to Create Your Own Micro Sourdough Starter
- Scrapings Method for Sourdough Starter
- How to Dehydrate Sourdough Starter
- Storing Sourdough Starter in the Refrigerator
- Storing Sourdough Starter on the Counter
- Best Containers for Storing Sourdough Starter and Discard
- How Long Does Sourdough Discard Last?
- What is the Difference Between Sourdough Starter and Sourdough Discard?
- Best Gifts for Sourdough Bakers
Substitutions and Variations
Vanilla and Almond Extracts: You could also add 1 teaspoon of vanilla or almond extract for additional flavor. Skip it if you're making savory scones.
For a savory scone with a stronger sourdough flavor, you can reduce the sugar to two tablespoons. You could also use brown sugar but will need to whisk it into the wet ingredients until there are no lumps.
This sourdough scone recipe was created as a generic base for whatever seasonal fruits, spices, or other flavorings you have available. Try adding:
- Herbs: mint, basil, sage, cilantro, rosemary, thyme, etc. Mix herbs into the dry ingredients.
- Spices: cinnamon, nutmeg, cardamom, clove, allspice, ginger, Chinese five-spice, Zaatar, everything bagel, curry, etc. Mix spices into the dry ingredients.
- Citrus Zest: orange, lemon, lime, and grapefruit Mix zest into the wet ingredients.
- Extracts: Replace the vanilla extract with a different extract like lemon, almond, anise, or mint.
- Fruit: Fresh, frozen, or dried If the fruit is particularly wet blot it with a paper towel before tossing it with the dry ingredients before adding the wet ingredients.
- Grated Vegetables: Grate carrots, zucchini, beets, or other vegetables. Because vegetables are mostly water wrap them in a cloth towel and squeeze most of the moisture out before tossing them with the dry ingredients before adding the wet ingredients.
- Add-Ins: chopped chocolate (white, milk, semi-sweet, dark, or ruby), shredded coconut, chopped nuts (walnuts, almonds, pecans, pistachios, etc.) Toss with the dry ingredients before adding the wet ingredients.
Sweet Flavor Additions
- Walnut Cherry Chocolate Chip: Knead in ¾ cup dried cherries, ½ cup walnuts, and ¾ cup white chocolate chips after mixing the wet ingredients into dry ingredients.
- Mixed Berry: After mixing the dry and wet ingredients together, add 1 ½ cups of your favorite fresh or frozen berries. Gently fold the berries in to avoid bursting them.
- Cranberry Orange Scones: After mixing the dry and wet ingredients together, knead in 1 ½ cups of fresh, frozen, or dried cranberries and 2 tablespoons of orange zest.
- Lemon Poppyseed: Mix in 2 tablespoons of lemon zest and 2 tablespoons of poppyseed into the liquid ingredients.
Savory Flavor Additions
Reduce the sugar to 2 Tablespoons and leave out the vanilla extract.
- Herb: Mix in 2 minced garlic cloves, 1 teaspoon ground black pepper, and ½ cup chopped herbs (rosemary, parsley, basil, etc.) into the dry ingredients before adding the wet ingredients.
- Ham, Swiss, and Green Onion: Add 1 cup of cooked cubed ham, 1 cup shredded Swiss cheese, and a ½ cup of chopped green onions to the dry ingredients before adding the wet ingredients.
- Zucchini and Cheddar Cheese: Mix in ⅔ cup of coarsely grated and drained zucchini and ¾ cup grated sharp cheddar cheese into the dry ingredients before adding the wet ingredients.
Step by Step Directions
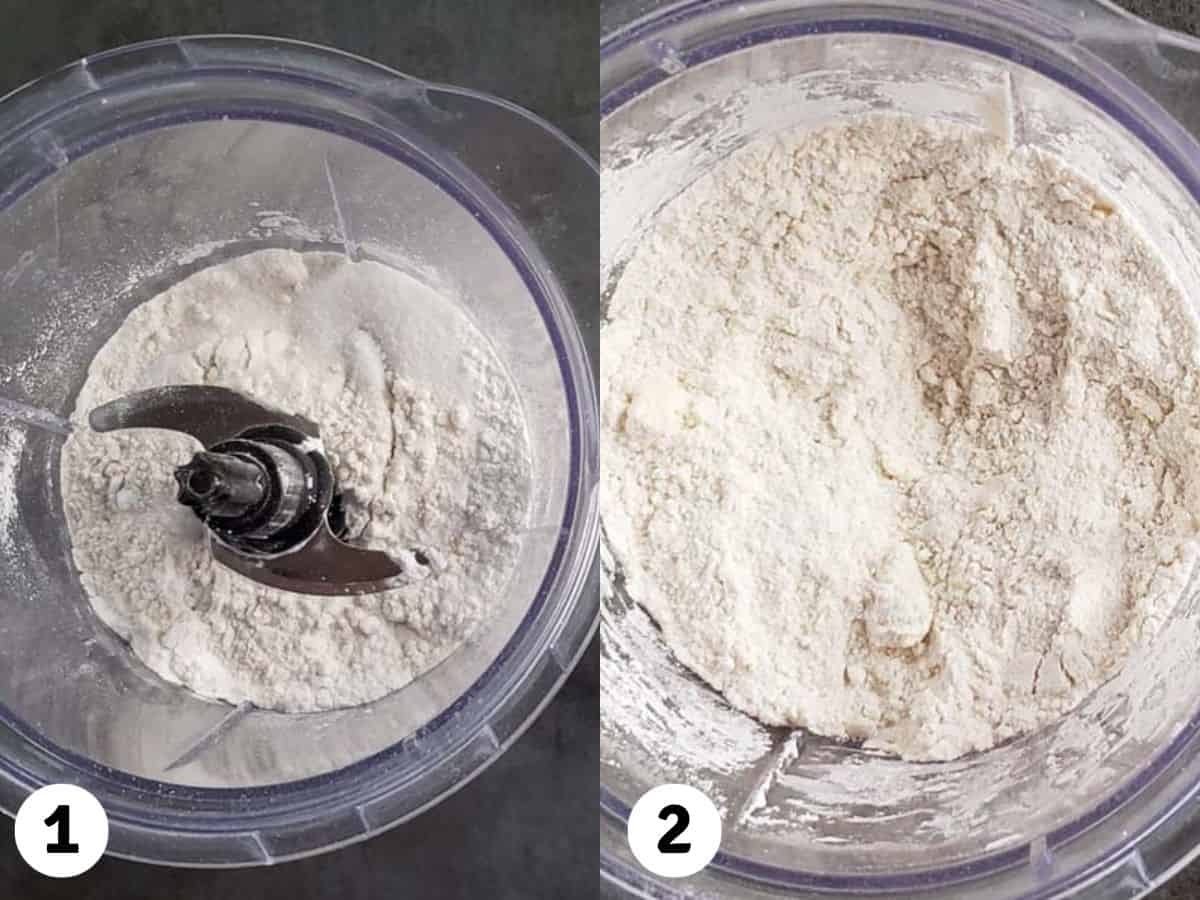
Step 1: Add the flour, granulated sugar, baking powder, and kosher salt to the bowl of your food processor. (Image 1)
Step 2: Cut the butter into 4 pieces and add it to the food processor. Pulse a few times to chop and incorporate the butter into the dry ingredients. Continue processing until the butter pieces are the size of peas. (Image 2)
Tip: You can also use a pastry blender to cut the butter into the flour mixture.
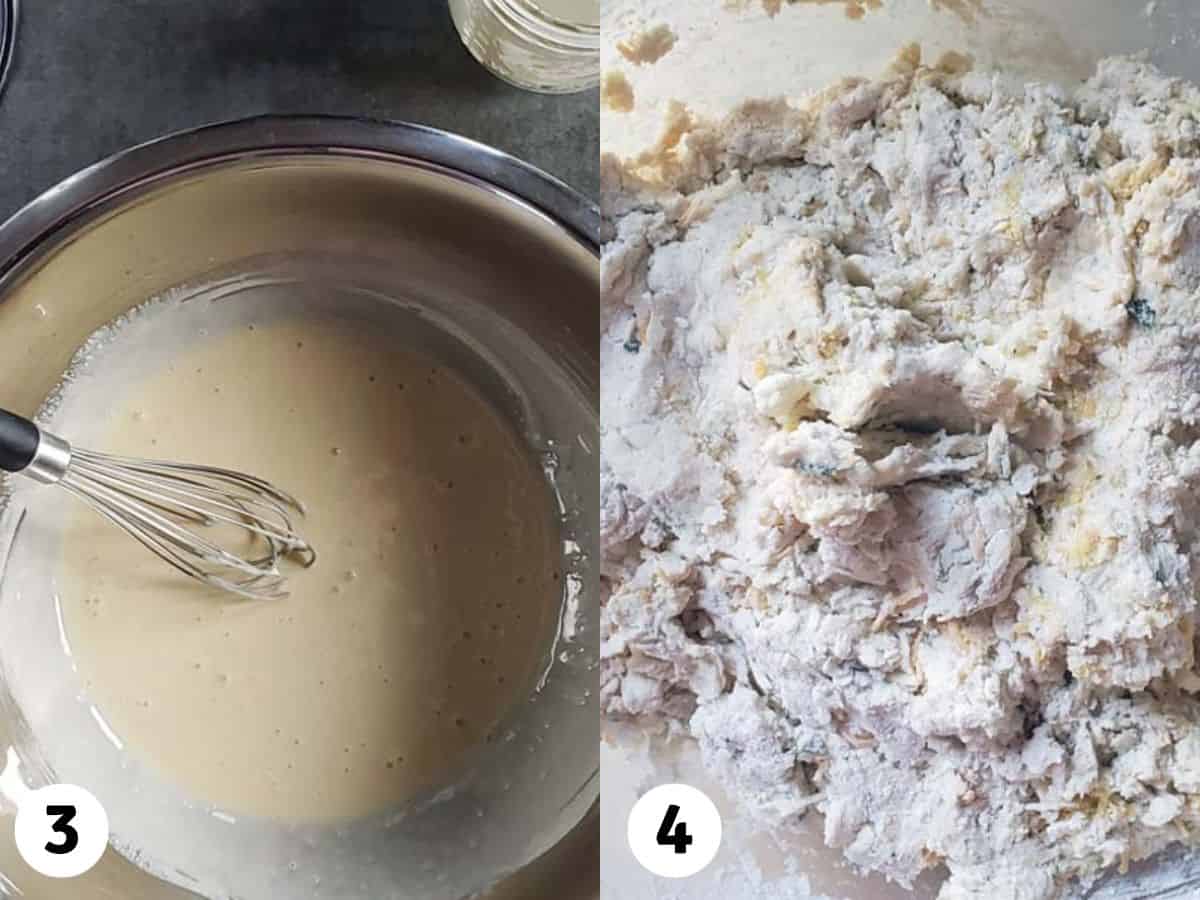
Step 3: In a large mixing bowl whisk together the sourdough discard, heavy cream, and egg yolk. (Image 3)
Step 4: Pour the flour mixture into the wet ingredients and fold them together. (Image 4)
Tip: Do not overmix the dough at this point. Overmixing will create tough dry scones.
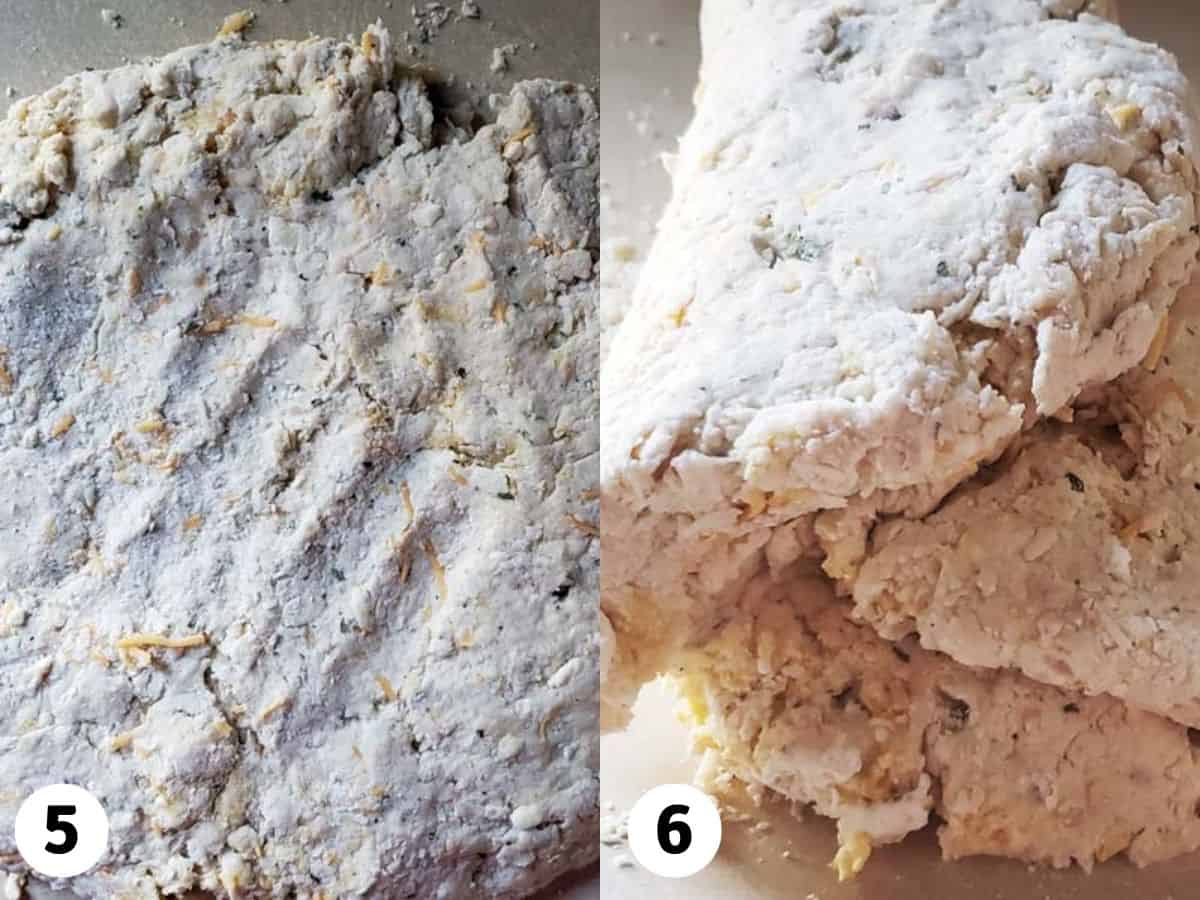
Step 5: Pour the dough onto a lightly floured surface. Knead the dough a few times until it begins to come together. Flatten the dough and fold it into thirds like you would a letter. Give the dough a quarter turn and repeat this flattening and folding process two more times. (Photos 5 & 6)
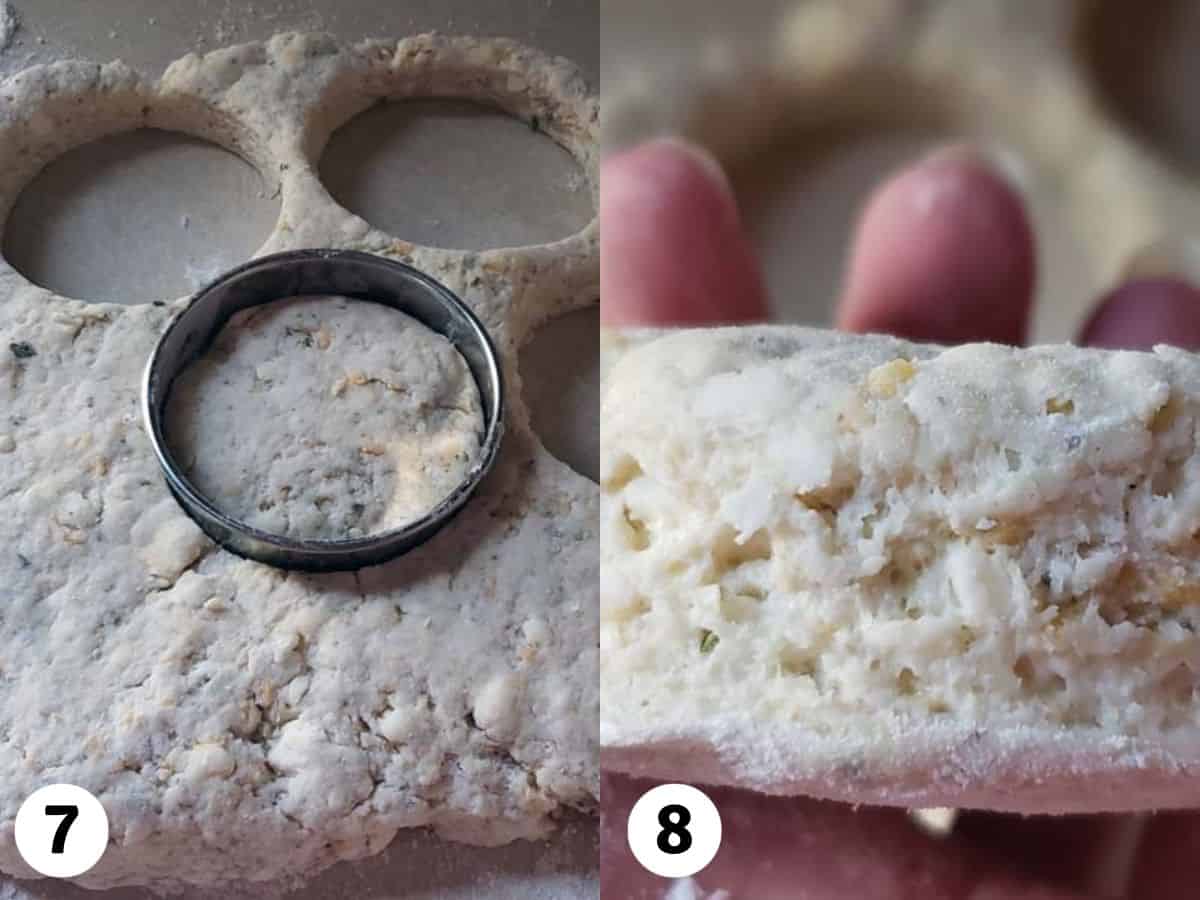
Step 6: Pat the dough into a disc approximately 1 inch thick. (Photos 7 & 8)
Step 7: There are two ways you can your dough to make individual scones:
- Use a knife to cut it into eight wedges.
- Use a circle biscuit cutter to cut out about 10 scones.
Tip: Cutting scones into circles looks nicer but you will always have at least one wonky-looking scone that is made by mashing all of the scraps together. Cutting scones into wedges is easier and has the added bonus of not creating any scraps. How you choose to cut your scones is up to you.
Tip: When cutting the scones, push straight down without twisting the cutter. Twisting the cutter seals the edges together and will prevent them from rising.
Step 8: Transfer the scones to a parchment paper-lined baking sheet. To prevent the scones from spreading chill in the refrigerator for 30 minutes.
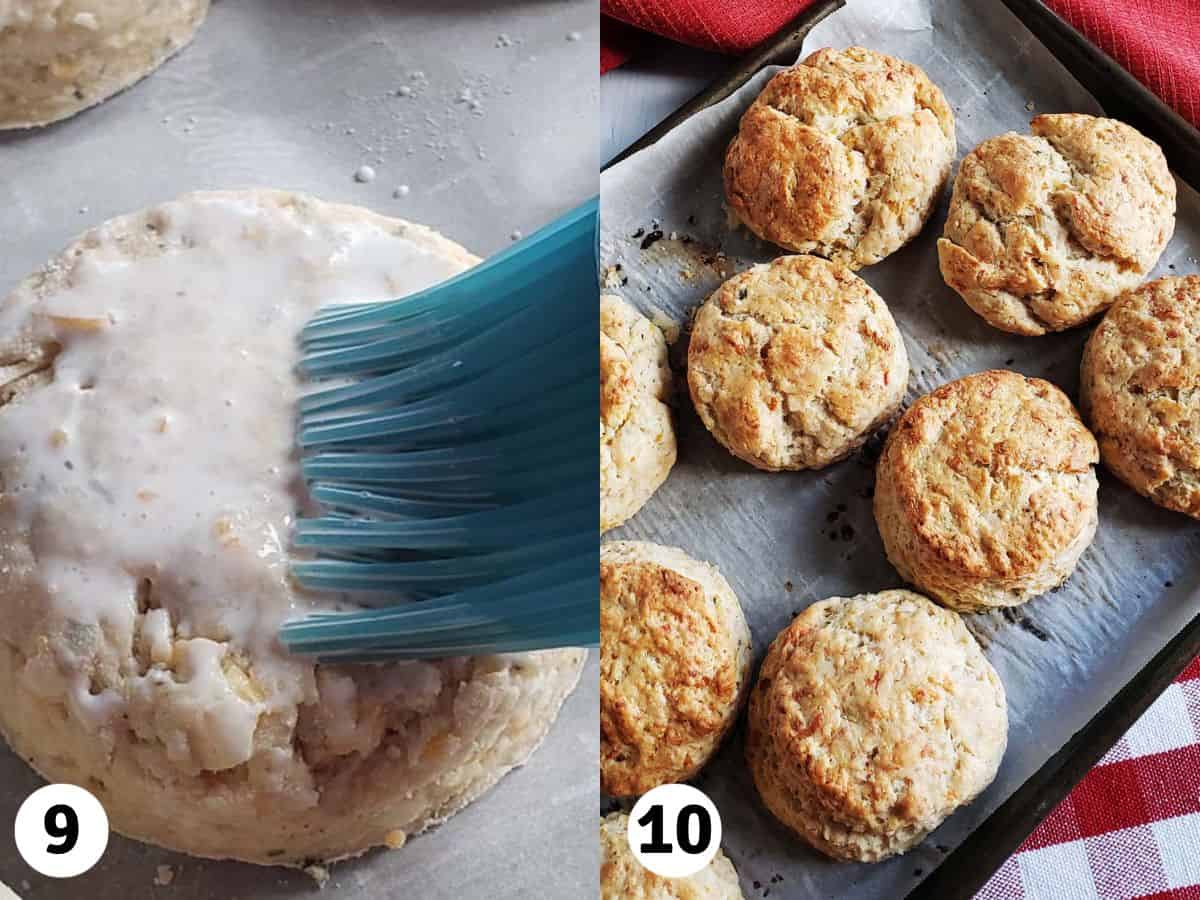
Step 9: Preheat the oven to 425°F (220°C) and brush tops with heavy cream. Brushing with heavy creams will encourage browning. (Photo 9)
Step 10: Bake for 13-15 minutes. The scones should be golden brown. (Photo 10)
Serving Suggestions
There are so many delicious toppings you could add to these scones.
- Lemon Curd
- Clotted Cream
- Whipped Cream
- Yogurt
- Powdered Sugar
- Jam or Marmalade
- Herbed Butter
- Chocolate Sauce
- Hazelnut Spread
- Powdered Sugar Glaze

Recipe FAQs
There are a few reasons why your scones may not have risen.
Check your baking powder. For maximum efficacy, the baking powder should be used within six months of opening. To test your baking powder, drop a small amount into hot water. Look for bubbles and fizzing. If a reaction occurs it's still good to use.
Kneading the dough for too long will make them tough, dense, and shorter.
Using too much flour will make the dough too stiff to rise to its full potential. I recommend using a kitchen scale to measure your ingredients by weight rather than volume. Accuracy matters particularly when baking.
Yes, scones can be in advance and frozen either before or after baking. See below for additional instructions on how to make and save scones made in advance.
Scones are best the day they are baked.
Leftover scones can be stored in an air-tight container in the refrigerator for up to four days.
To freeze baked scones, let them cool completely and then wrap tightly in plastic wrap and place in a zip-top bag labeled with the date and contents. Freeze scones for up to 3 months.
Thaw on the counter for a few hours, and then warm in the oven to get the best texture.
To freeze unbaked scones, cut the scones out and arrange them on a baking sheet lined with parchment paper. Freeze them until solid and then transfer them to a zip-top bag labeled with the date and contents. Scones can be frozen for up to 3 months.
To bake frozen scones, bake the scones directly from frozen adding an extra 2-3 minutes of baking time.
Expert Tips
- A food processor makes blending the butter into the dry ingredients a million times easier. And allows you to work with colder butter without hurting your hands. Try putting the butter in the freezer for an hour before blending it into the dry ingredients. The texture of your scones will be even better.
- If you don't have a food processor, use a box grater to create small strips of butter that will be easier to cut into the flour with a pastry blender.
- If you don't have any sourdough discard, you can substitute ½ cup of heavy cream and a ½ cup of all-purpose flour for the 1 cup of sourdough discard.
- If you don't have heavy cream, you can substitute milk or half and half.
- Don't overwork the dough. Overworking the dough creates gluten which will result in chewy rather than flaky scones.
- Don't use a rolling pin. Pat the dough out with your hands to avoid overworking the dough.
- When cutting the scones, push straight down without twisting the cutter. Twisting the cutter seals the edges together and will prevent them from rising,
- To help scones keep their shape, chill them in the refrigerator for at least 30 minutes before baking.
- Bake scones on parchment paper or a silicone mat to avoid overcooked bottoms.
- Baking times will vary depending upon your oven. It is helpful to know your oven and worth purchasing an inexpensive oven thermometer. Oven temperatures can vary as much as 50 degrees plus or minus.
- If the bottoms of the scones are browning too quickly, slide a second baking sheet directly under.
More Sourdough Recipes


Thanks for Reading!
If you try this recipe, let me know! Leave a comment and rate it below! You can also snap a picture and post it on Facebook or Instagram be sure to tag me @RaspberriesandKohlrabi.
Subscribe to get more recipes and tips by email.
📖 Recipe

Sourdough Scones
Equipment
- mixing bowl
- baking pan
Ingredients
- 2 ½ cups all-purpose flour
- ½ cup granulated white sugar
- 2 tablespoons baking powder
- 1 teaspoon kosher salt
- 8 tablespoons unsalted butter chilled
- 1 cup sourdough discard
- ⅔ cup heavy cream plus extra for brushing
- 1 egg yolk
Instructions
- Add the 2 ½ cups all-purpose flour, ½ cup granulated white sugar, 2 tablespoons baking powder, and 1 teaspoon kosher salt to the bowl of your food processor.
- Cut the 8 tablespoons unsalted butter into 4 pieces and add it to the food processor. Pulse a few times to chop and incorporate the butter into the dry ingredients. Continue processing until the butter pieces are the size of peas.
- In a large bowl whisk together the 1 cup sourdough discard, ⅔ cup heavy cream, and 1 egg yolk.
- Pour the dry ingredients into the wet ingredients and fold together being careful to not over mix.
- Pour the dough onto a lightly floured surface. Knead the dough a few times until it begins to come together. Flatten the dough and fold it into thirds like you would a letter. Give the dough a quarter turn and repeat this flattening and folding process two more times.
- Pat into a disc approximately 1 inch thick and cut into circles using a 2.5″ cutter. You can reshape the scraps and cut out additional scones but they won't be as flaky.
- Transfer the scones to a parchment paper-lined baking sheet. To prevent the scones from spreading chill in the refrigerator for 30 minutes.
- Preheat the oven to 425°F (220°C) and brush tops with heavy cream. Brushing with heavy creams will encourage browning.
- Bake for 13-15 minutes. The scones should be golden brown.


Carol Blankenship says
I made it using ricotta cheese rather than the heavy cream. They're delicious!
Erica Schramek says
I am so glad you enjoyed them!