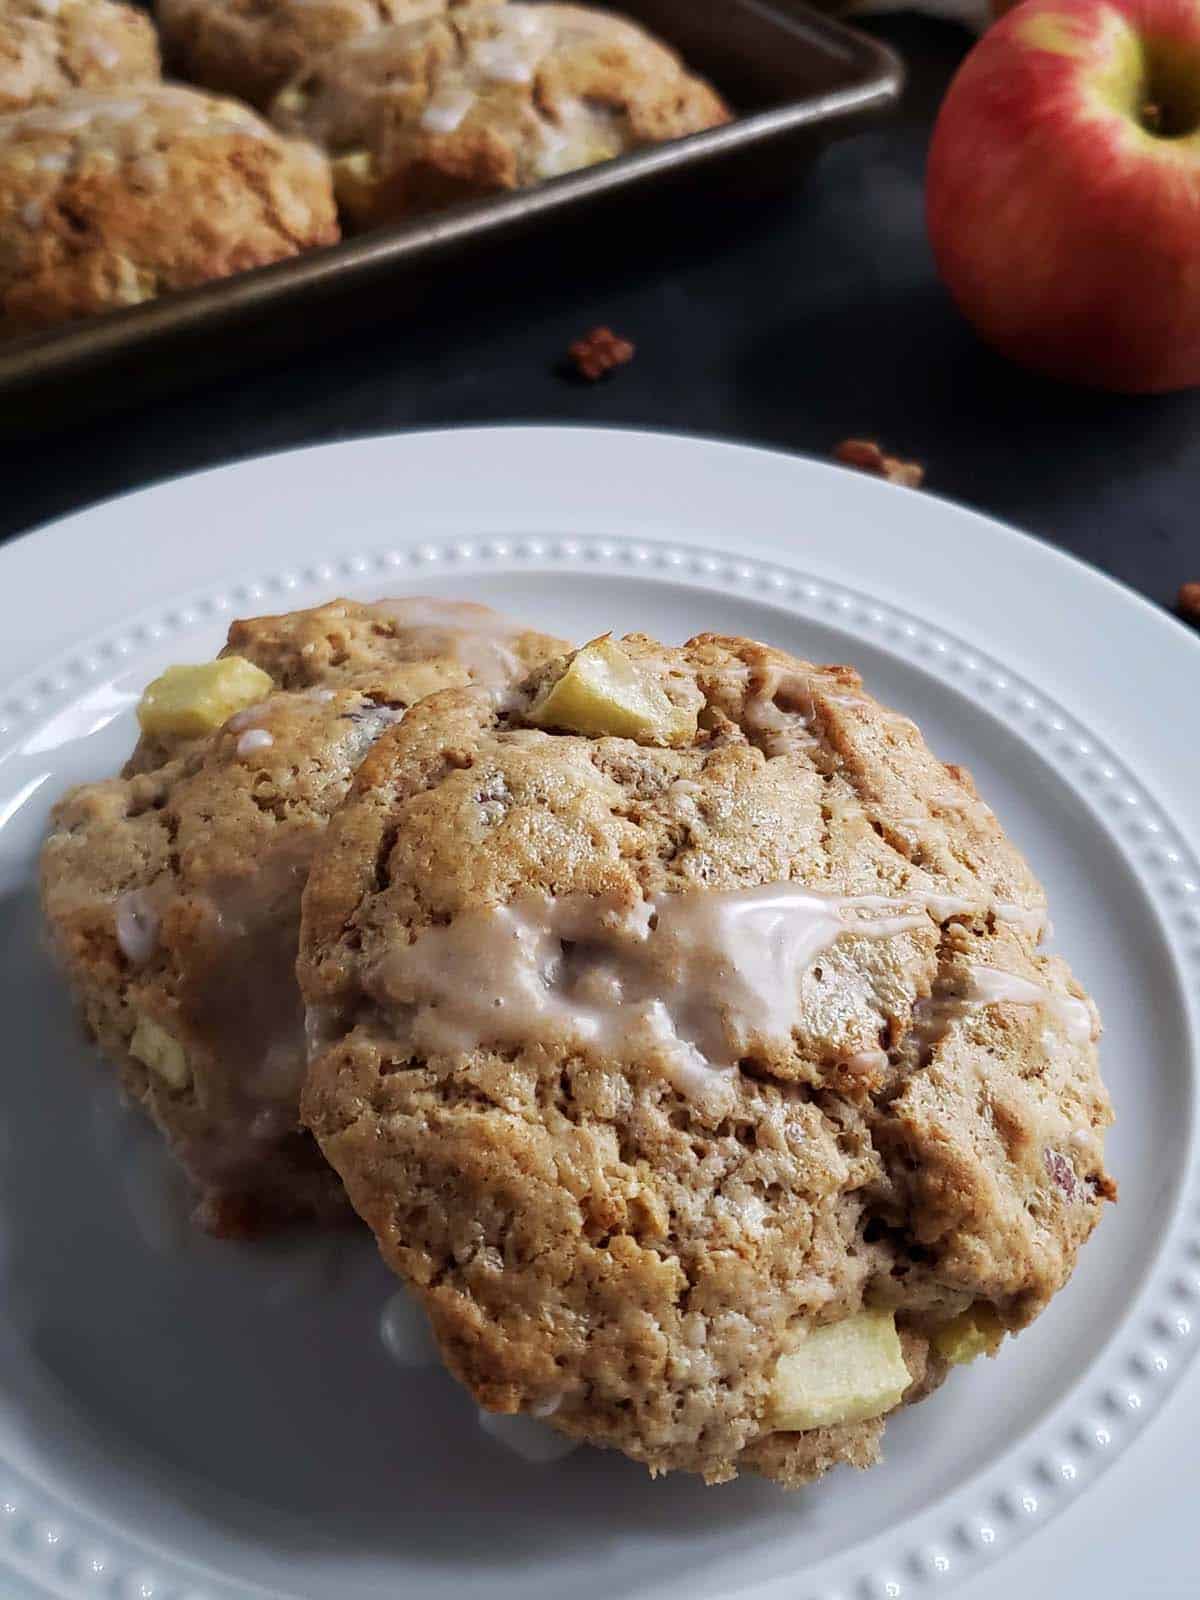
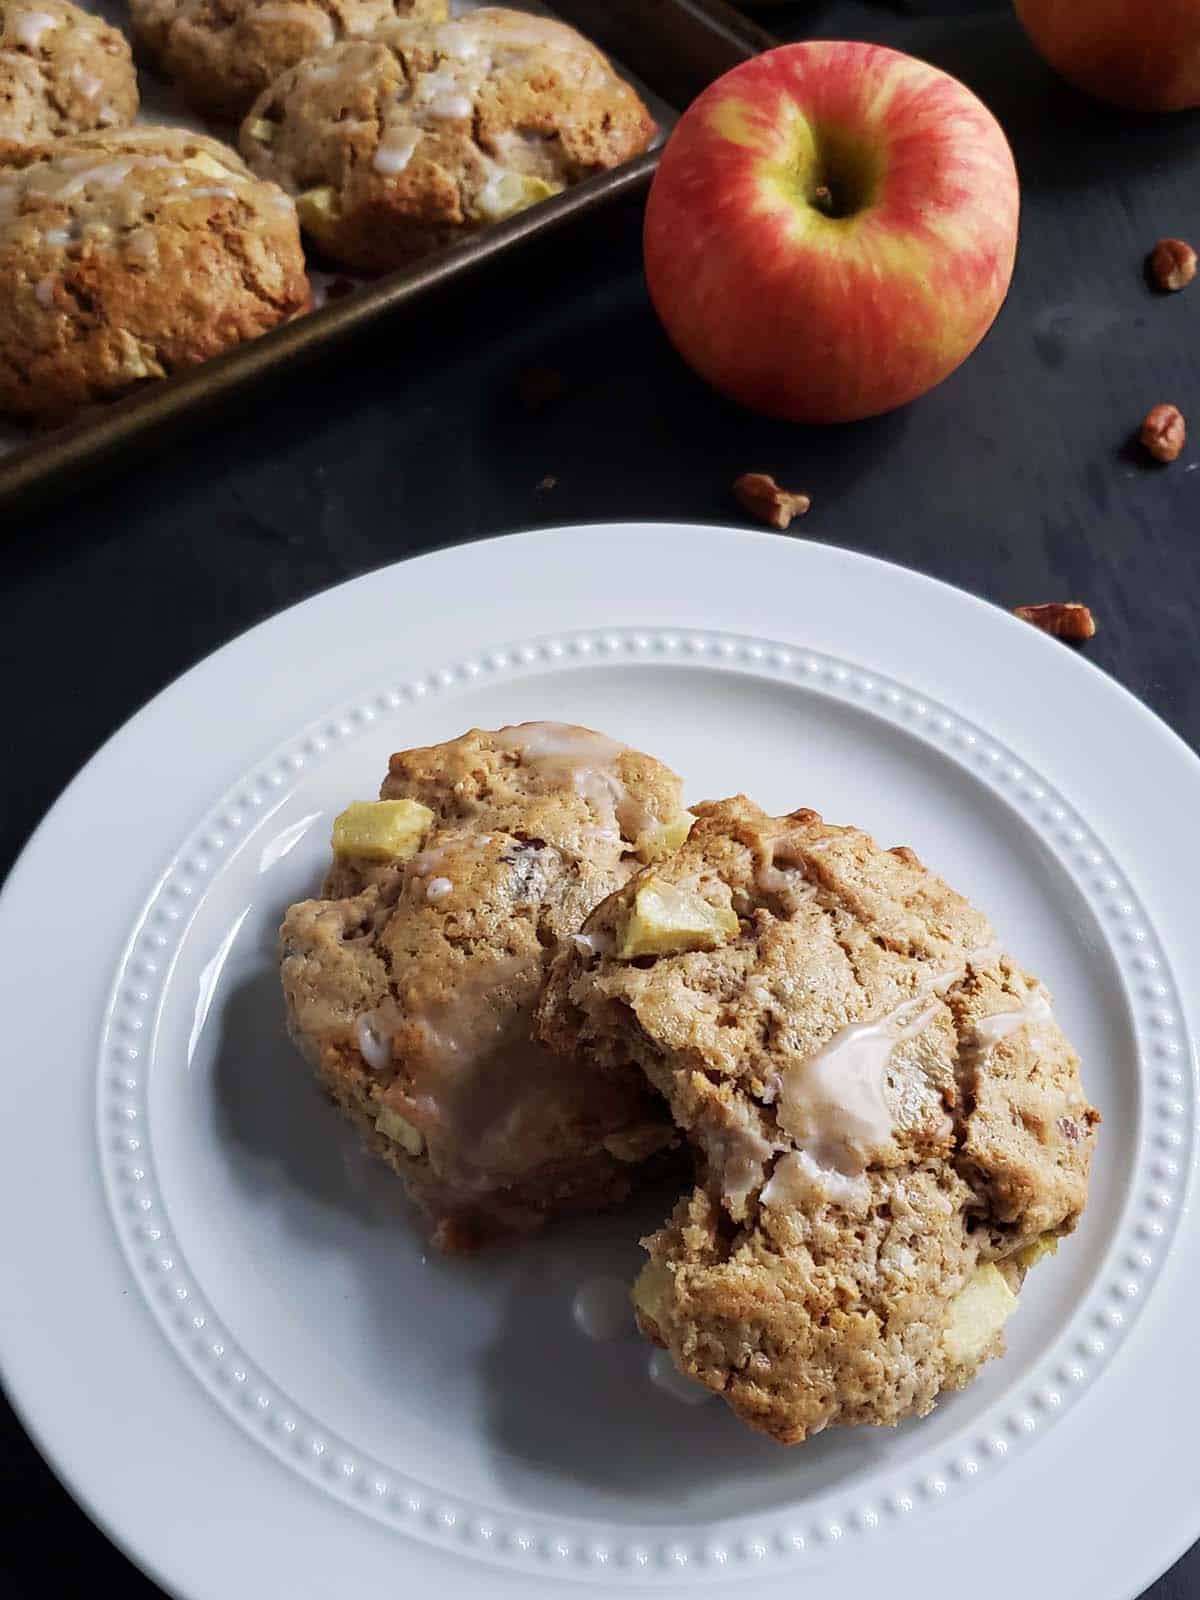
These Apple Cinnamon Pecan Scones are a perfect fall breakfast treat. They also pair beautifully with your favorite tea or a hot cup of coffee.
Juicy bits of apple and crunchy pecans dot these flakey scones. They are topped with a thin drizzle of sweet vanilla glaze tops these delicious scones.
I spent most of my life never having tried a scone. Now that I have I just can't get enough. Try one of my other scone recipes: Ham and Cheese Sourdough Scones, Blueberry Sourdough Scones, Sourdough Scones, or Brown Butter Pecan Scones.
Jump to:
Why You Will Love This Recipe
- Bursting with cinnamon apple flavor these scones are the perfect fall treat.
- With crispy edges and a soft tender center, these scones are filled with the best fall flavors cinnamon and brown sugar.
- Made with pantry staples these scones are so easy to mix together. You don't need a mixer just a bowl and minimal arm power.
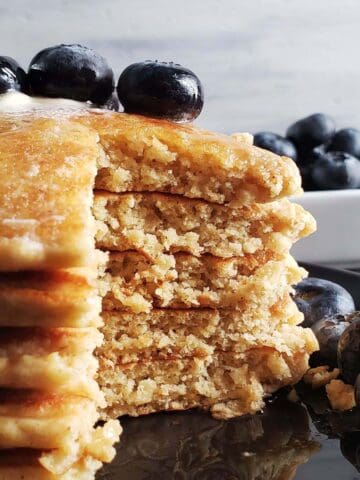
Here are a few more easy breakfast recipes: Coconut Mango Pancakes, Sourdough Dutch Baby, Cinnamon Spice Oatmeal, Panera Mango Smoothie, and Sourdough Waffles.
Recipe Ingredients
You will need the following ingredients to make these cozy Apple Cinnamon Pecan Scones.
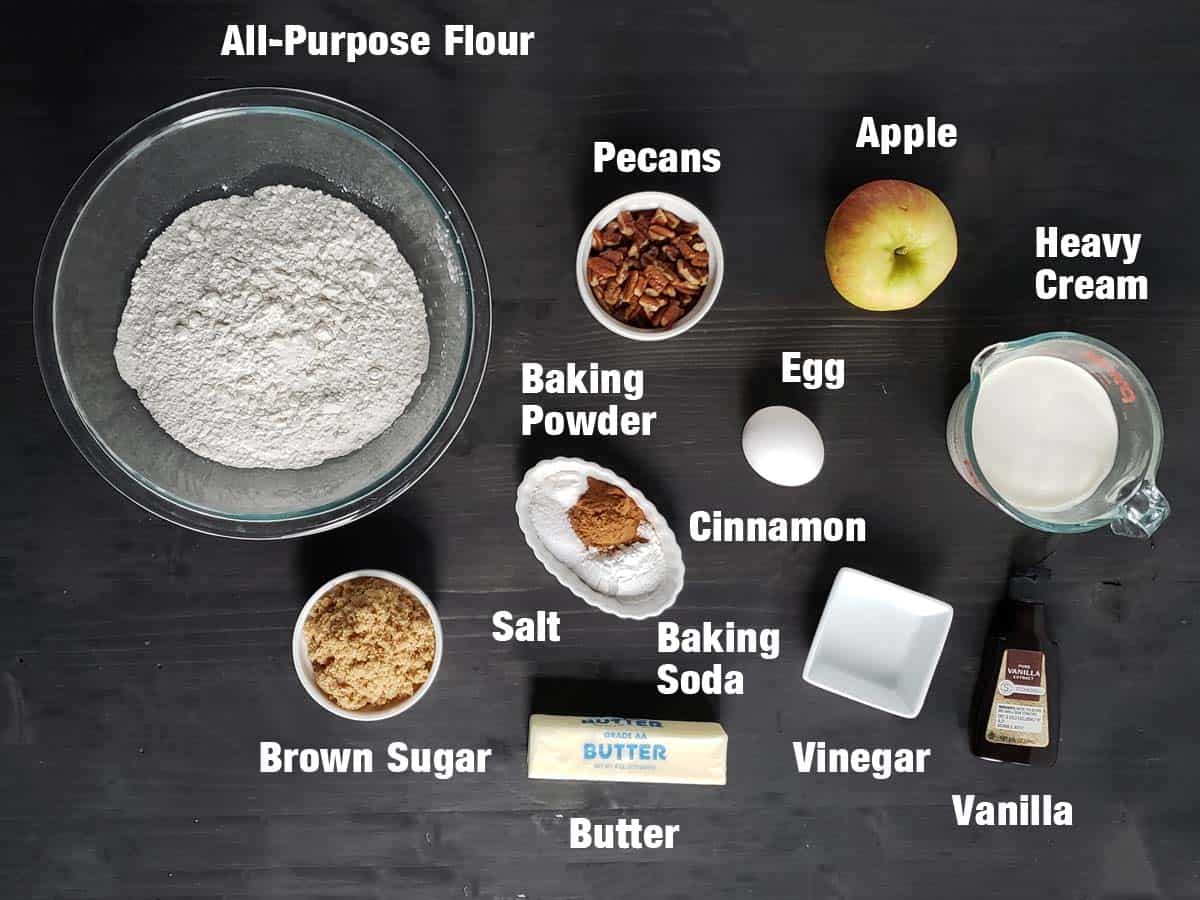
Flour: Nothing special here regular all-purpose flour will work perfectly. For accuracy, the best way to measure the flour is by using a digital kitchen scale.
Tip: If you don't have a digital scale, spoon the flour into the measuring cup and level it with the back of a butter knife. Try not to compress the flour into the measuring cup.
Brown Sugar: Brown sugar adds a delicious caramel flavor along with sweetening the scones.
Baking Powder and Baking Soda: Both baking powder and baking soda give the scones lift making them light and flakey rather than thick and dense.
Salt: I add at least a pinch of salt to all of my recipes. Salt complements and intensifies the other flavors. For all of my recipes, I use Morton Kosher Salt which packs more densely than Diamond Crystal Kosher Salt. If you are using Diamond Crystal Kosher Salt you will want to double the amount of salt you add.
Unsalted Butter: For flaky scones, you will want to make sure the butter is chilled. Keeping the scone dough as cold as possible prevents over-spreading and preserves the scone's flakiness.
Tip: I store extra butter in the freezer at all times. Which means I always have frozen butter ready to be used in scones or pie crusts. Butter can be frozen for up to six months.
Heavy Cream: The amount of cream will vary based on how liquid or thick your sourdough starter is. Drizzle in just enough cream until the dough becomes cohesive.
Egg: The addition of an egg is nontraditional. But I think it adds richness and creates a lighter less dense scone. The additional fat will also help stop the scones from drying out.
White Vinegar: Vinegar reacts with the baking soda giving the scones an extra bit of lift.
Apples: When baking with apples you want to look for apples that will hold their shape and not turn to mush when they are baked. Granny Smith apples are typically the go-to apple when baking but they are not your only option.
My personal favorite is the Honey Crisp apple. It is my favorite apple to eat, which means I always have them on hand. Their not-too-sweet crisp texture also holds up well when baked.
Looking for more delicious fall apple recipes? Try this Homemade Apple Bundt Cake, these Sourdough Apple Cinnamon Muffins, these Sourdough Apple Cookies, this Apple Kale Salad, these Apple Raspberry Muffins, or these Chicken Apple Meatballs.
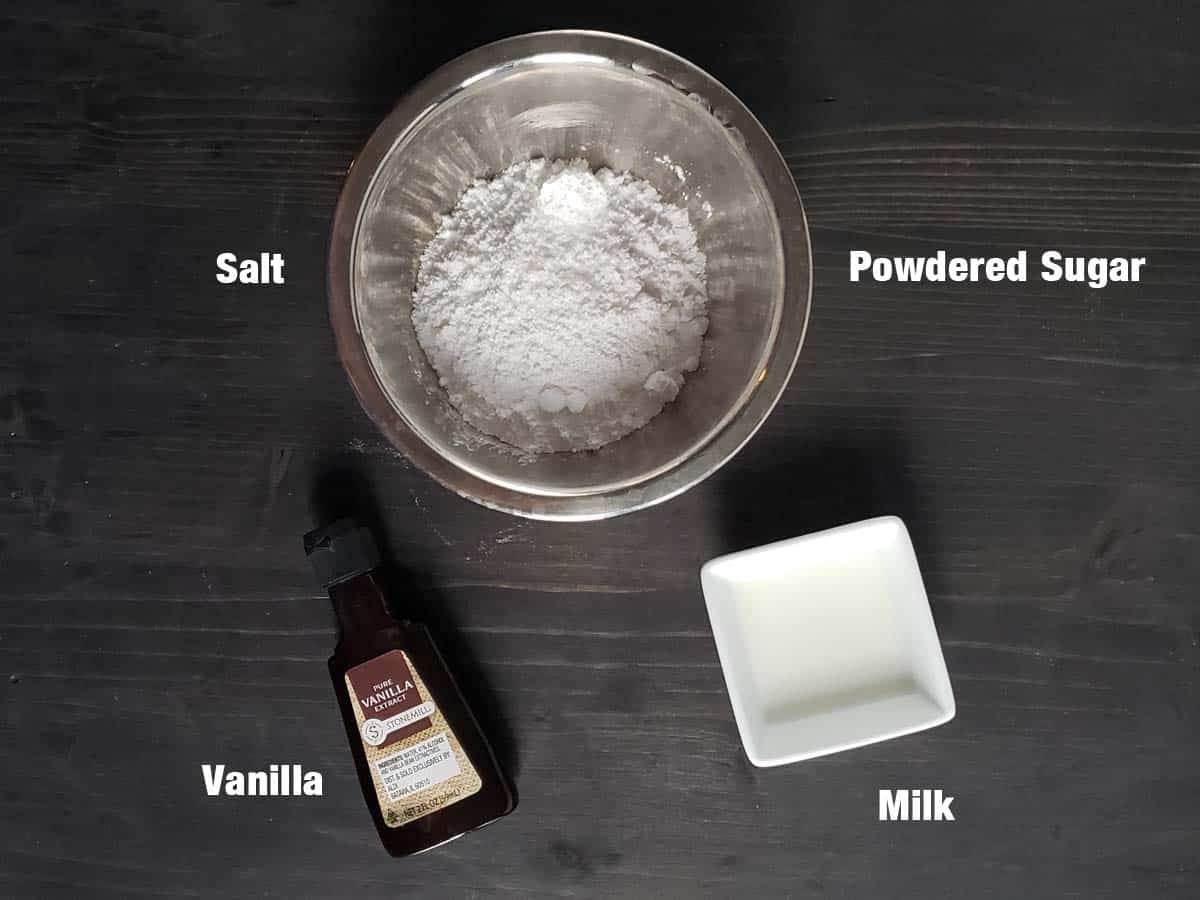
Powdered Sugar: Powdered sugar quickly dissolves in the milk creating a smooth glaze rather than a gritty one.
Milk: Make sure to add the milk to the powdered sugar slowly. Adding just enough to make the glaze the consistency you want.
See the recipe card for full information on ingredients and quantities.
Substitutions and Variations
Pecans: Feel free to substitute your favorite nut. I think walnuts make a perfect substitution.
Step by Step Directions
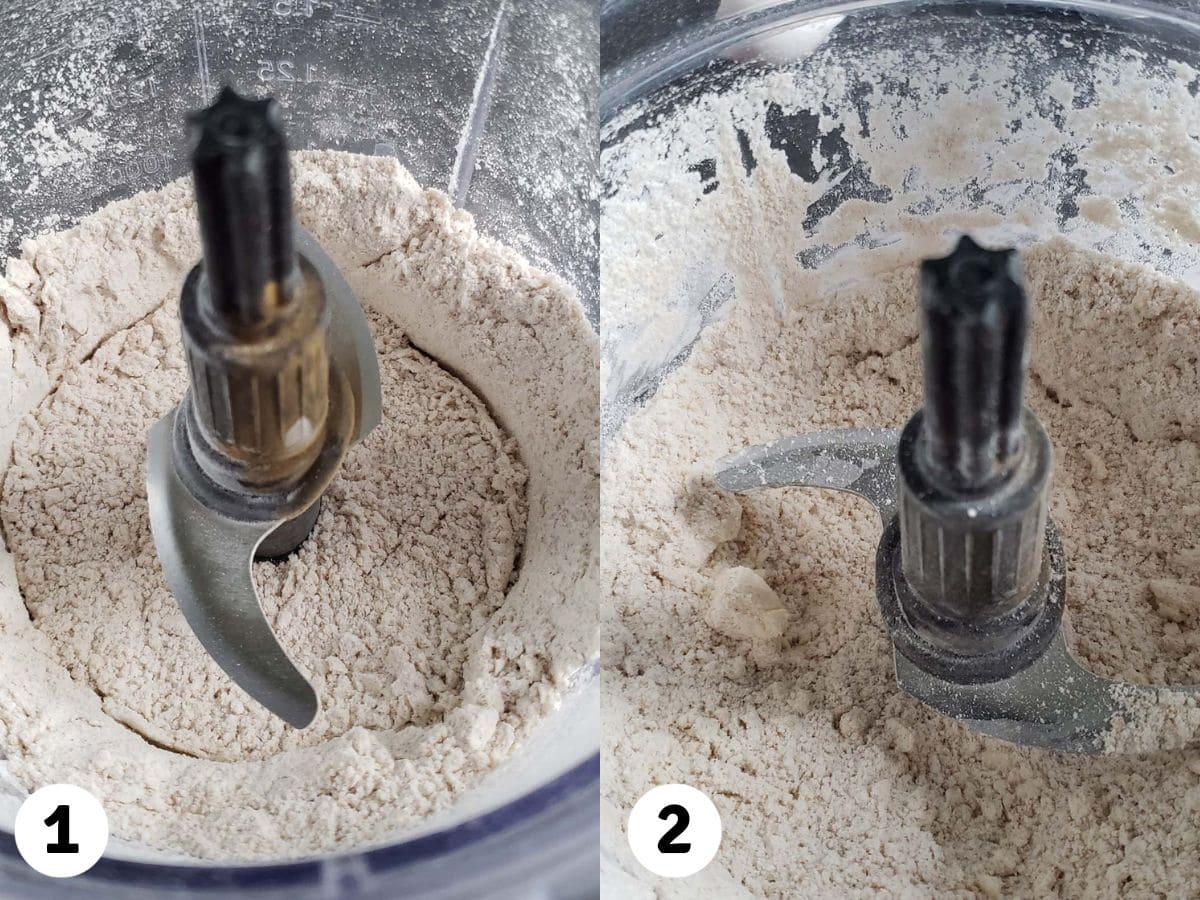
Step 1: Add the flour, brown sugar, baking powder, cinnamon, kosher salt, and baking soda to the bowl of your food processor.
Step 2: Cut the butter into 4 pieces and added it to the food processor. Pulse a few times to chop and incorporate the butter into the dry ingredients. Continue processing until the butter pieces are the size of peas. Transfer to a large bowl. (Images 1 & 2)
Tip: You can also use a pastry blender to cut the butter into the flour mixture.
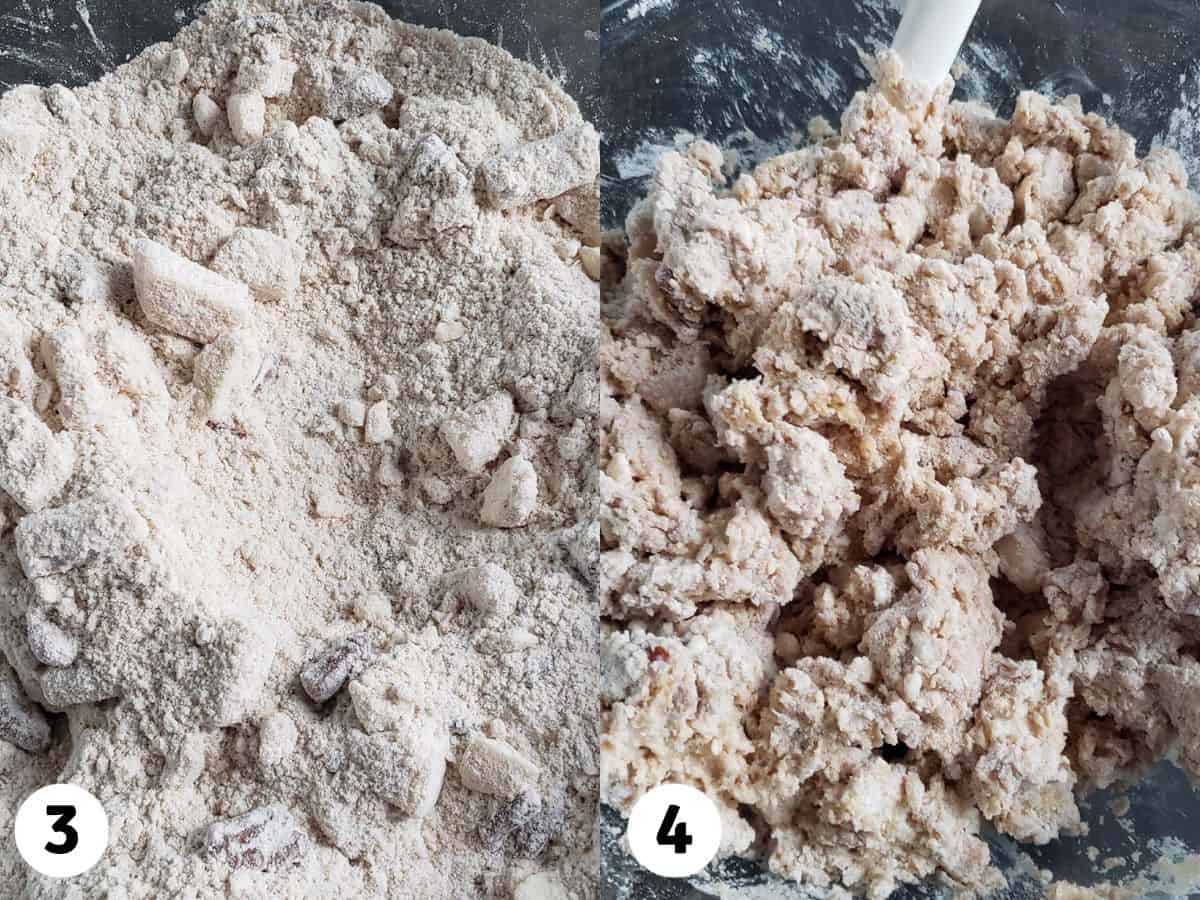
Step 3: Fold the apples and pecans into the dry ingredients. (Image 3)
Step 4: Add the egg, vanilla extract, and vinegar to the dry ingredients and stir to combine.
Slowly stir in the heavy cream as you stir the dough together. The amount of cream will vary based on how liquid or thick your sourdough starter is. Drizzle in just enough cream until the dough becomes cohesive. (Image 4)
Tip: Do not overmix the dough at this point. Overmixing will create tough dry scones.
Tip: Squeeze the dough, when it holds together with no crumbs left in the bottom of the bowl, you've added enough cream.
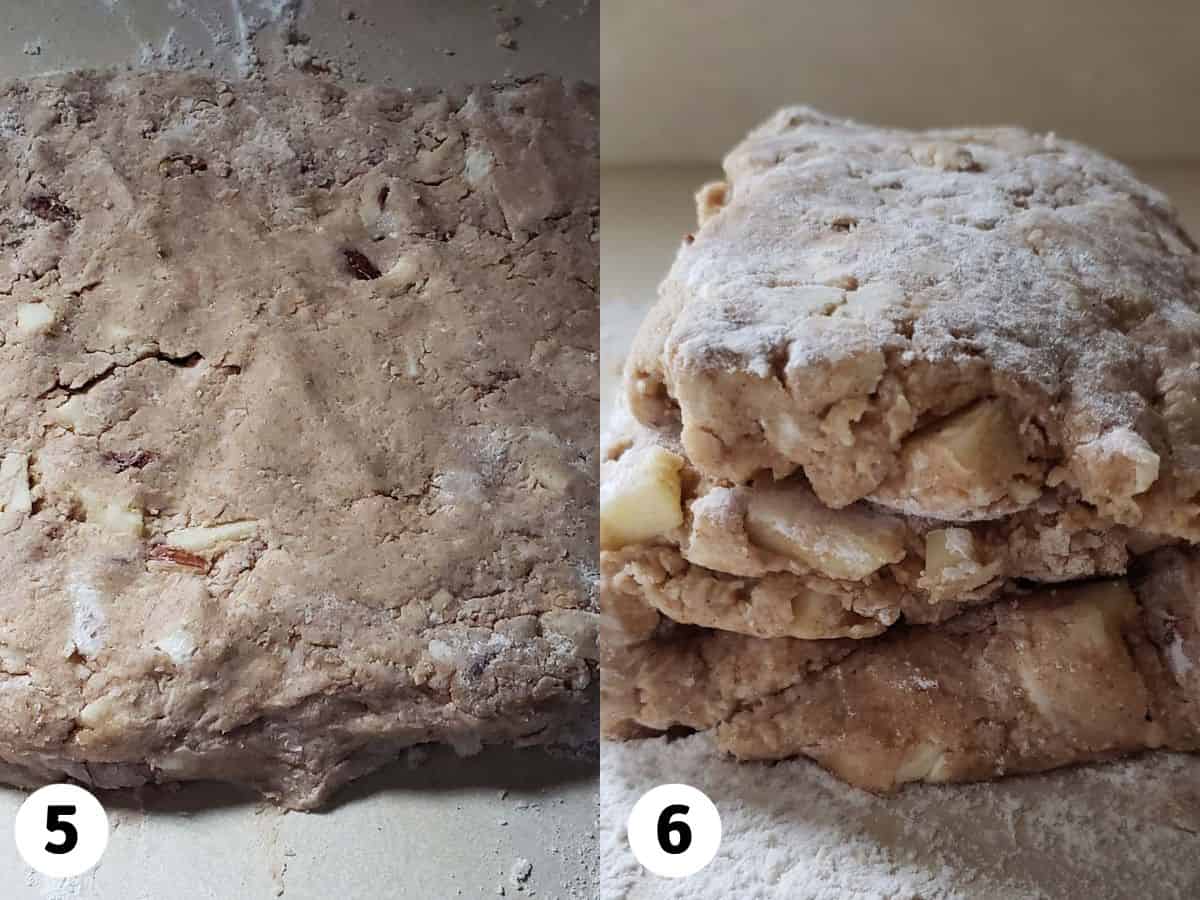
Step 5: Pour the dough onto a lightly floured surface. Knead the dough a few times until it begins to come together. Flatten the dough and fold it into thirds like you would a letter. Give the dough a quarter turn and repeat this flattening and folding process two more times. (Photos 5 & 6)
By folding the dough you will literally be creating layers of flour and butter, creating flakey layers, and encouraging the scones to rise. The dough will be a bit sticky, do not add extra flour. The moist dough gives the scones a soft texture and helps them to rise.
Step 6: Pat the dough into a disc approximately 1 inch thick. (Photo 7)
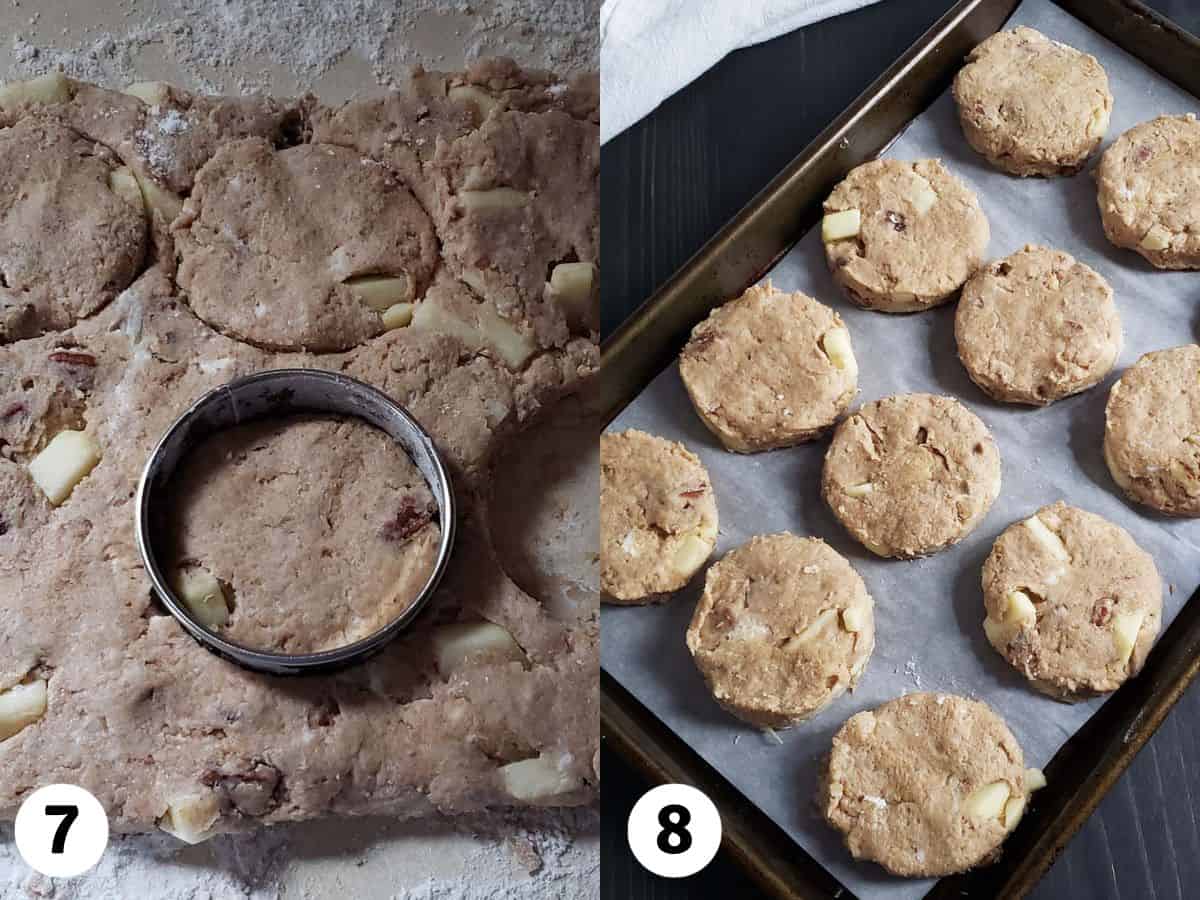
Step 7: There are two ways you can your dough to make individual scones:
- Use a knife to cut it into eight wedges.
- Use a circle biscuit cutter to cut out about 10 scones.
Tip: Cutting scones into circles looks nicer but you will always have at least one wonky-looking scone that is made by mashing all of the scraps together. Cutting scones into wedges is easier and has the added bonus of not creating any scraps. How you choose to cut your scones is up to you.
Tip: When cutting the scones, push straight down without twisting the cutter. Twisting the cutter seals the edges together and will prevent them from rising.
Step 8: Transfer the scones to a parchment paper-lined baking sheet. To prevent the scones from spreading chill in the refrigerator for 30 minutes. (Photo 8)
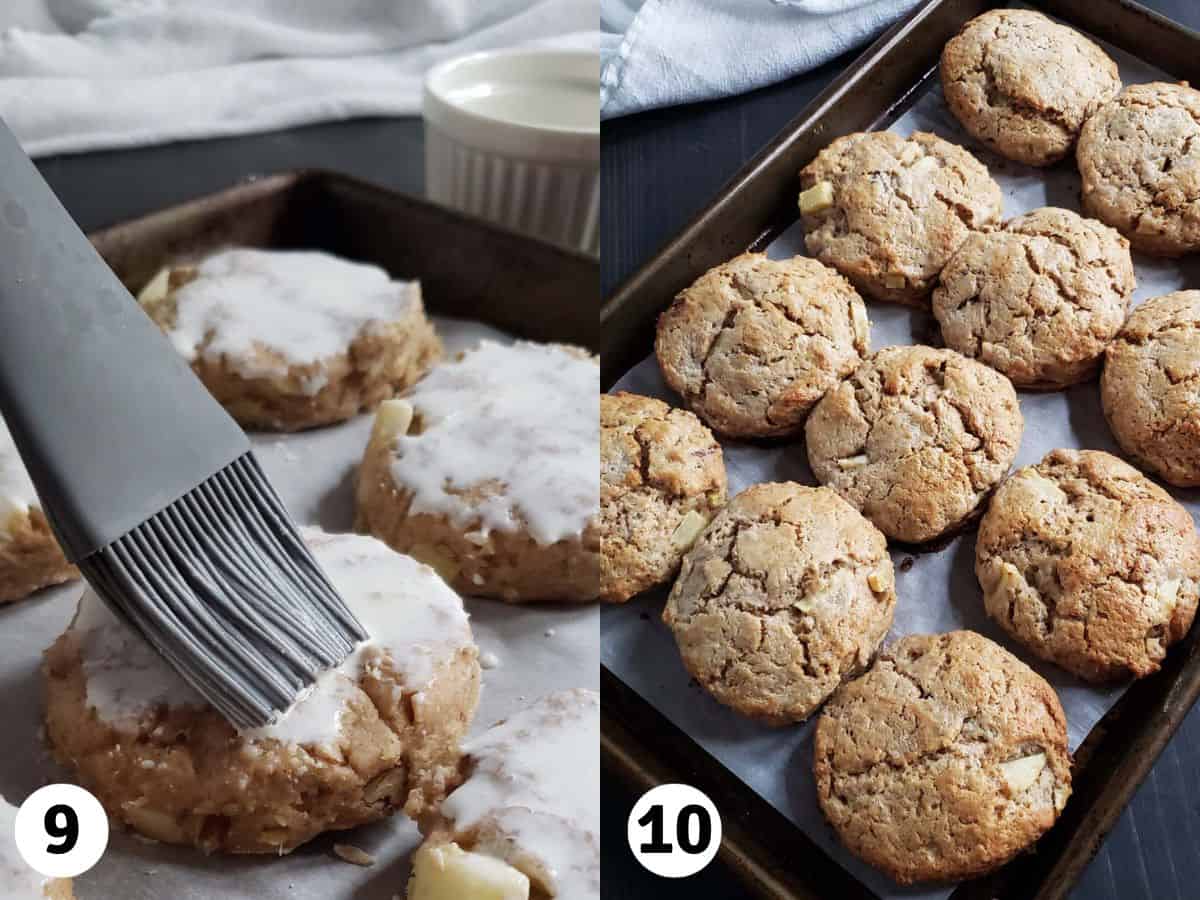
Step 9: Preheat the oven to 425°F (220°C) and brush tops with heavy cream. Brushing with heavy creams will encourage browning. (Photo 9)
Step 10: Bake for 18-20 minutes. The scones should be golden brown. (Photo 10)
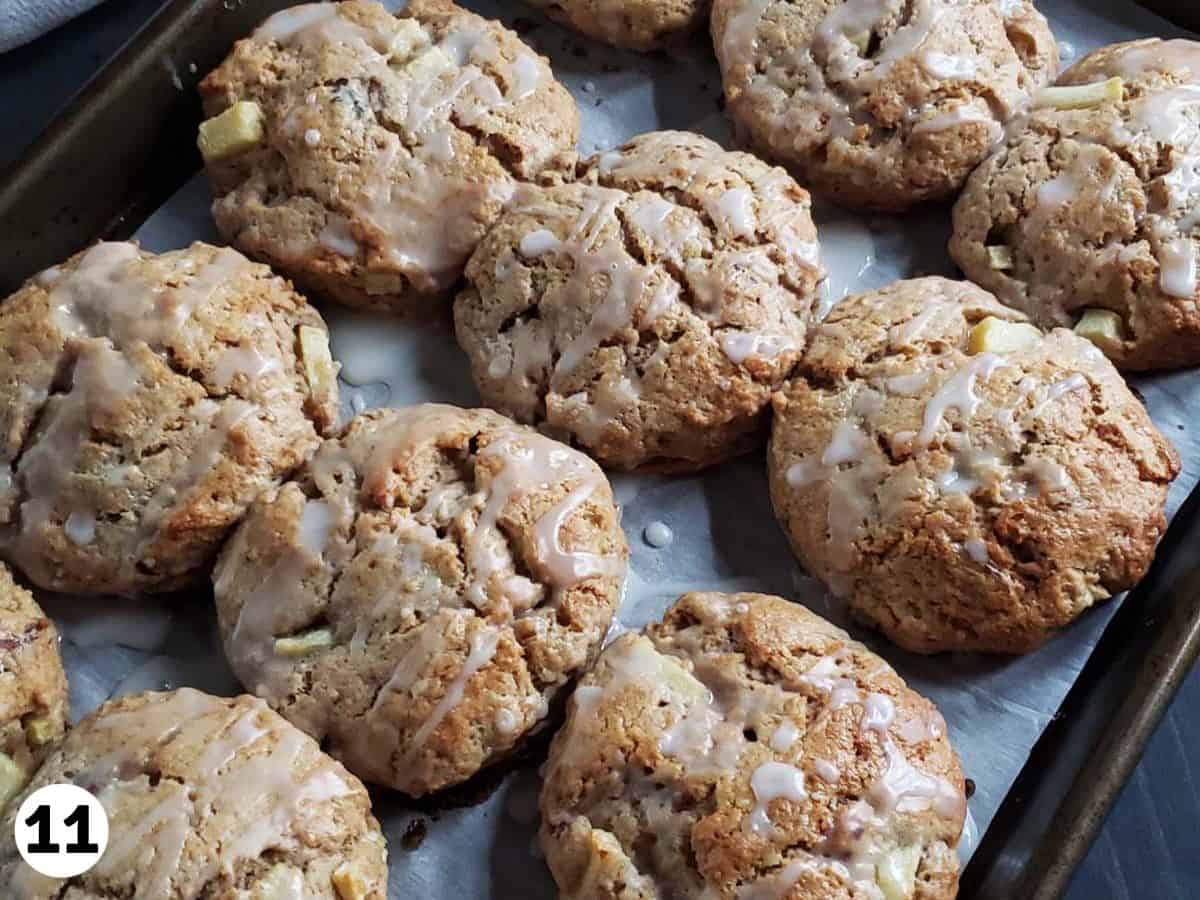
Step 11: Whisk the powdered sugar, vanilla, and a pinch of salt together. Add the milk gradually, adding just enough until the glaze reaches your desired consistency.
Drizzle the glaze over each scone. (Photo 11)
Recipe FAQs
Whether or not you peel the apples is down to personal preference. Once cooked I don't mind the apple peel. It softens as it bakes and is not noticeable to me. I also appreciate the extra fiber it adds to the scones making them healthier.
There are a few reasons why your scones may not have risen.
Check your baking powder. For maximum efficacy, the baking powder should be used within six months of opening. To test your baking powder, drop a small amount into hot water. Look for bubbles and fizzing. If a reaction occurs it's still good to use.
Kneading the dough for too long will make them tough, dense, and shorter.
Using too much flour will make the dough too stiff to rise to its full potential. I recommend using a kitchen scale to measure your ingredients by weight rather than volume. Accuracy matters particularly when baking.
Yes, scones can be in advance and frozen either before or after baking. See below for additional instructions on how to make and save scones made in advance.
When scones are fully baked they are golden brown and flakey. The interior shouldn't be doughy or wet. When fully baked scones will have an internal temperature of 200°F (93°C). You can check the temperature with an instant-read thermometer.
Scones are best the day they are baked.
Leftover scones can be stored in an air-tight container in the refrigerator for up to four days.
To freeze baked scones, let them cool completely and then wrap tightly in plastic wrap and place in a zip-top bag labeled with the date and contents. Freeze scones for up to 3 months.
Thaw on the counter for a few hours, and then warm in the oven to get the best texture.
To freeze unbaked scones, cut the scones out and arrange them on a baking sheet lined with parchment paper. Freeze them until solid and then transfer them to a zip-top bag labeled with the date and contents. Scones can be frozen for up to 3 months.
To bake frozen scones, bake the scones directly from frozen adding an extra 2-3 minutes of baking time.
Expert Tips
- A food processor makes blending the butter into the dry ingredients a million times easier. And allows you to work with colder butter without hurting your hands. Try putting the butter in the freezer for an hour before blending it into the dry ingredients. The texture of your scones will be even better.
- If you don't have a food processor, use a box grater to create small strips of butter that will be easier to cut into the flour with a pastry blender.
- If you don't have heavy cream, you can substitute milk or half and half.
- Don't overwork the dough. Overworking the dough creates gluten which will result in chewy rather than flaky scones.
- Don't use a rolling pin. Pat the dough out with your hands to avoid overworking the dough.
- When cutting the scones, push straight down without twisting the cutter. Twisting the cutter seals the edges together and will prevent them from rising.
- To help scones keep their shape, chill them in the freezer for at least 30 minutes before baking.
- Bake scones on parchment paper or a silicone mat to avoid overcooked bottoms.
- Baking times will vary depending on your oven. It is helpful to know your oven and worth purchasing an inexpensive oven thermometer. Oven temperatures can vary as much as 50 degrees plus or minus.
- If the bottoms of the scones are browning too quickly slide a second baking sheet directly under.
Here are a few more easy breakfast recipes: Coconut Mango Pancakes, Sourdough Dutch Baby, Cinnamon Spice Oatmeal, Panera Mango Smoothie, and Sourdough Waffles.
More Breakfast Recipes
Thanks for Reading!
If you try this recipe, let me know! Leave a comment and rate it below! You can also snap a picture and post it on Facebook or Instagram be sure to tag me @RaspberriesandKohlrabi.
Subscribe to get more recipes and tips by email.
📖 Recipe

Apple Cinnamon Pecan Scones
Equipment
- food processor or pastry blender
- mixing bowl
Ingredients
Scones
- 3 cups all-purpose flour
- ½ cup brown sugar
- 1 tablespoon baking powder
- 2 teaspoons cinnamon
- 1 teaspoon kosher salt
- ½ teaspoon baking soda
- 8 tablespoons unsalted butter chilled
- 1 apple chopped into small pieces
- ½ cup pecans finely chopped
- 1 large egg
- 1 teaspoon vanilla extract
- ½ teaspoon white vinegar
- 1 cup heavy whipping cream plus extra for brushing
Vanilla Glaze
- ½ cup powdered sugar
- 1 teaspoon vanilla extract
- 1 tablespoon milk
Instructions
Scones
- Add the 3 cups all-purpose flour, ½ cup brown sugar, 1 tablespoon baking powder, 2 teaspoons cinnamon, 1 teaspoon kosher salt, and ½ teaspoon baking soda to the bowl of your food processor.
- Cut the 8 tablespoons unsalted butter into 4 pieces and add it to the food processor. Pulse a few times to chop and incorporate the butter into the dry ingredients. Continue processing until the butter pieces are the size of peas. Transfer to a large bowl.
- Fold the 1 apple and ½ cup pecans into the dry ingredients.
- Add the 1 large egg, 1 teaspoon vanilla extract, and ½ teaspoon white vinegar to the dry ingredients and stir to combine.
- Slowly stir in the 1 cup heavy whipping cream . Drizzle in just enough cream until the dough becomes cohesive.
- Squeeze the dough, when it holds together with no crumbs left in the bottom of the bowl, you've added enough cream.
- Pour the dough onto a lightly floured surface. Knead the dough a few times until it begins to come together. Flatten the dough and fold it into thirds like you would a letter. Give the dough a quarter turn and repeat this flattening and folding process two more times.
- Pat into a disc approximately 1 inch thick and cut into circles using a 2.5″ cutter. You can reshape the scraps and cut out additional scones but they won't be as flaky.
- Transfer the scones to a parchment paper-lined baking sheet. To prevent the scones from spreading chill in the refrigerator for 30 minutes.
- Preheat the oven to 425°F (220°C) and brush tops with heavy cream. Brushing with heavy creams will encourage browning.
- Bake for 18-20 minutes. The scones should be golden brown.
Vanilla Glaze
- Whisk the ½ cup powdered sugar, 1 teaspoon vanilla extract, and a pinch of salt together. Add the 1 tablespoon milk gradually, adding just enough until the glaze reaches your desired consistency.
- Drizzle the glaze over each scone.


Comments
No Comments