
Creating and maintaining a small sourdough starter means less waste with the same great results.
All you need is flour, water, and time.
Are you discouraged by the amount of wasted starter that is discarded every time you feed it? This tutorial walks readers through creating a sourdough starter from scratch using just small amounts of flour and water.
Perhaps you are drowning in discarded starter and running out of recipes for using up sourdough discard or you are tired of just throwing away.
One solution is to switch your starter to a micro starter, which naturally produces less waste and only creates small amounts of discard.
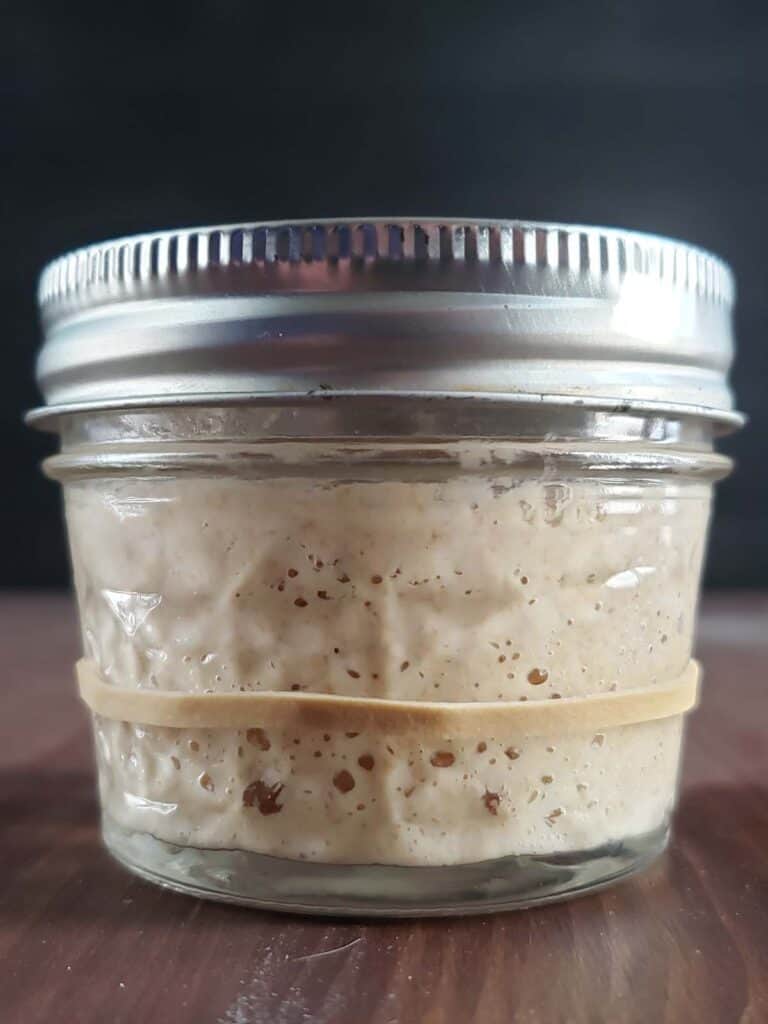
HOW WILL YOU STORE YOUR SOURDOUGH STARTER?
Once your starter is established, you don't have to follow the same maintenance routine forever. How often you bake and how much maintenance you want can help determine the best way to store it. Take my quick quiz to find the sourdough starter storage method that best fits your routine.
Jump to:
- What is Sourdough Starter?
- Equipment Needed to Create a Small Sourdough Starter
- What Type of Flour is Best for Creating a Sourdough Starter?
- What Type of Water Should You Use to Create a Sourdough Starter?
- Day 1: Creating Your Mini Sourdough Starter
- Day 2
- Day 3
- Days 4 Through 7
- Day 8
- Days 9 and 10
- Day 11
- Days 12 Through 14
- How Do You Know When Sourdough Starter Is Ready To Bake With?
- What is the Float Test?
- Your Sourdough Starter Is Ready! What's Next?
- Building Enough Starter for a Recipe
- Maintaining Sourdough Starter
- Frequently Asked Questions
- 💬 Comments
What is Sourdough Starter?
Simply put starter is a mixture of equal parts flour and water that is left at room temperature. Within this mixture wild yeast and bacteria, that are naturally present in the flour, are allowed to grow. These microbes metabolize the flour's natural sugars to produce carbon dioxide, ethanol, and lactic acid. Once matured this wild yeast and bacteria are capable of raising a loaf of bread and providing sourdough's signature tang.
The process of creating a new starter involves regularly discarding portions of the starter and feeding the remaining portion with fresh flour and water. It can take a few weeks before a starter is mature and strong enough to be used for baking.
As the balance of yeast and bacteria is established, the volume of the starter begins to increase for several hours after a feeding and then collapses as the cycle winds down.
It is important that after you feed your starter you pay attention to its behavior as it develops.
Once created, starter can be stored in the refrigerator, or you can store your starter on the counter at room temperature.
Like many, I began experimenting with sourdough baking in 2020 when commercial yeast became scarce at the grocery store. For just over a year I maintained my starter, nicknamed "Baby Doughda."

I enjoyed the ritual of daily feedings and experimenting with ways to utilize the neverending sourdough discard. But then summer came and life got busier. I started forgetting to feed my starter. Then one day I opened the jar and saw mold growing on top.
I had never taken the time to dehydrate my starter and therefore my sourdough journey came to an end. At first, I was happy to be relieved of the responsibility of daily feedings and have enjoyed almost a year without my starter.
But now the weather is cold again and we are spending more time inside. The urge to bake sourdough bread is calling. So I decided it was time to jump back into the world of sourdough baking.
I thought I would document my process of recreating my starter and share the process and tips with you.
Note: If you decide to create your own starter your time frame may vary. How quickly a starter grows and moves from one stage to the next varies depending upon various factors including type of flour used and warmth of its environment.
No two starters are the same. Once you get to know your starter you will get a feel for what your starter needs.
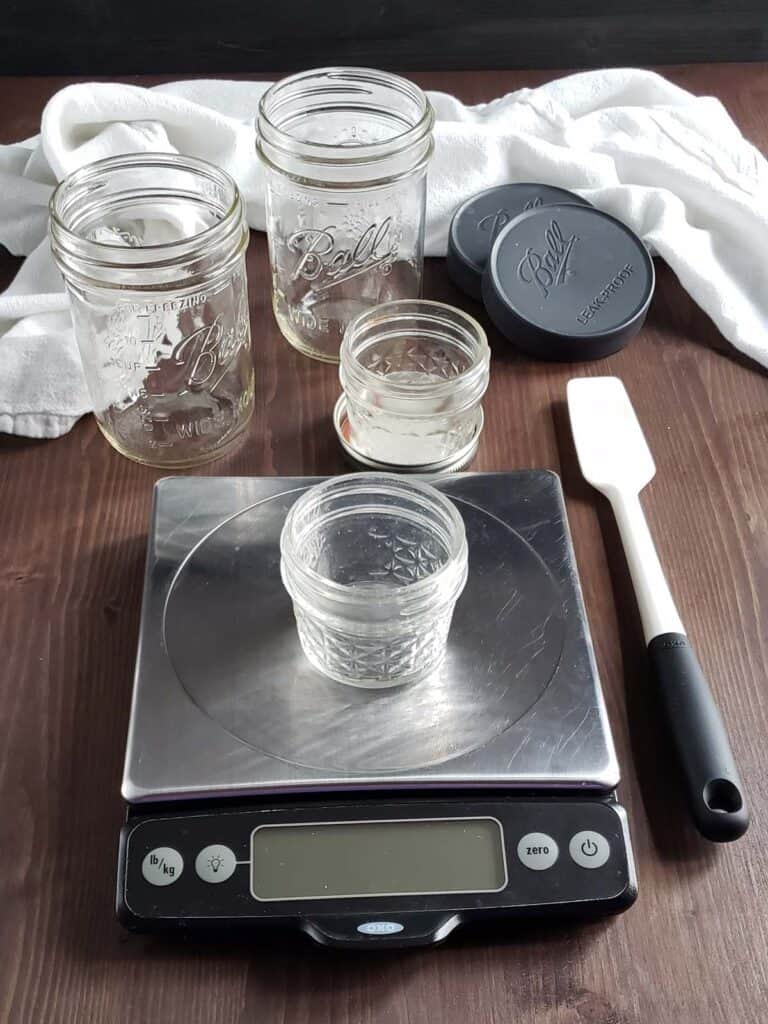
Equipment Needed to Create a Small Sourdough Starter
Two small glass containers: I prefer to use ¼ pint glass canning jars.
Two large glass containers: I like to use 1-quart glass canning jars. One jar will be used to hold the flour mixture necessary for feeding your starter. The second jar will be used to collect the discard for sourdough discard recipes.
Small Rubber Spatula: Scaling down your starter to a smaller container means that smaller tools are necessary. I really like this jar spatula from OXO.
Digital Scale: When baking and creating a starter accurate measurements are important.
The absolute easiest way to maintain this ratio is to always use a digital kitchen scale to measure your ingredients. When starting and maintaining a starter accuracy matters. Weight measurements are more accurate than volume measurements.
This scale from OXO is the one I use after it was recommended by Alton Brown. What makes this scale great is the display pulls out to make viewing measurements easier when using a large bowl.
Rubber Band: A rubber band is useful for marking the height of your starter so you can keep track of how much it has risen since its last feeding.
For more information check out my blog post on choosing the best containers for storing starters.
I also have a sourdough gift guide that lists all of my favorite sourdough products.
What Type of Flour is Best for Creating a Sourdough Starter?
You will see the best results using organic unbleached flour. The bleaching process depletes the naturally occurring microbes we are trying to nurture in the flour.
When first creating a starter I use a combination of white and whole wheat flour. Whole wheat flour tends to be more active and has more nutrients than white flour and is more likely to contain the bacteria and yeast we want.
Once your starter is mature you can switch to feeding it with white nonorganic flour.
What Type of Water Should You Use to Create a Sourdough Starter?
Unchlorinated, filtered water is best. Chlorine and chloramine which are commonly used to treat city water can stop the fermentation process. The purpose of adding these chemicals to water is to kill pathogens but they will also kill the beneficial bacteria and yeast in your starter.
You can learn if there's disinfectant in your water, what type is used, and how well your utility follows disinfection rules by obtaining a copy of your utility's consumer confidence report.
Visit the Environmental Protection Agency's website to view your local Consumer Confidence Report.
If you must use city water, let it sit out overnight before adding it to your starter. This length of time should be sufficient to allow the chlorine to dissipate.
If your city uses chloramine, leaving the water out on the counter won't do much. It is best to stick with filtered water.
Once your starter is mature you can experiment with using your tap water by splitting your starter into two separate jars. Continue using filtered water on one starter and experiment to see the results of using tap water on the second starter. You may find that your starter is now strong enough to remain active while using plain tap water.
Adding warm water can help speed up the fermentation process if your house is chilly. But use caution. When adding water make sure it is not hotter than 110 degrees Fahrenheit. Water temperatures above 110 degrees Fahrenheit will kill your starter.
Day 1: Creating Your Mini Sourdough Starter
The most important guideline for creating and maintaining a smaller starter is to follow the 1:1:1 ratio. Meaning you always mix equal parts of starter, flour, and water together.
Consistent daily feeding of your starter is important. Try to get into a routine of feeding it at the same time each day.
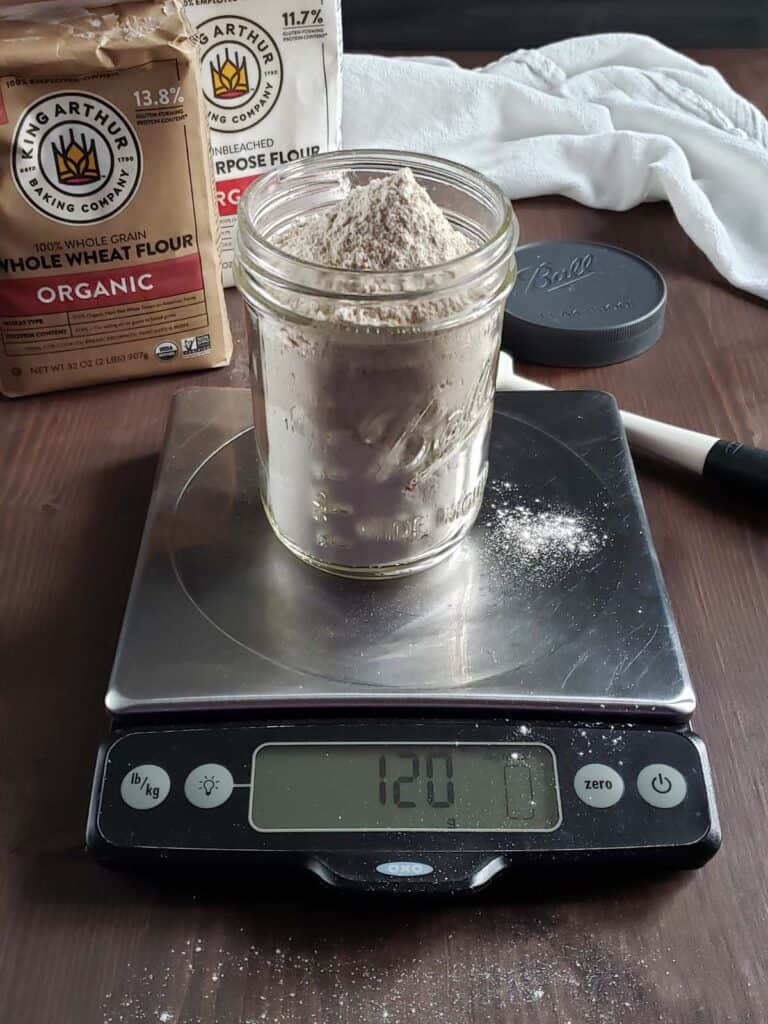
Measure 1 cup (120 grams) of all-purpose flour and 1 cup (120 grams) whole wheat flour into a sealed container and shake to combine. I like to use a wide-mouth quart-size canning jar with a reusable lid.
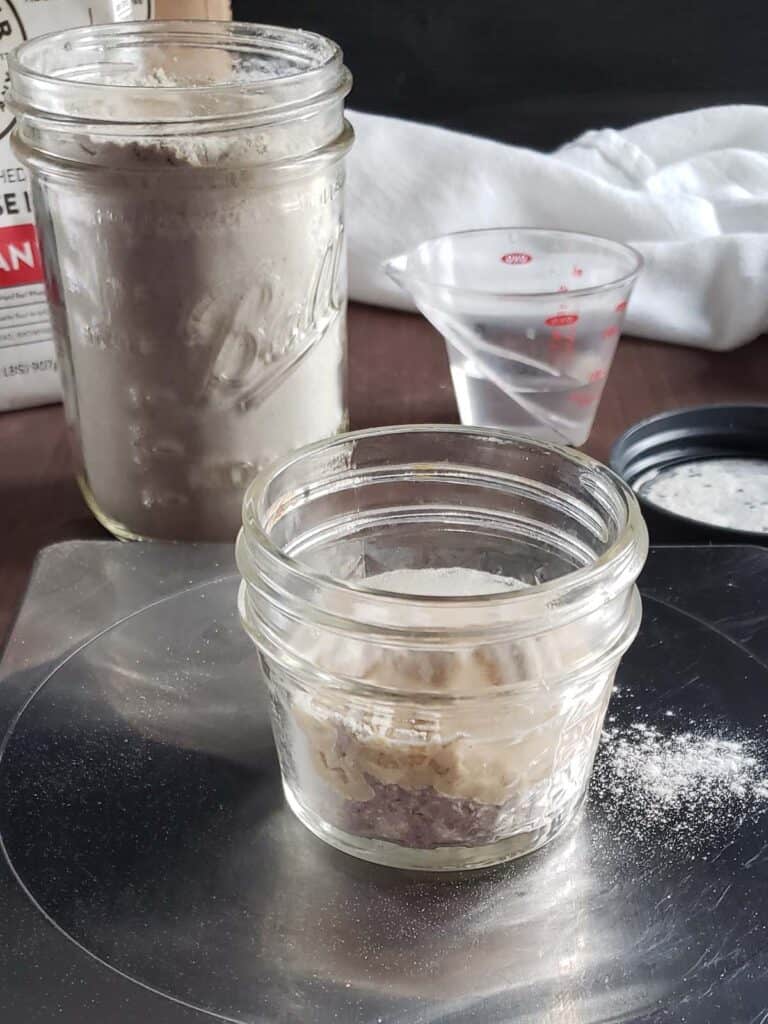
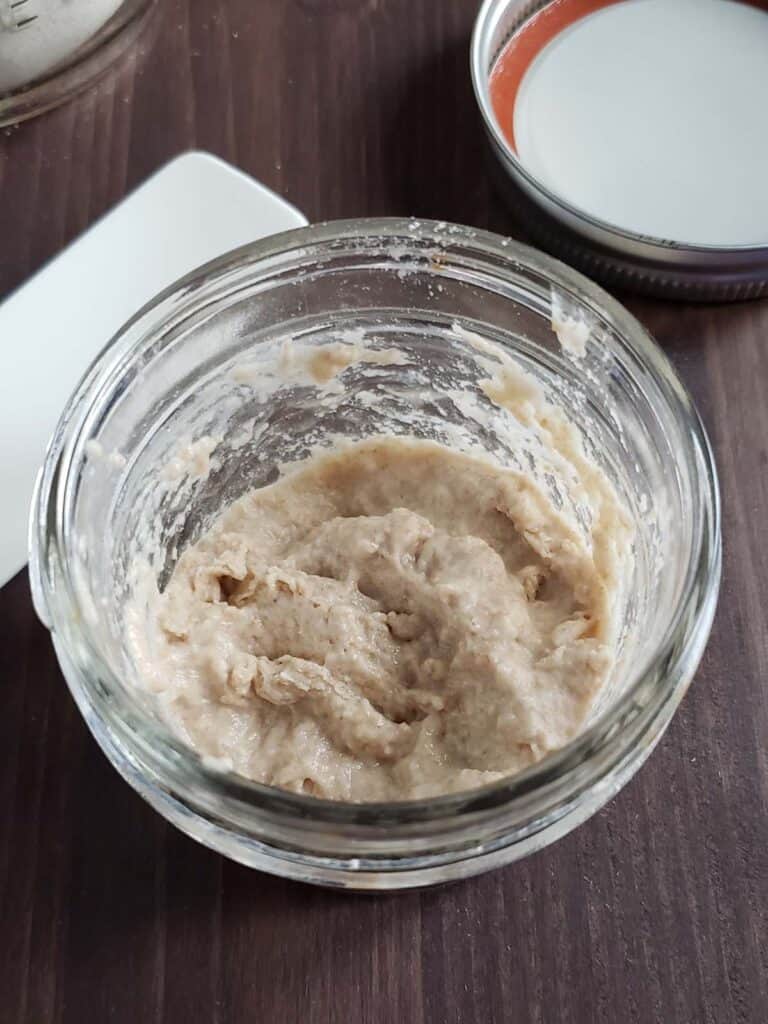
Measure 10 grams of the flour mixture and 10 grams of water into one of the small jars. Stir to combine, cover loosely with the lid, and let sit at warm room temperature (70 to 80 degrees Fahrenheit).
If your house is chillier than 70 degrees, place the jar on top of your refrigerator or inside the oven with the light turned on. Both of these spaces are typically warmer.
Check the jar every 24 hours. You are looking for the mixture to be bubbly and wet-looking. It will also start to have a sour smell. If you don't see these signs of progression return it back to its warm spot and check again in another 24 hours.
Day 2
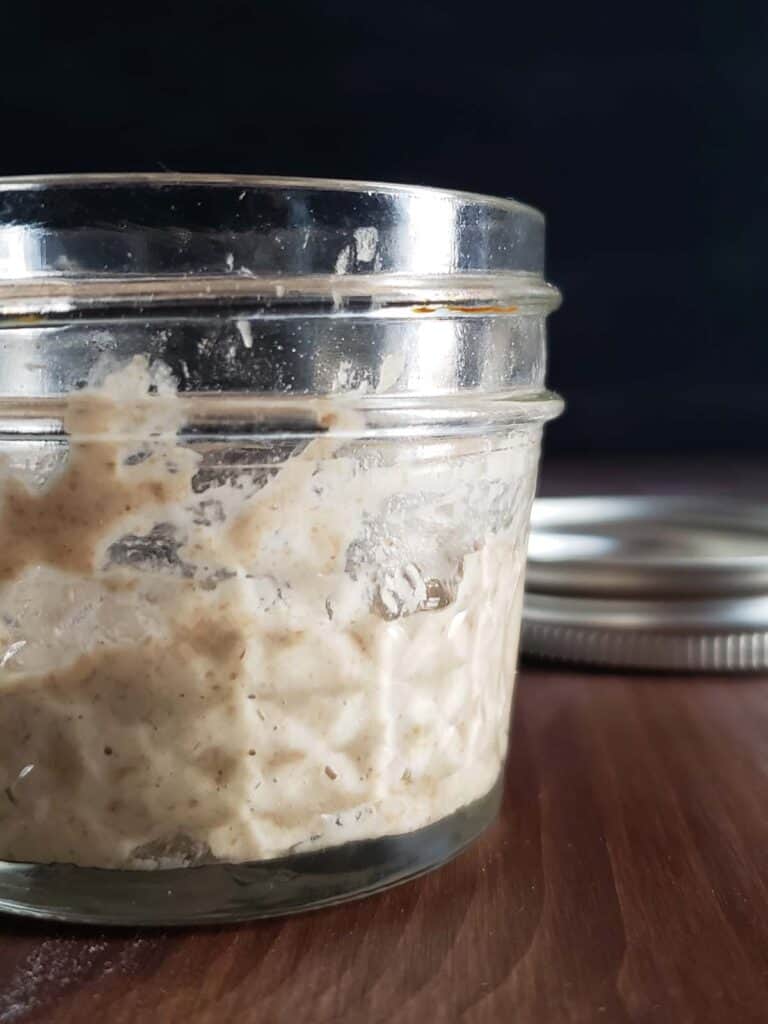
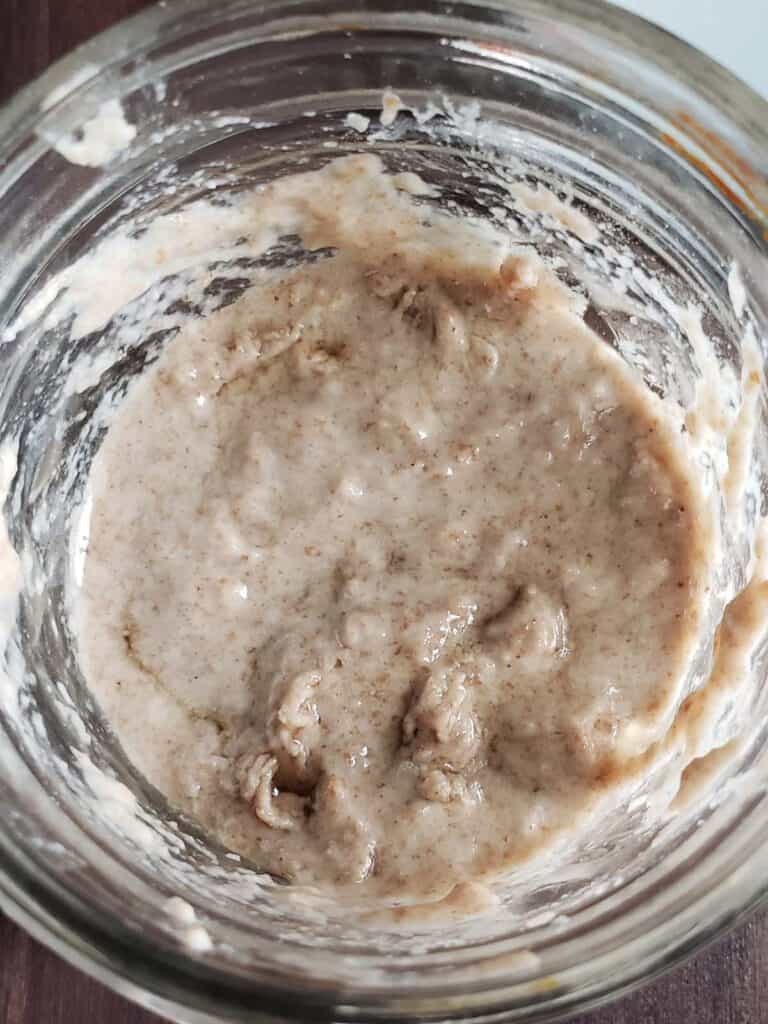
On day two there are a couple of bubbles visible and the top of the starter looks wet, which are both good signs. But the starter still has a sweet flour smell and we are looking for a bit more activity.
The starter isn't yet ready for its first feeding. I am looking for more bubbles and a slightly sour smell. I returned the starter to the top of the refrigerator and will check it again in 24 hours.
Day 3
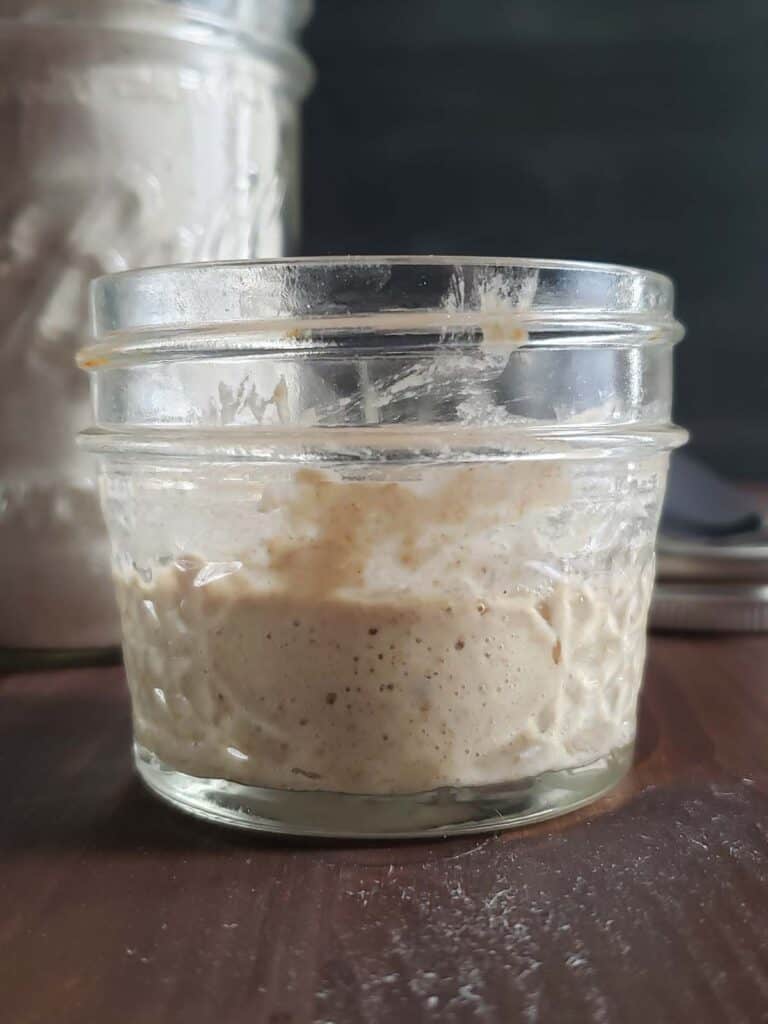
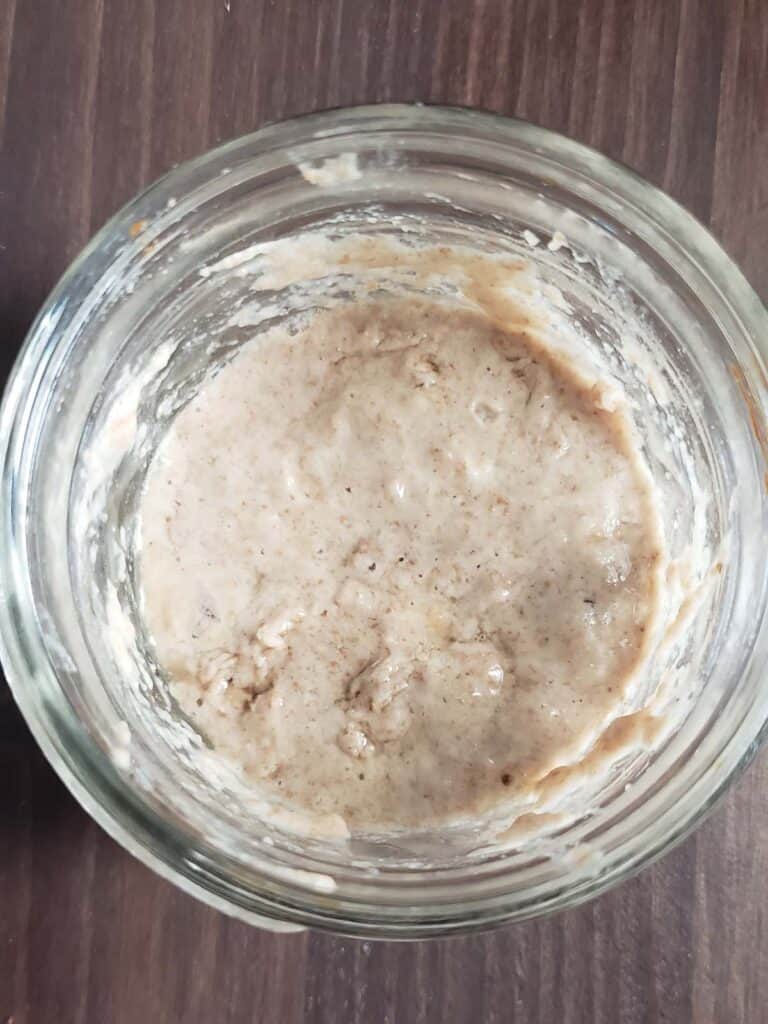
My starter is showing signs of life! Notice the more prevalent bubbles? It also has a slightly sour smell and looser consistency. Now it is time to start regularly feeding the starter every 24 hours.
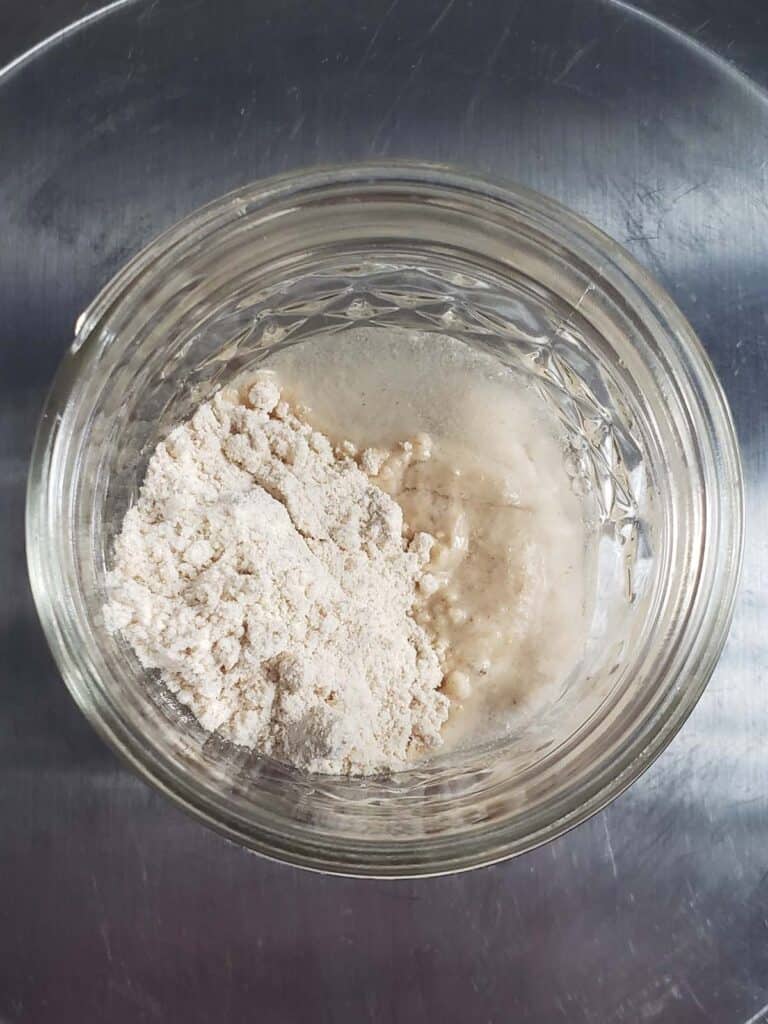
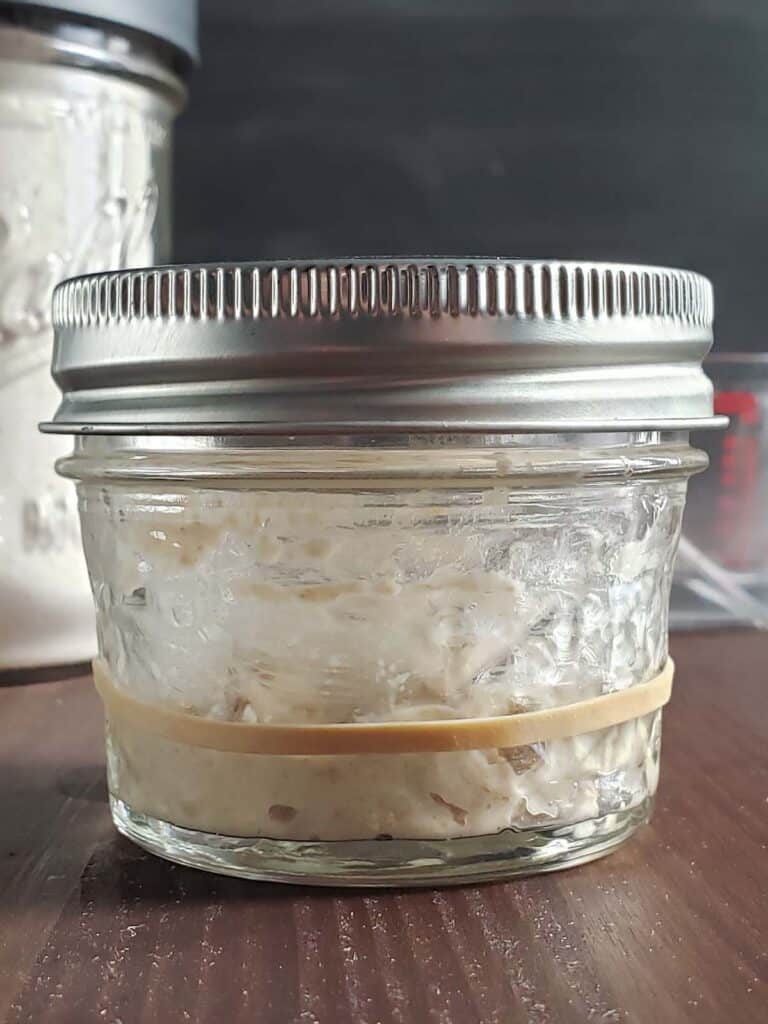
Stir the starter and transfer 10 grams to the second small jar. Add 10 grams of the flour mixture and 10 grams of water. Stir to combine.
I also added a rubber band around the jar to easily track how much the starter rises and falls.
Cover loosely with the lid and return it back to its warm spot.
Clean the original small jar for use tomorrow.
Days 4 Through 7
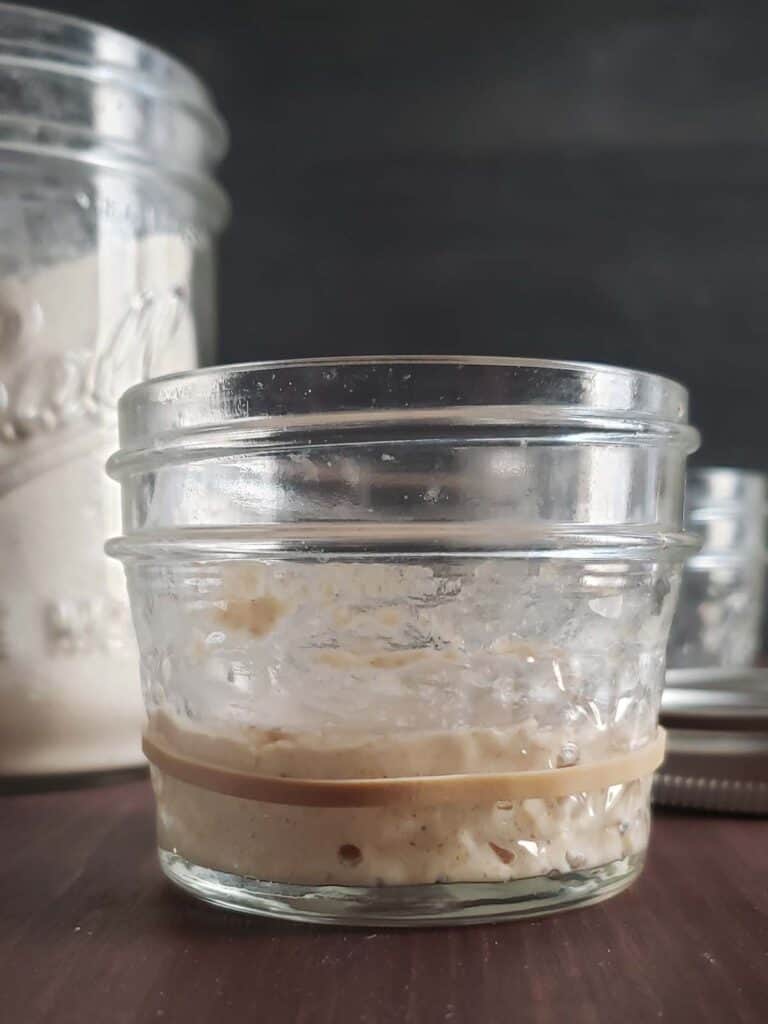
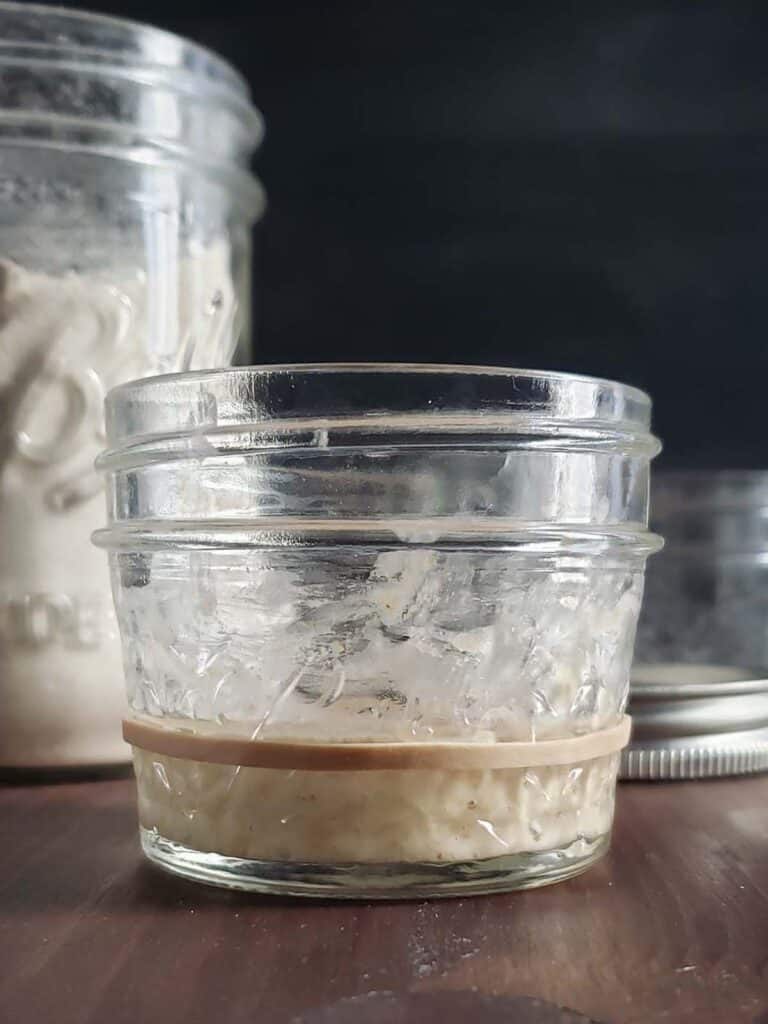
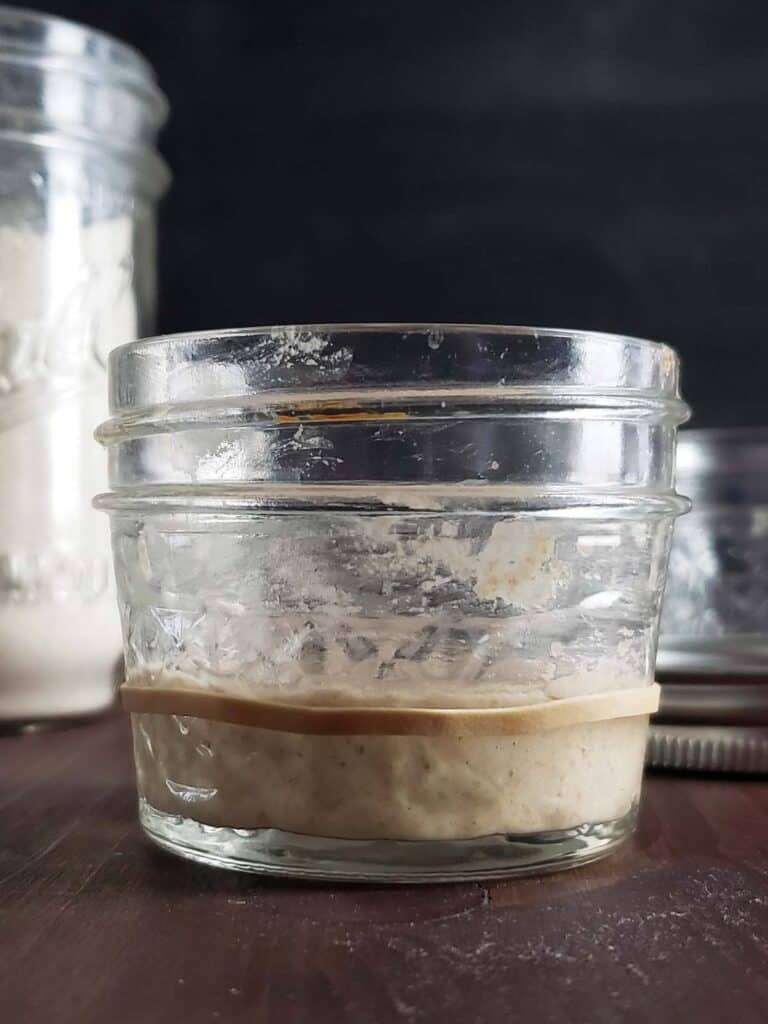
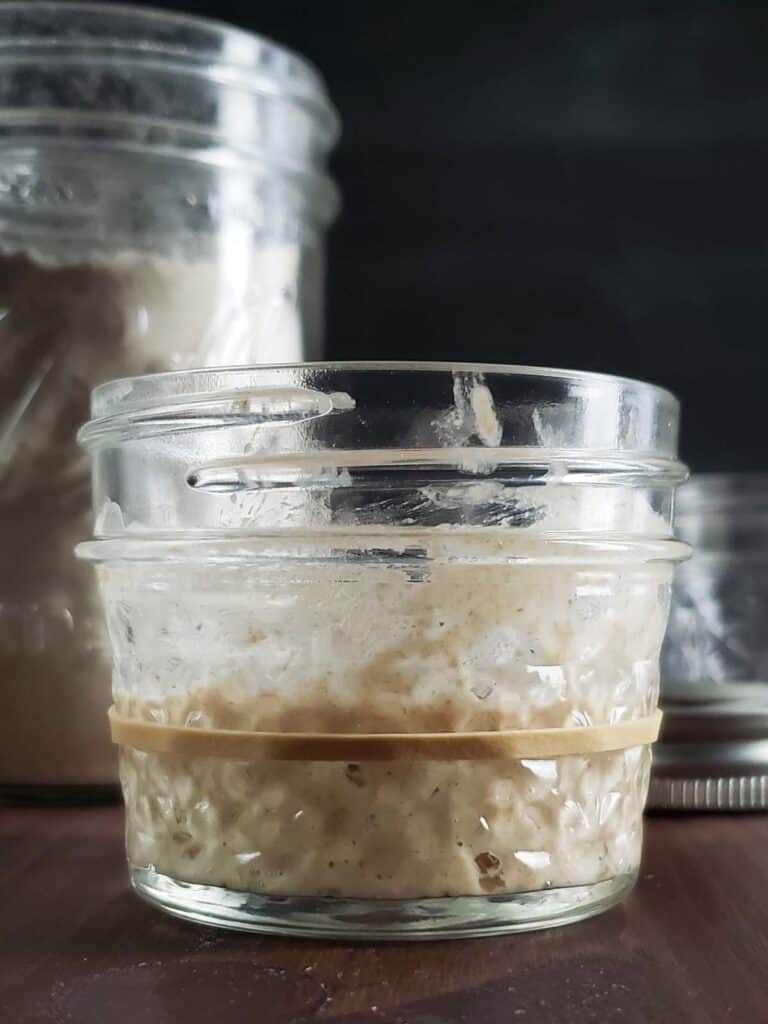
Repeat the feeding process every 24 hours. Throughout this time your starter may remain bubbly or it may go dormant. Don't worry. Continue to feed your starter every 24 hours eventually it will become very active.
Day 4: The starter was bubbly and had risen above the rubber band slightly. It was also the smelliest it has ever been.
Day 5: There are barely any bubbles today but the starter is smelly once again so I know there is activity happening. You might be tempted to give up at this point, but don't. Continue feeding your starter every 24 hours. Eventually, you will start to see more activity.
Day 6: Still not many bubbles and still very smelly. Pretty much the same as yesterday.
Day 7: A little more activity today. There are more bubbles and the starter rose slightly. It also smells a bit better. There is still the smell of acetone but there is also another smell. The smell you expect from sourdough is sour but also sweet.
Day 8
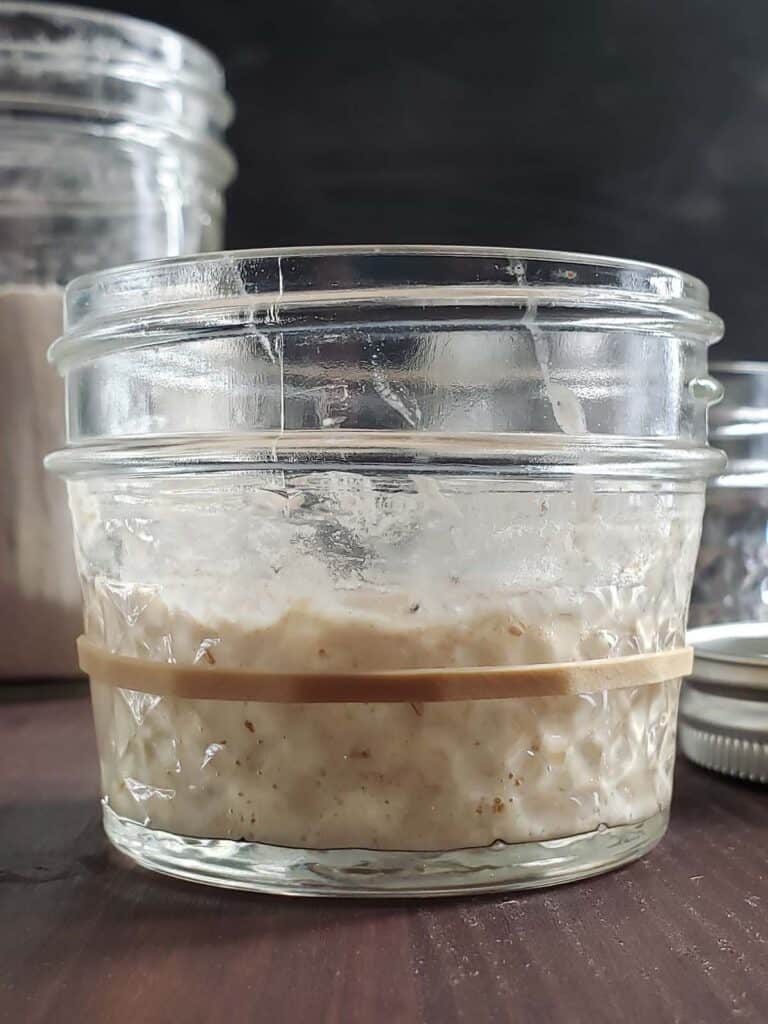
The starter still seemed very sluggish. More sluggish than it should have been. I suspect that it is just too cold in our house right now for it to thrive. Most starters like temperatures above 70 degrees Fahrenheit. During the winter our house is 68 degrees during the day and 65 degrees overnight.
To help the starter along I placed it in the oven with the oven light on and the door closed.
Out of curiosity I also placed my instant-read thermometer in the oven. With the oven light on the temperature inside the oven is 79 degrees Fahrenheit.
I also placed a post-it over the temperature controls to make sure no one accidentally baked my starter.
Heating the environment of the starter by just a few degrees made a big difference in its activity. There are more tiny bubbles throughout and it is starting to rise above the rubber band.
Days 9 and 10
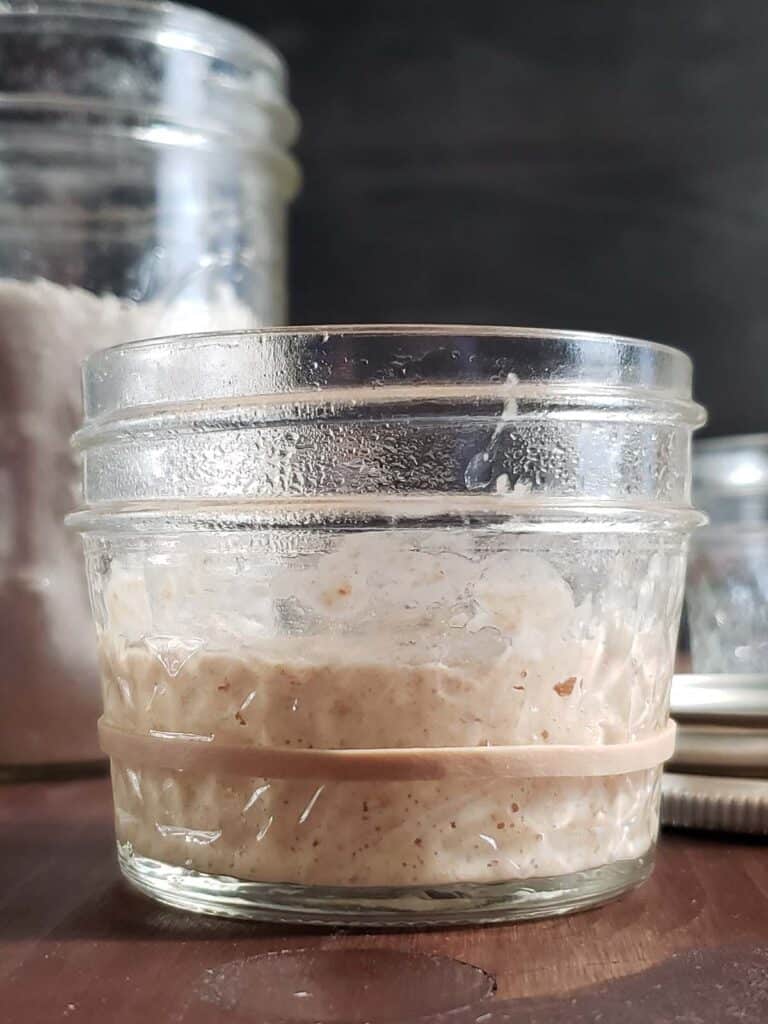
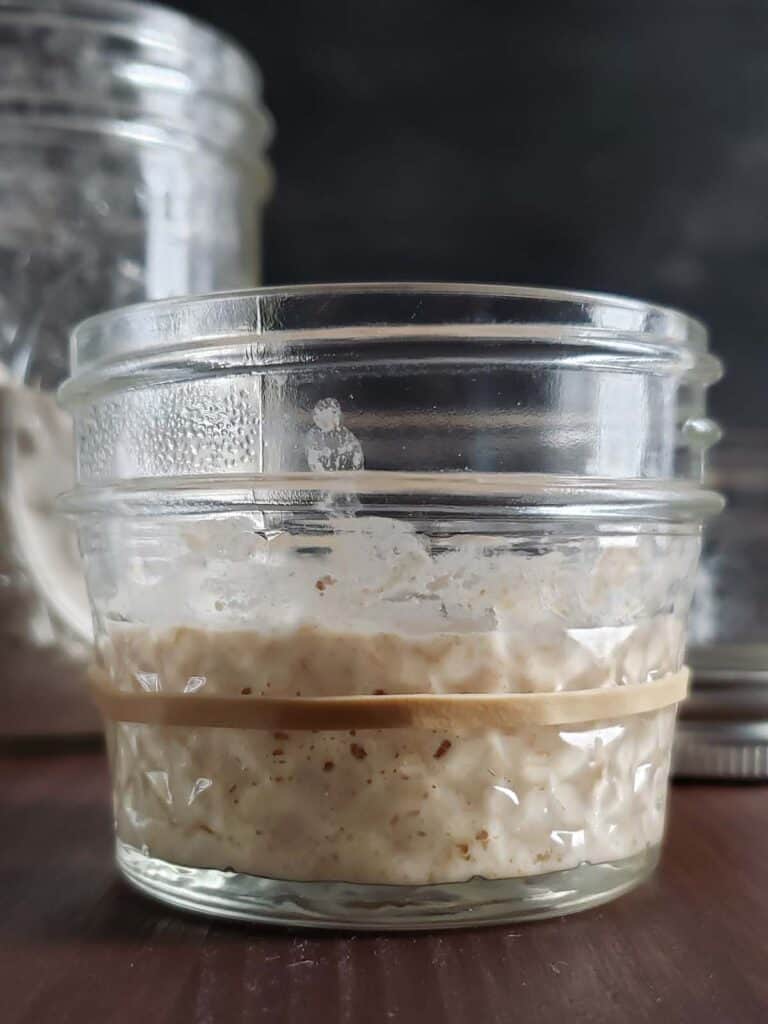
Day 9: Moving the starter to a warmer environment was a good decision. It seems so much happier. The starter has almost doubled in size and is light and airy with lots of bubbles.
Day 10: My sourdough is still happily percolating away. It has a pleasant yeasty sourdough smell instead of the strong acetone smell it had earlier. It is still not doubling in less than 12 hours so I will continue feeding every 24 hours.
Day 11
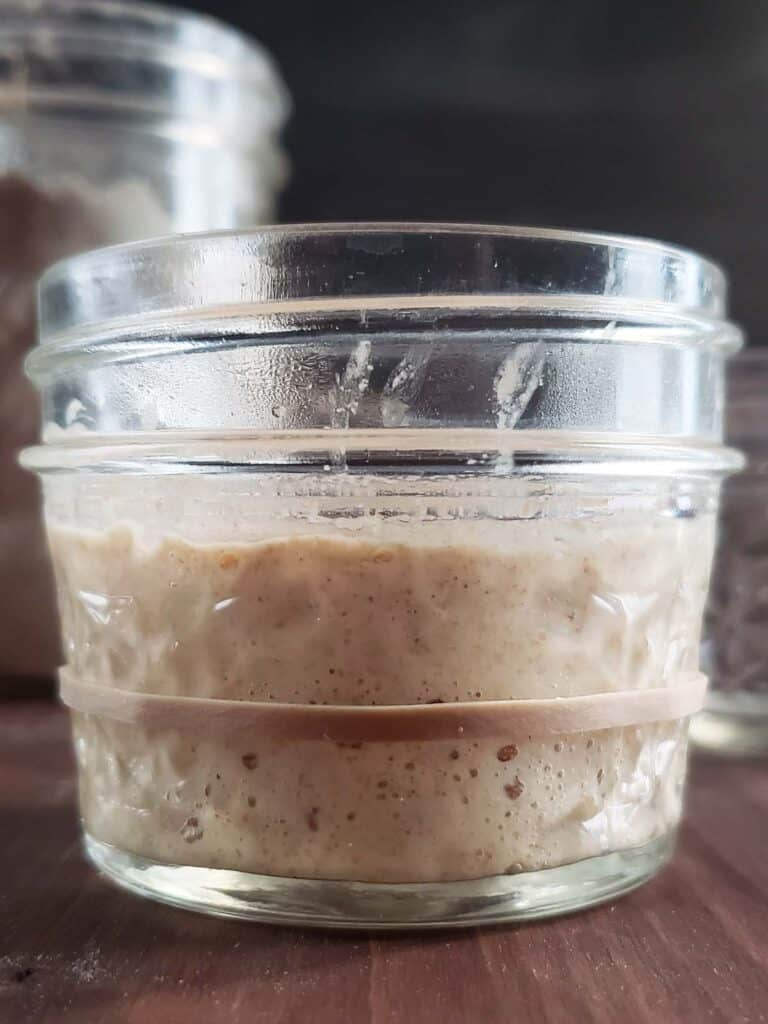
Last night I fed the starter at 8:30 pm. Here is how it looked in the morning when I woke up. It has doubled in size in less than 12 hours from the previous feeding! It also has a lovely yeasty bread smell. It is now time to start feeding the starter every 12 hours.
I fed the starter at 7:30 am and by 3:30 pm it had tripled in size.
At this point, you can start saving the leftover sourdough starter in a jar in your refrigerator to use in sourdough discard recipes. If you're not sure what to make, find a sourdough discard recipe based on how much discard you have.
I don't save discard during the early stages of creating a starter. The microbial community is still developing and the starter often has unpleasant aromas during this stage. Once my starter is consistently active and smells pleasantly yeasty and sour, I begin saving the discard in the refrigerator.
How long does sourdough discard last?
What is the difference between starter and sourdough discard?
If your starter's activity slows down or stops, return to feeding it once a day until it becomes active in less than 12 hours again.
I will now continue feeding my starter twice a day for a couple of days to build up its strength.
Days 12 Through 14
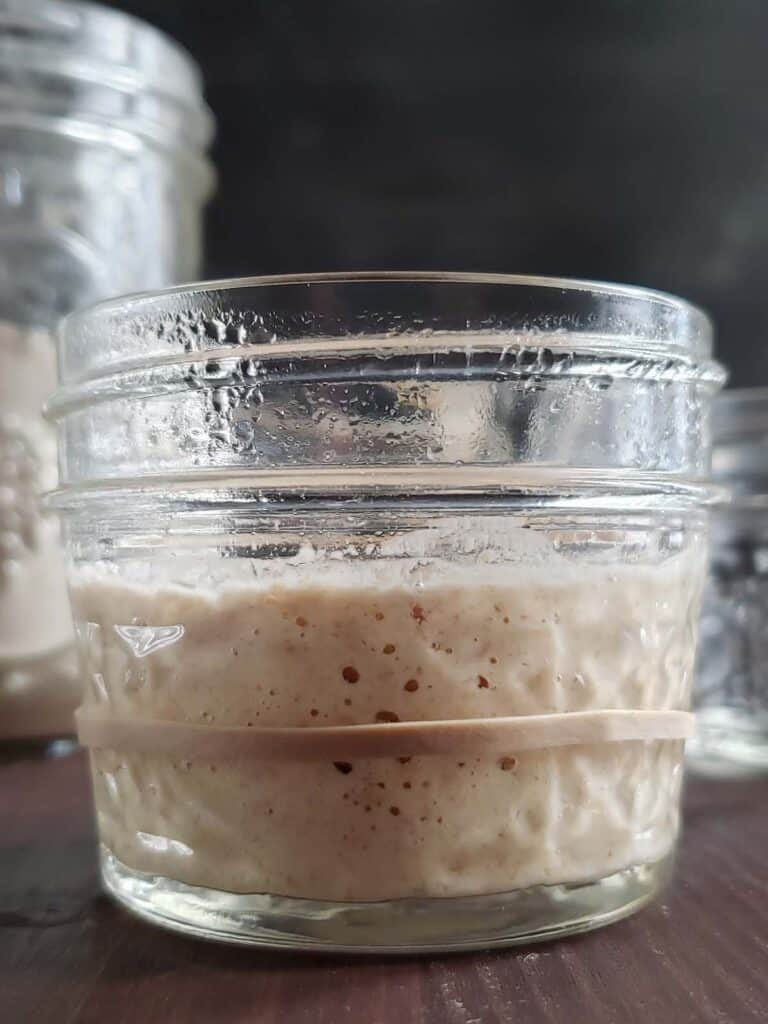
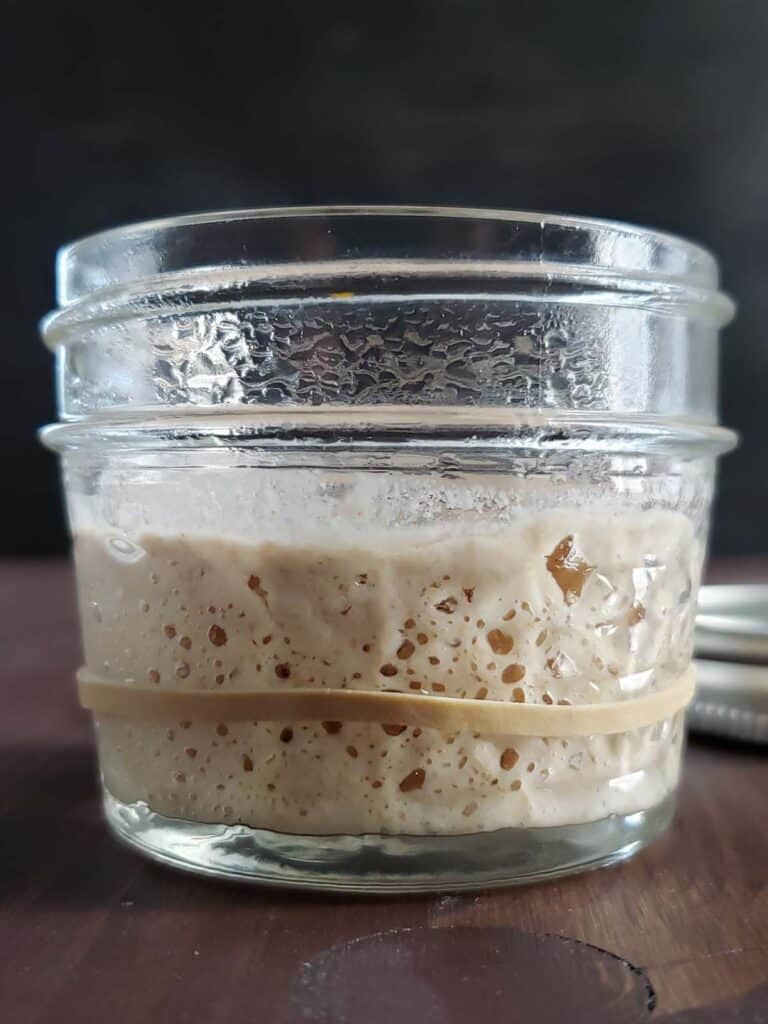
Day 12
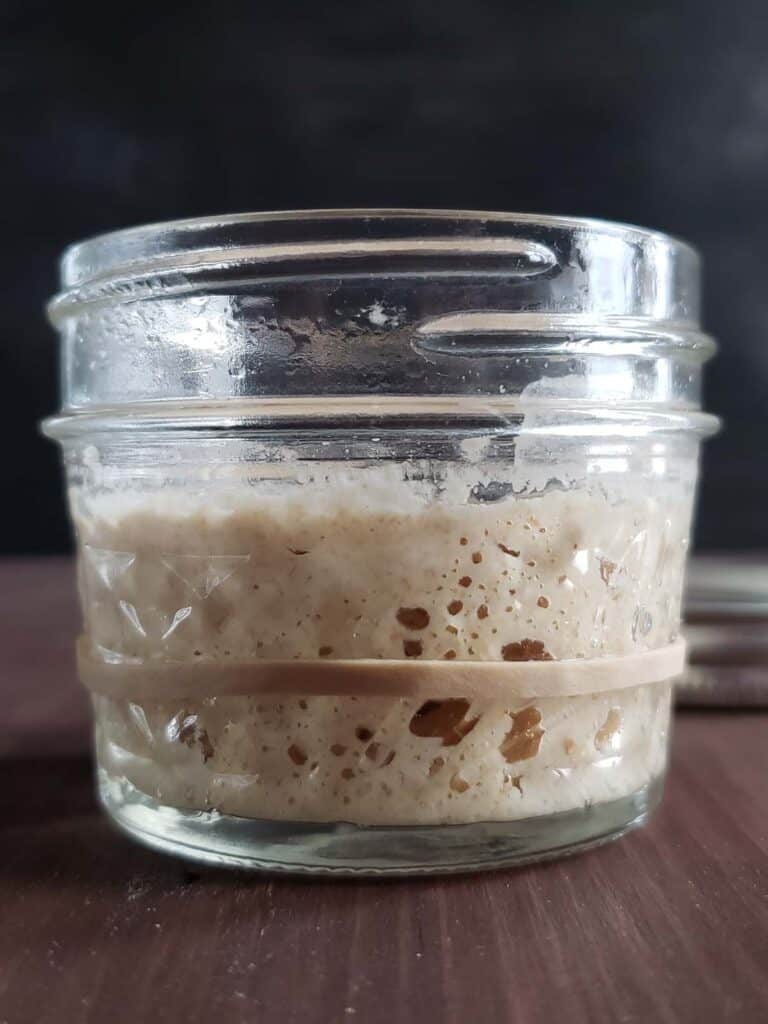
9 AM: I fed my starter last night at 9 pm. Twelve hours later it has doubled in size, is bubbly, and smells pleasantly yeasty.
4 PM: By 4 pm my starter has doubled in size again, which is a great sign that the starter is healthy and happy. I will feed it again around 9 pm tonight.
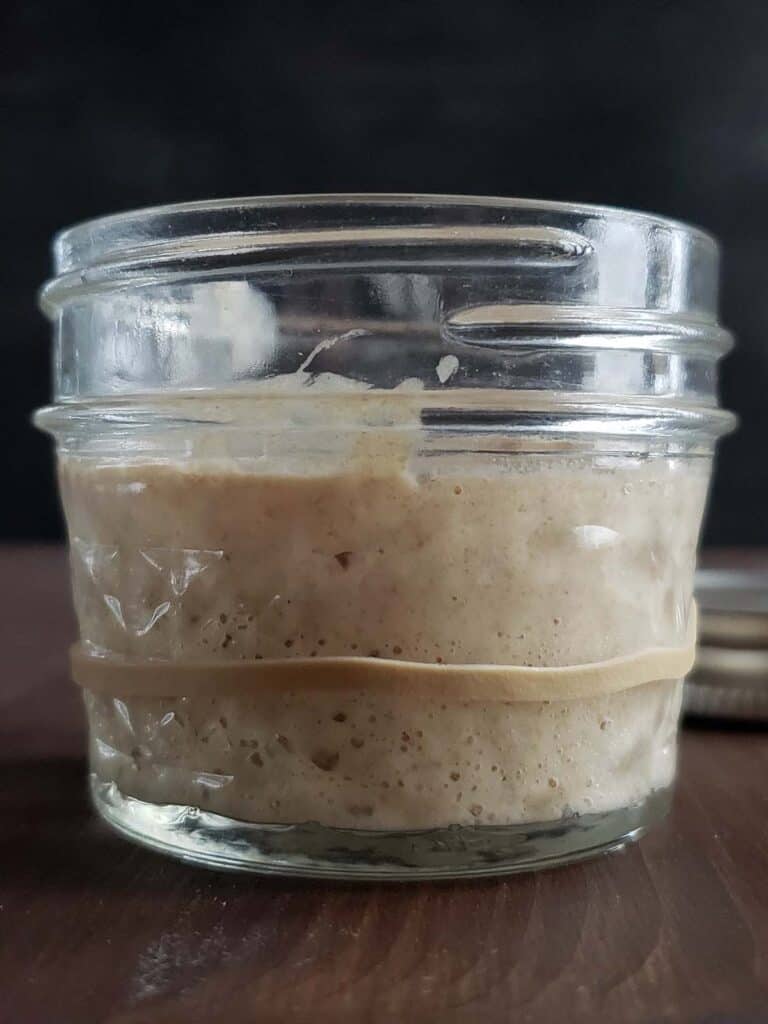
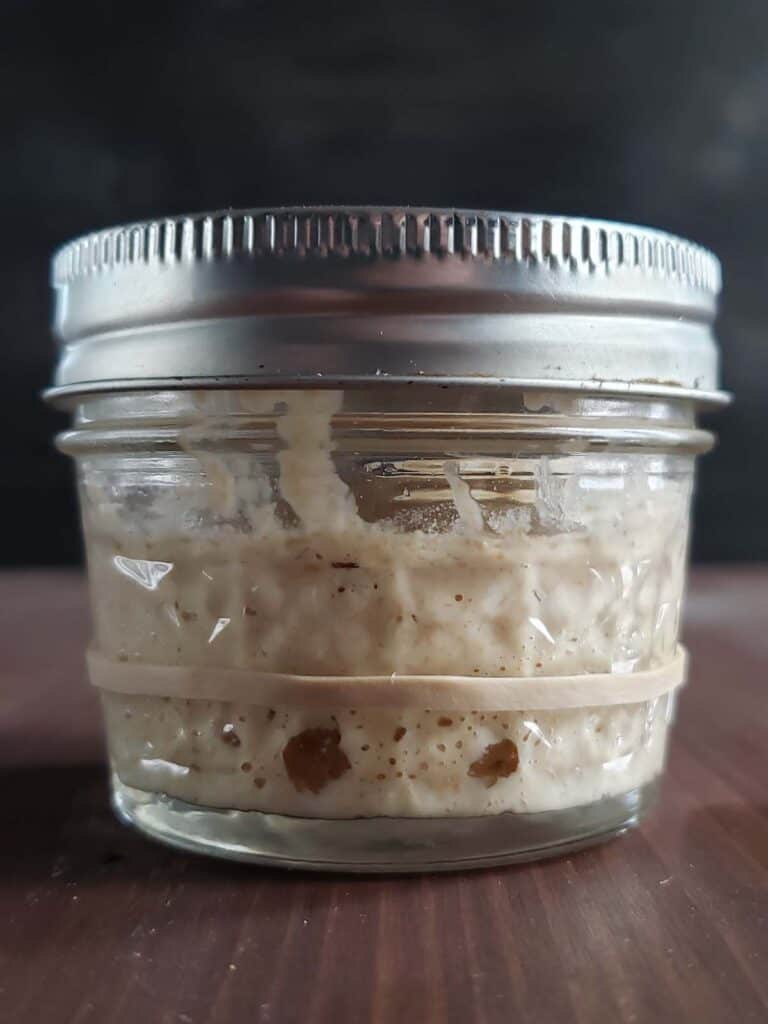
Day 13
9 AM: I fed my starter last night at 9 pm. Twelve hours later it has doubled in size, is bubbly, and smells pleasantly yeasty.
5 PM: By 5 pm my starter has doubled in size again, which is a great sign that the starter is healthy and happy. I will feed it again around 9 pm tonight.
Day 14
My starter was bubbly and happy again this morning. It is also two weeks old.
I think it's time to try the float test and see if the starter is ready for bread-making.
How Do You Know When Sourdough Starter Is Ready To Bake With?
There isn't a specific day when every new starter becomes ready to bake with. Instead of relying on its age alone, watch for consistent activity and a predictable rise after feeding. Look for these signs:
- Consistently doubles or triples after feeding
- Does so within a predictable amount of time
- Has plenty of bubbles throughout
- Has a pleasantly yeasty, mildly sour aroma
- Shows a predictable rise-and-fall cycle
What is the Float Test?
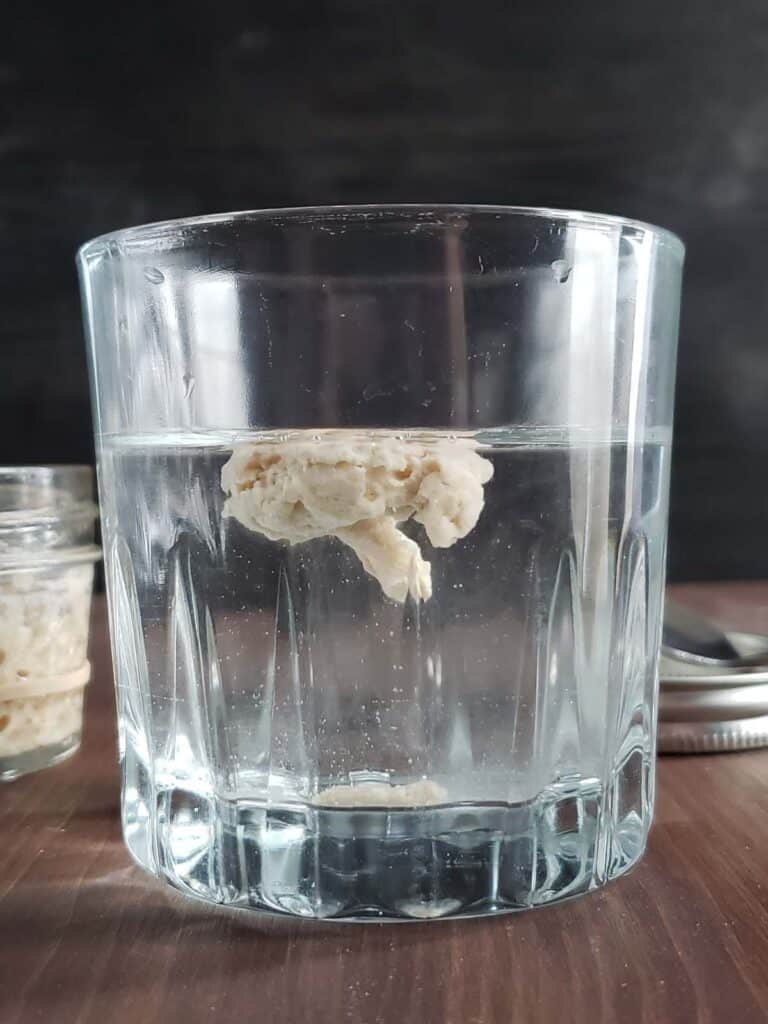
The float test is a popular method for checking whether a sourdough starter is ready to use, but it isn't always a reliable indicator of starter strength.
To perform the float test, gently drop a small spoonful of active starter into a glass of room-temperature water. If the starter contains enough trapped gas, it may float. However, whether it floats can be affected by factors such as the starter's hydration, the type of flour used and whether some of the trapped gas was disturbed when the starter was scooped.
Instead of relying on the float test, I prefer to watch how my starter behaves after feeding. A mature starter should reliably double or triple in size, have bubbles throughout and develop a bubbly, slightly domed surface near its peak. It should also smell pleasantly yeasty and mildly sour.
If your starter isn't showing these signs yet, continue your regular feeding schedule and give it more time to become established.
Your Sourdough Starter Is Ready! What's Next?
Once your starter is consistently doubling or tripling after feeding, it's time to put it to work.
Bake your first loaf. If you're ready to make sourdough bread, my Same Day Sourdough Bread recipe is a great place to start. You can mix, ferment and bake your bread in a single day without having to plan around an overnight rise.
Choose how to maintain your starter. You don't have to keep feeding your starter twice a day forever. How often you bake will help determine whether it's better to store your starter in the refrigerator or maintain it at room temperature.
Not sure which method is right for you? Take my Sourdough Starter Storage Quiz to find a routine that fits your baking schedule.
Building Enough Starter for a Recipe
Maintaining a small starter doesn't mean you have to change recipes that call for a larger amount of active starter. When you're ready to bake, simply use a small portion of your established starter to build the amount you need.
For example, if your recipe requires 200 grams of active starter, remove 10 grams from your established starter and place it in a larger jar. Add 100 grams of flour and 100 grams of water. This will give you approximately 210 grams of starter.
I like to build a little more starter than the recipe requires because some will inevitably stick to the sides of the jar and your spoon or spatula. The extra 10 grams gives you a small buffer so you can easily measure the full 200 grams needed for your recipe.
Because this uses a higher feeding ratio than the 1:1:1 ratio used to maintain your small starter, it may take longer to reach peak activity. Once it is bubbly, active and has reached its peak, measure the amount your recipe requires.
Your original starter stays in its jar and can continue to be maintained using your normal routine. You don't need to save any of the starter you built for the recipe to maintain your established starter. Think of these as two separate jobs: you maintain your small starter to keep the culture healthy, while the larger build gives you the amount of active starter you need for your recipe.
Maintaining Sourdough Starter
Once your starter is established, how you maintain it depends largely on how often you bake and how much starter you want to keep on hand.
If you bake frequently, keeping your starter at room temperature allows it to stay active and ready to use, but it will need regular feedings. If you bake less often, storing your starter in the refrigerator can reduce how frequently it needs to be fed.
You can also adjust how much starter you maintain. Methods like the scrapings method and maintaining a microstarter allow you to keep a much smaller amount of starter between bakes, which can help reduce both flour use and discard.
For longer breaks from baking or as a backup, you can also dehydrate your starter and reactivate it when you're ready to use it again.
Not sure which method makes the most sense for you? Take my Sourdough Starter Storage Quiz to find the storage method that best fits your baking routine.
Frequently Asked Questions
Not necessarily. If you maintain your starter using a traditional feeding routine, you'll usually remove a portion before adding fresh flour and water. This keeps the amount of starter manageable and prevents you from using increasingly large amounts of flour with each feeding.
But removing starter doesn't mean you have to throw it away. Once your starter is established, you can save the discard in the refrigerator and use it in sourdough discard recipes.
You can also use a maintenance method that produces very little discard. For example, the scrapings method leaves only a small amount of starter in the jar between bakes, which you build back up when you're ready to bake.
Yes. While it isn't recommended to store your starter in a metal container brief contact with a metal spoon while you stir it won't harm your starter.
While your starter is actively fermenting at room temperature, cover the jar with a lid but don't tighten it completely. Fermentation produces carbon dioxide, so a loosely fitted lid allows gas to escape while keeping dust and debris out of your starter.
I prefer using a solid lid rather than cloth or a paper towel because it also helps prevent the surface of the starter from drying out.
When storing your starter in the refrigerator, you can secure the lid more firmly once the starter has cooled and fermentation has slowed.
A vinegar or acetone smell is a sign that your starter is hungry and has produced lots of acetic acid. If your starter starts consistently smelling really sour it needs to be fed more often.
Healthy sourdough smells fresh and yeasty with perhaps a slightly sour smell.
Probably not. A sourdough starter can become sluggish after changes in temperature, an inconsistent feeding schedule or spending an extended period in the refrigerator.
If you don't see any signs of spoilage, try feeding your starter with fresh flour and water and keeping it in a warm location. A neglected or refrigerated starter may need several feedings before it begins rising predictably again.
However, if you see visible mold, pink or orange discoloration or other clear signs of contamination, discard the starter and begin again. When in doubt about whether your starter is safe to keep, it's best to start fresh.
Let me know in the comments if you decide to nurture your own starter and what you decide to name it.
Wondering what to make with your sourdough discard?
Whether you have half a cup or a jar that's nearly overflowing, find a recipe based on how much discard you have.


Vickie says
Beginner here,
In your post above, when you refrigerate your starter and feed once a week, do you discard as well? If so, how much do you discard and how much flour and water do you add.
Thank you!
Erica Schramek says
Yes you would continue to feed and discard just like a normal feeding, but if you are refrigerating the starter you only need to feed it once a week or so.