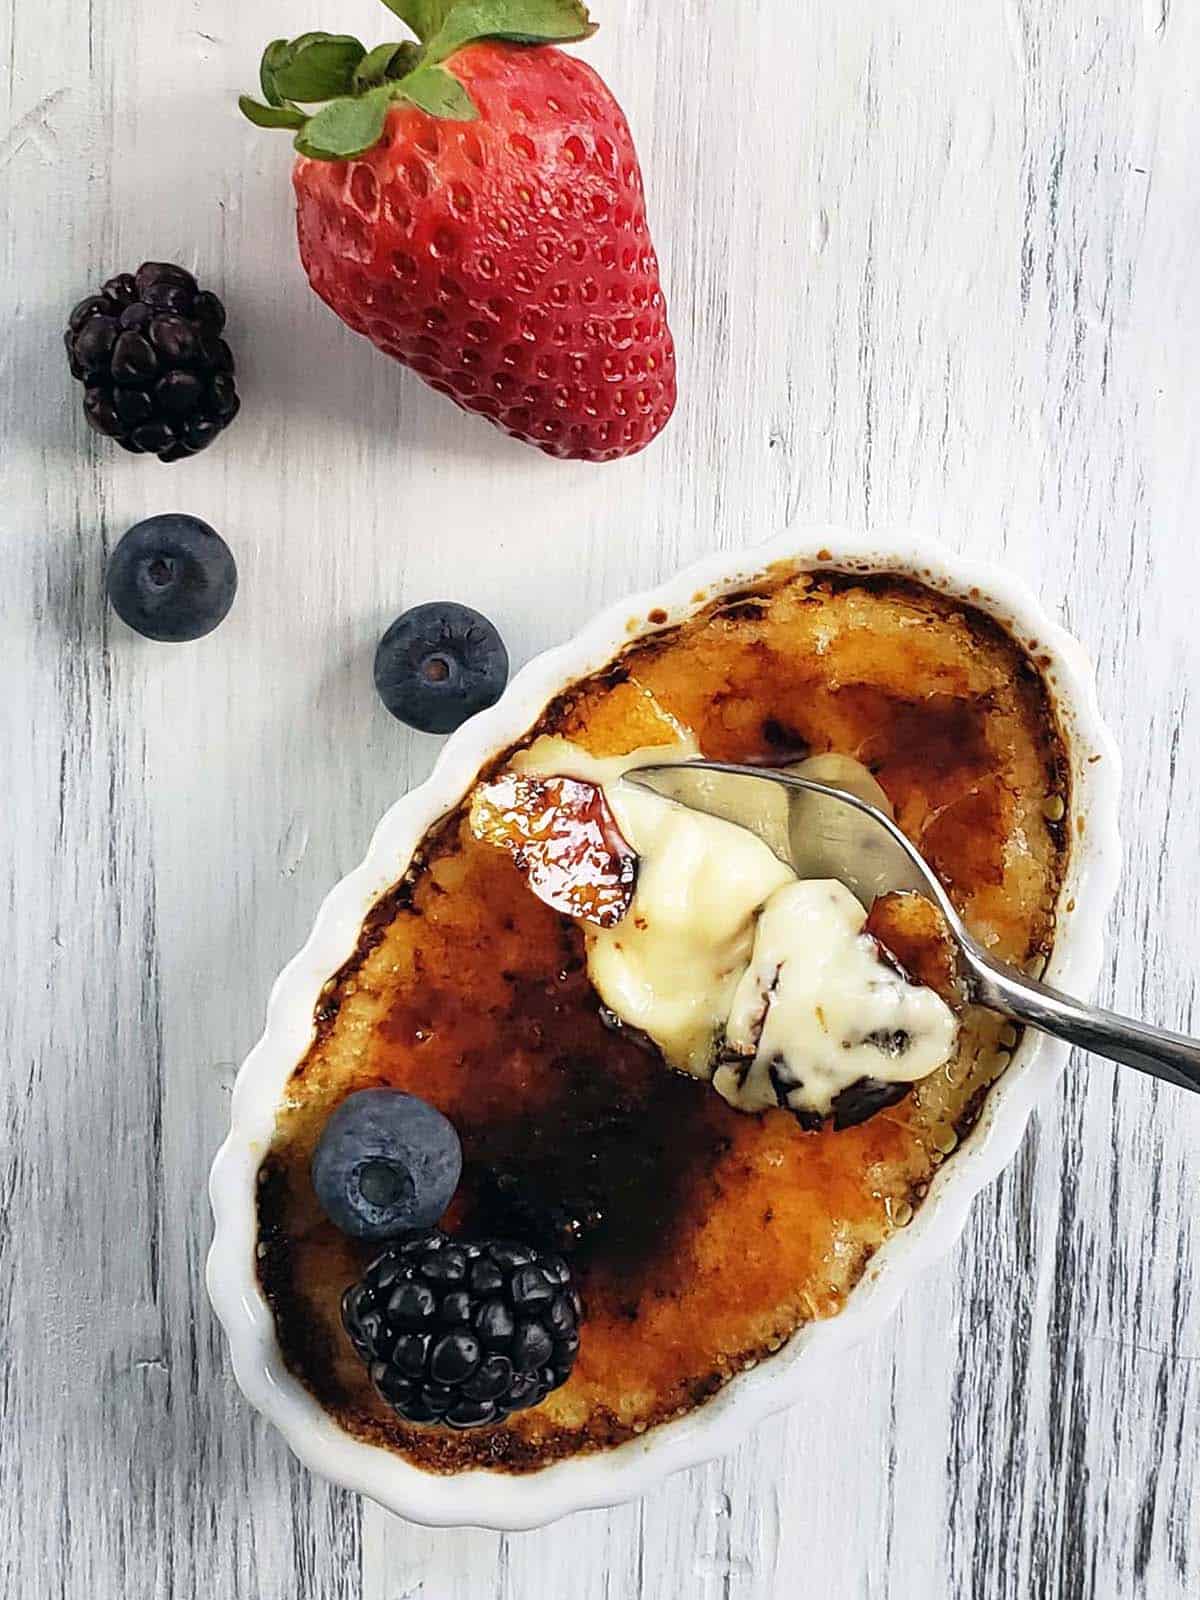
This Vanilla Creme Brulee with Fruit has a creamy silky custard with a crunchy caramelized sugar crust.
The only thing that could make this dessert better is topping it with fresh fruit.
Creme brulee may seem like an elegant dessert available only at a fancy restaurant but it is actually really simple to make and will quickly become your favorite dessert.
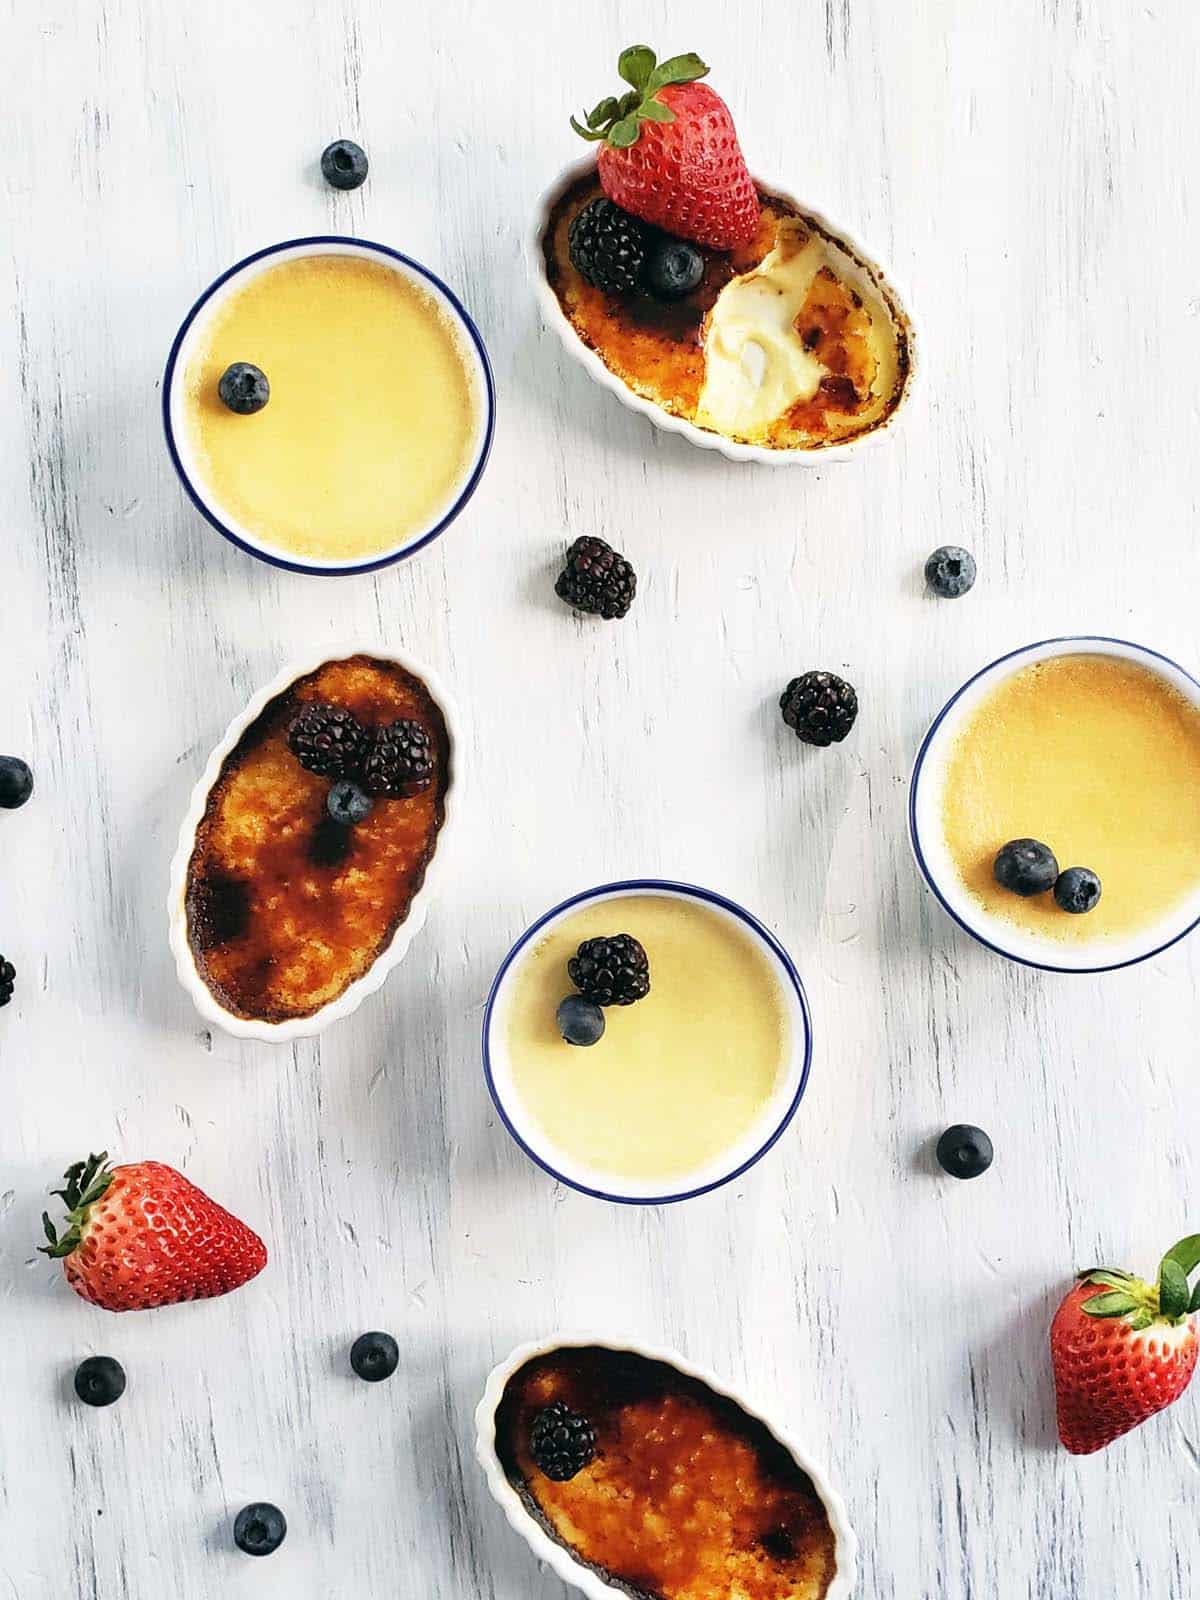
You can experiment and customize creme brulee by adding caramel, chocolate, fruit, or other flavorings to the custard.
Here are some of my favorite variations on creme brulee: Blueberry Creme Brulee, Nutella Creme Brulee, Horchata Creme Brulee, Peach Creme Brulee, Mango Creme Brulee, Rhubarb Creme Brulee, and even Sweet Corn Creme Brulee.
Jump to:
Why You Will Love This Recipe
- Creme brulee is a simple dessert with a big flavor.
- This dessert uses just five common ingredients that are probably already in your pantry.
- Using a blow torch to caramelize sugar is fun and looks pretty impressive.
Need some more fancy desserts that are sure to impress? Try this No-Bake Tiramisu Recipe Without Rum or Other Alcohol or this Chocolate Heath Bar Trifle.
Recipe Ingredients
Creme Brulee is made with only a five simple ingredients.
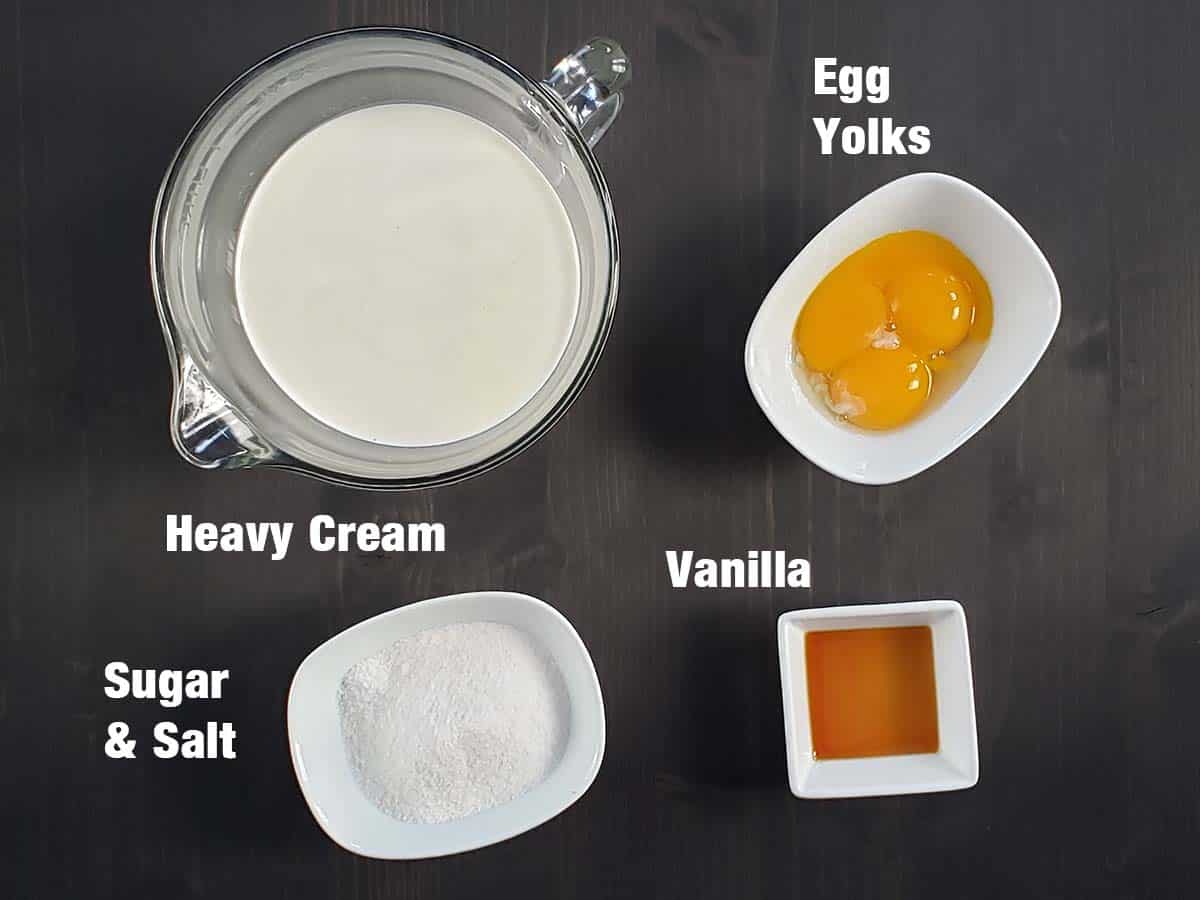
Heavy Whipping Cream: Some recipes use a combination of both heavy whipping cream and milk to make the custard lighter. In my opinion, creme brulee is meant to be rich so this recipe uses only heavy whipping cream.
Tip: If you want to substitute milk for some of the heavy whipping cream I would stick with a 1:1 ratio. Use one cup of heavy whipping cream and one cup of milk.
Egg Yolks: For creme brulee, you want to use just the egg yolks. Egg whites would set too firmly giving the creme brulee a rubbery texture.
If you have never separated eggs before, check out this post from Sugar Hero where she shares Four Methods for Separating Eggs.
Save the egg whites for another recipe. Like this Lemon Swiss Meringue.
Granulated White Sugar: For creme brulee, the best sugar to use is regular granulated white sugar. Its small granules easily melt into the custard perfectly balancing the bitterness of the burnt sugar crust.
Speaking of the crust we will use granulated white sugar for the topping as well. Granulated sugar works best because the granules are small and caramelize quickly, which is important. We don't want the custard to melt while we are brûléeing the sugar.
Another benefit to using white sugar is it is easy to tell when the sugar has caramelized because it will turn from white to a golden brown.
Vanilla Extract: Use pure vanilla extract not imitation vanilla. It may be a little more expensive but the flavor is so much better.
Salt: I add at least a pinch of salt to all of my recipes. Salt complements and intensifies the other flavors. For all of my recipes, I use Morton Kosher Salt which packs more densely than Diamond Crystal Kosher Salt. If you are using Diamond Crystal Kosher Salt you will want to double the amount of salt you add.
See the recipe card for full information on ingredients and quantities.
Step by Step Directions
Step 1: Move an oven rack to the middle position and preheat the oven to 325°F (165°C).
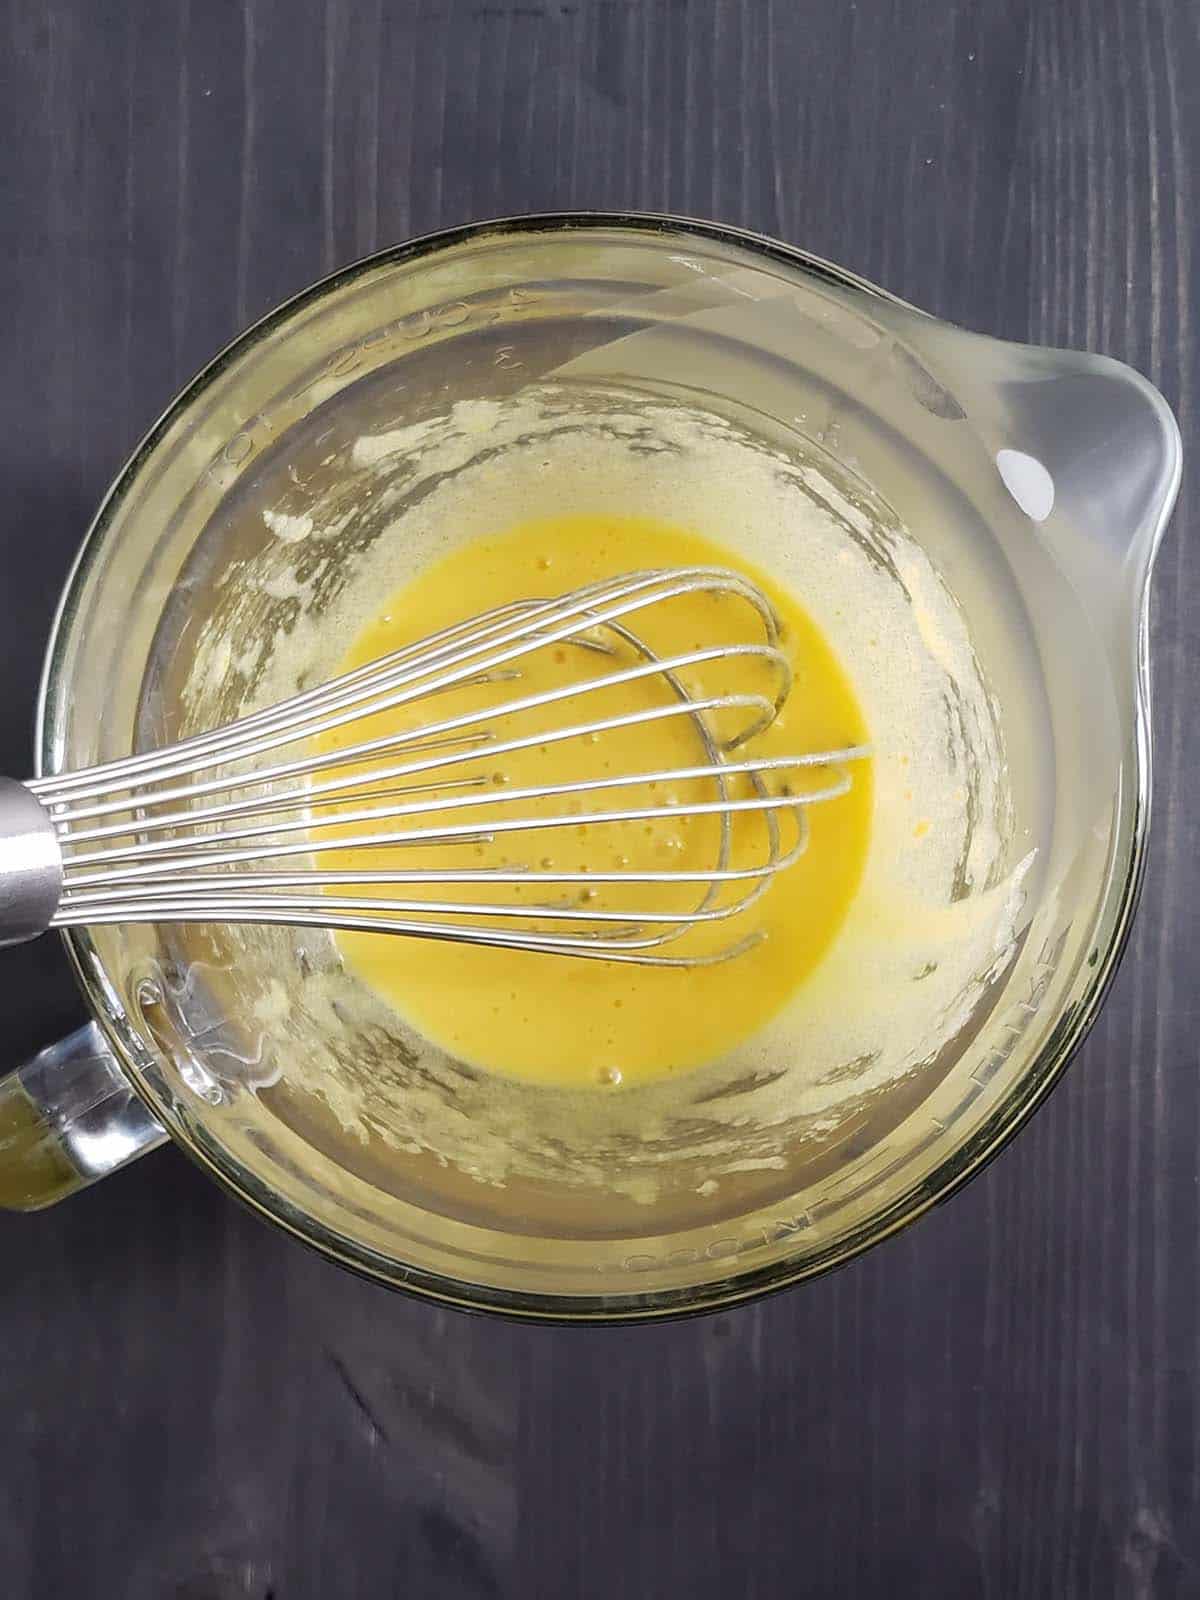
In a medium-sized bowl whisk together the egg yolks, sugar, and salt until smooth and the egg yolks start to lighten in color.
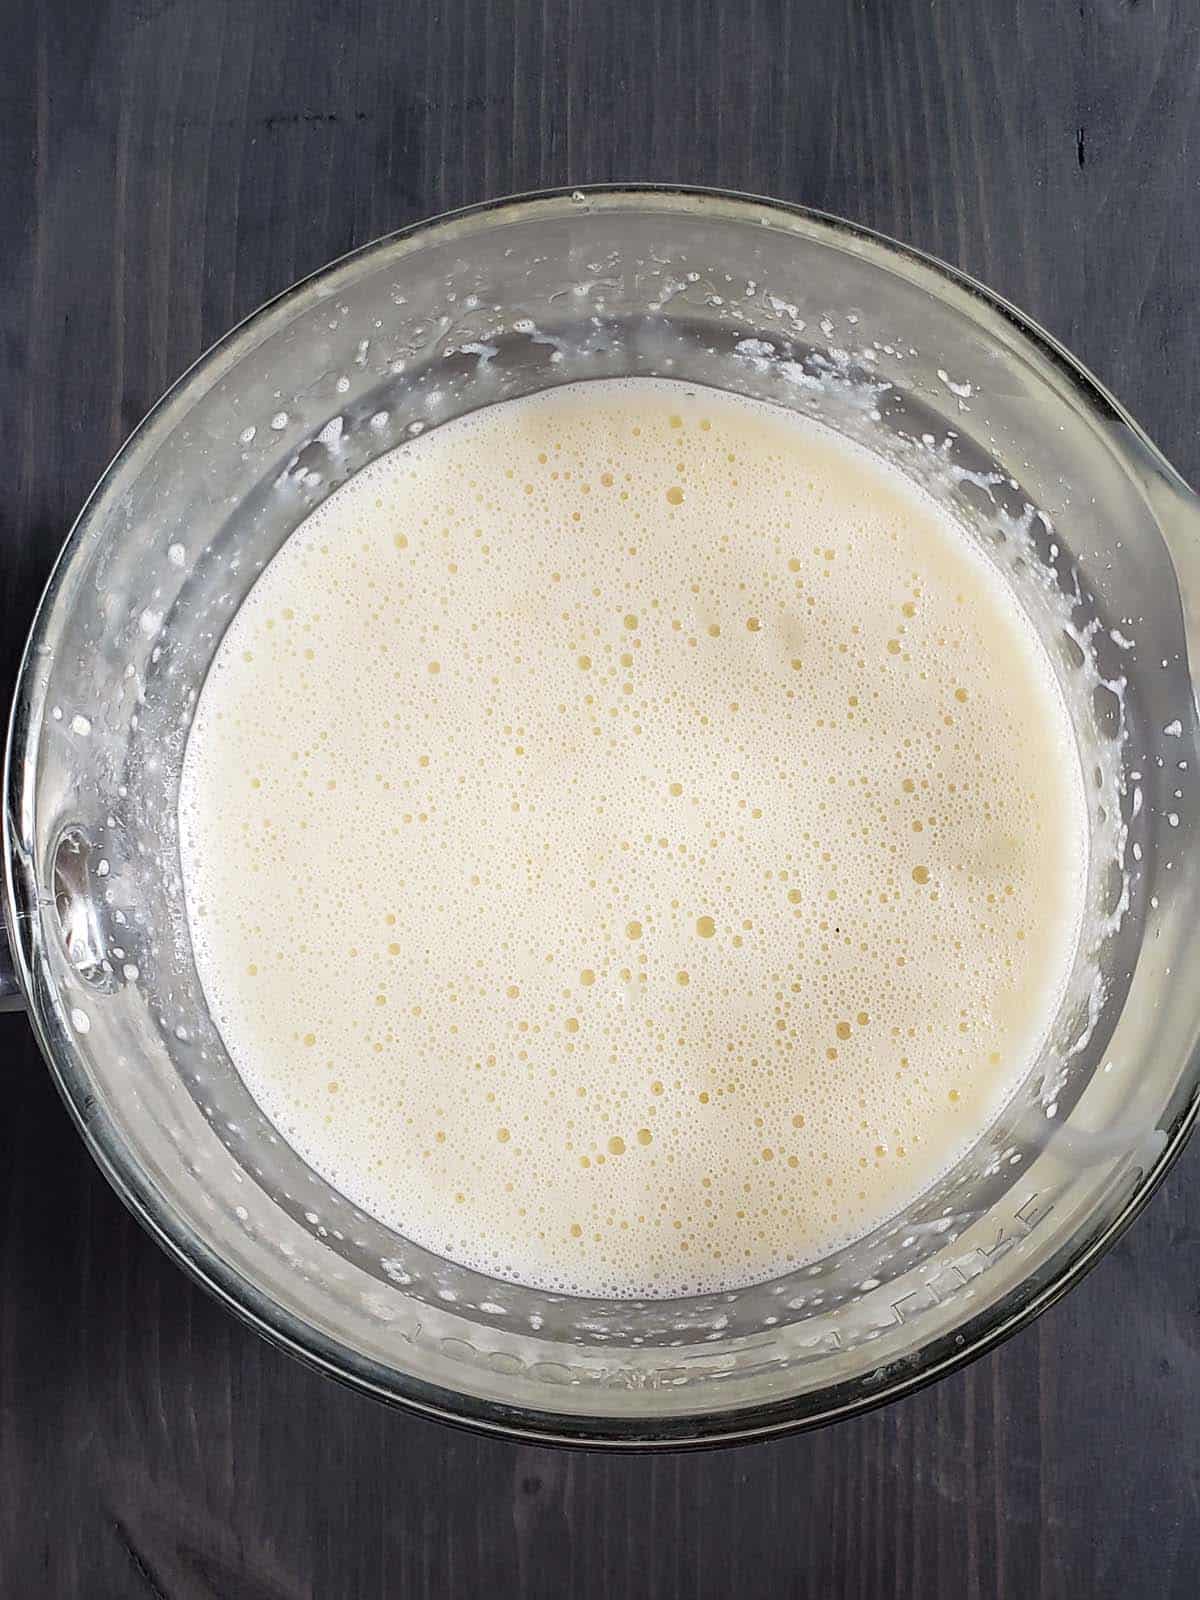
Step 2: Stir in the heavy cream and vanilla.
Tip: Whisk the eggs and salt together in a large measuring cup to make pouring the custard into the ramekins easier.
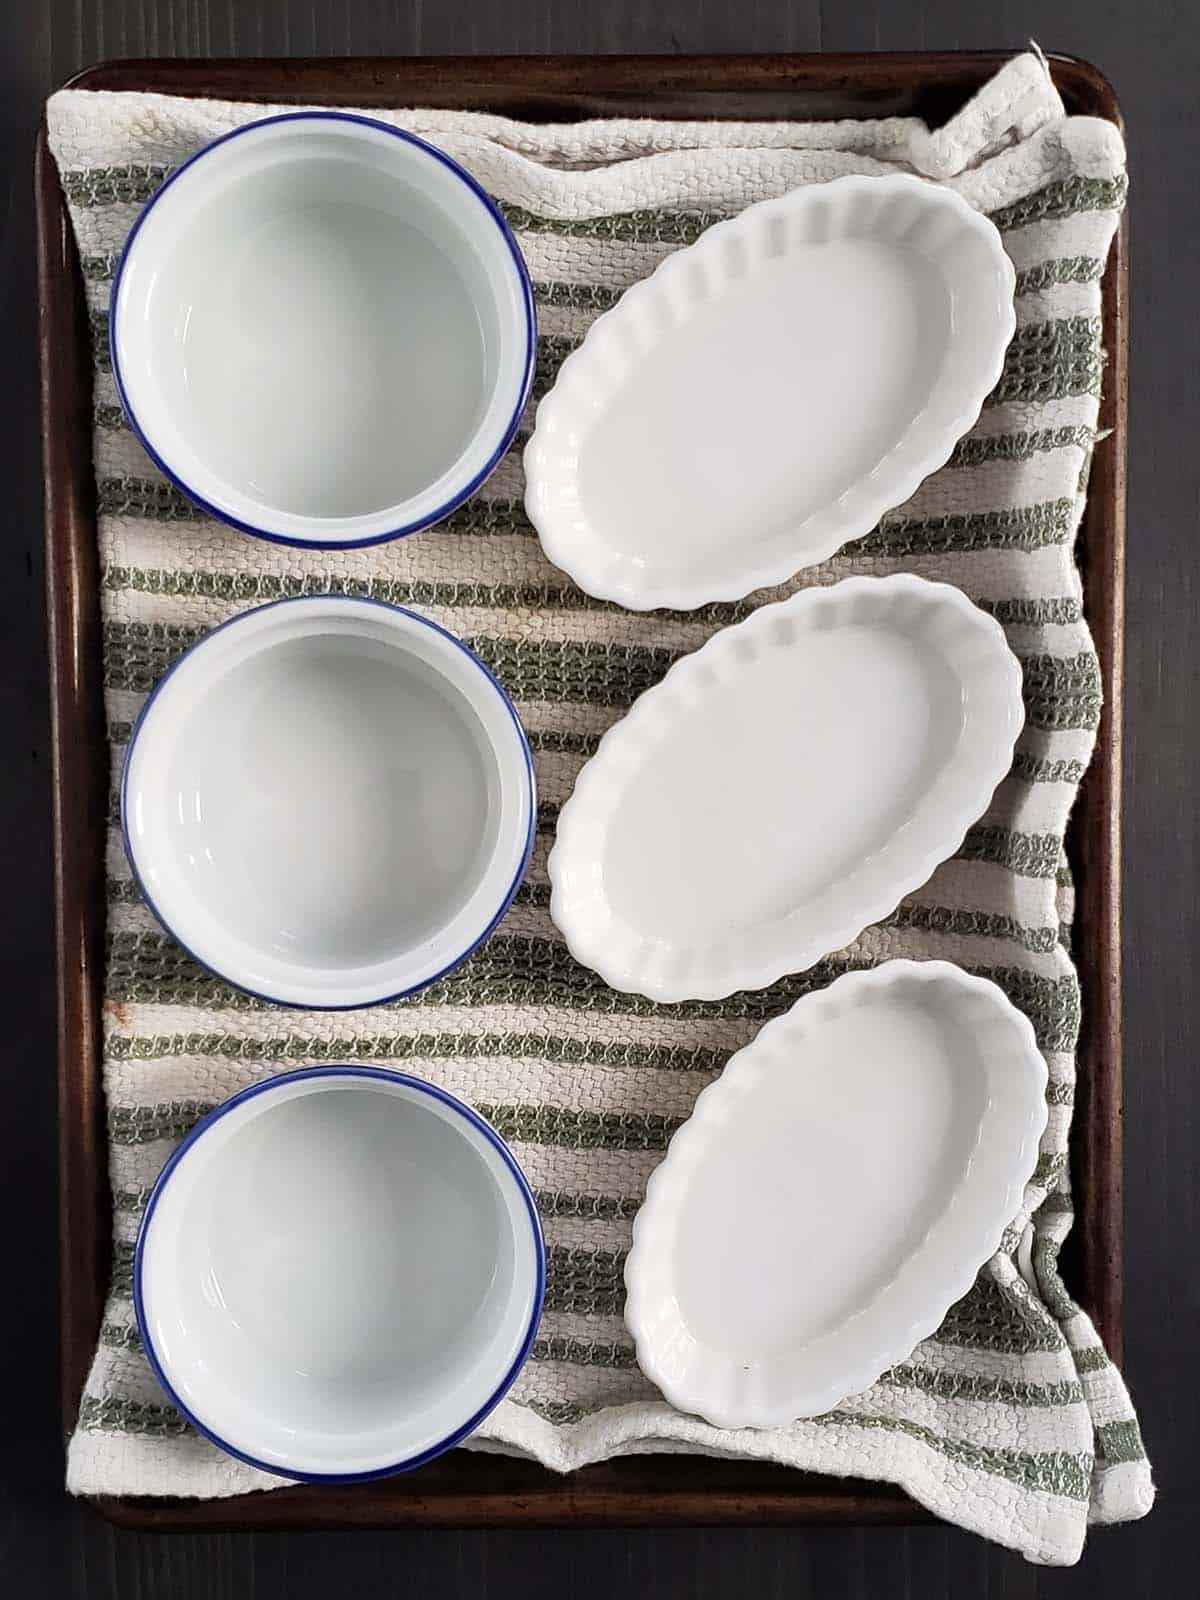
Step 3: Lay a towel across the bottom of the pan and arrange your ramekins on top. The towel will keep the ramekins from sliding around.
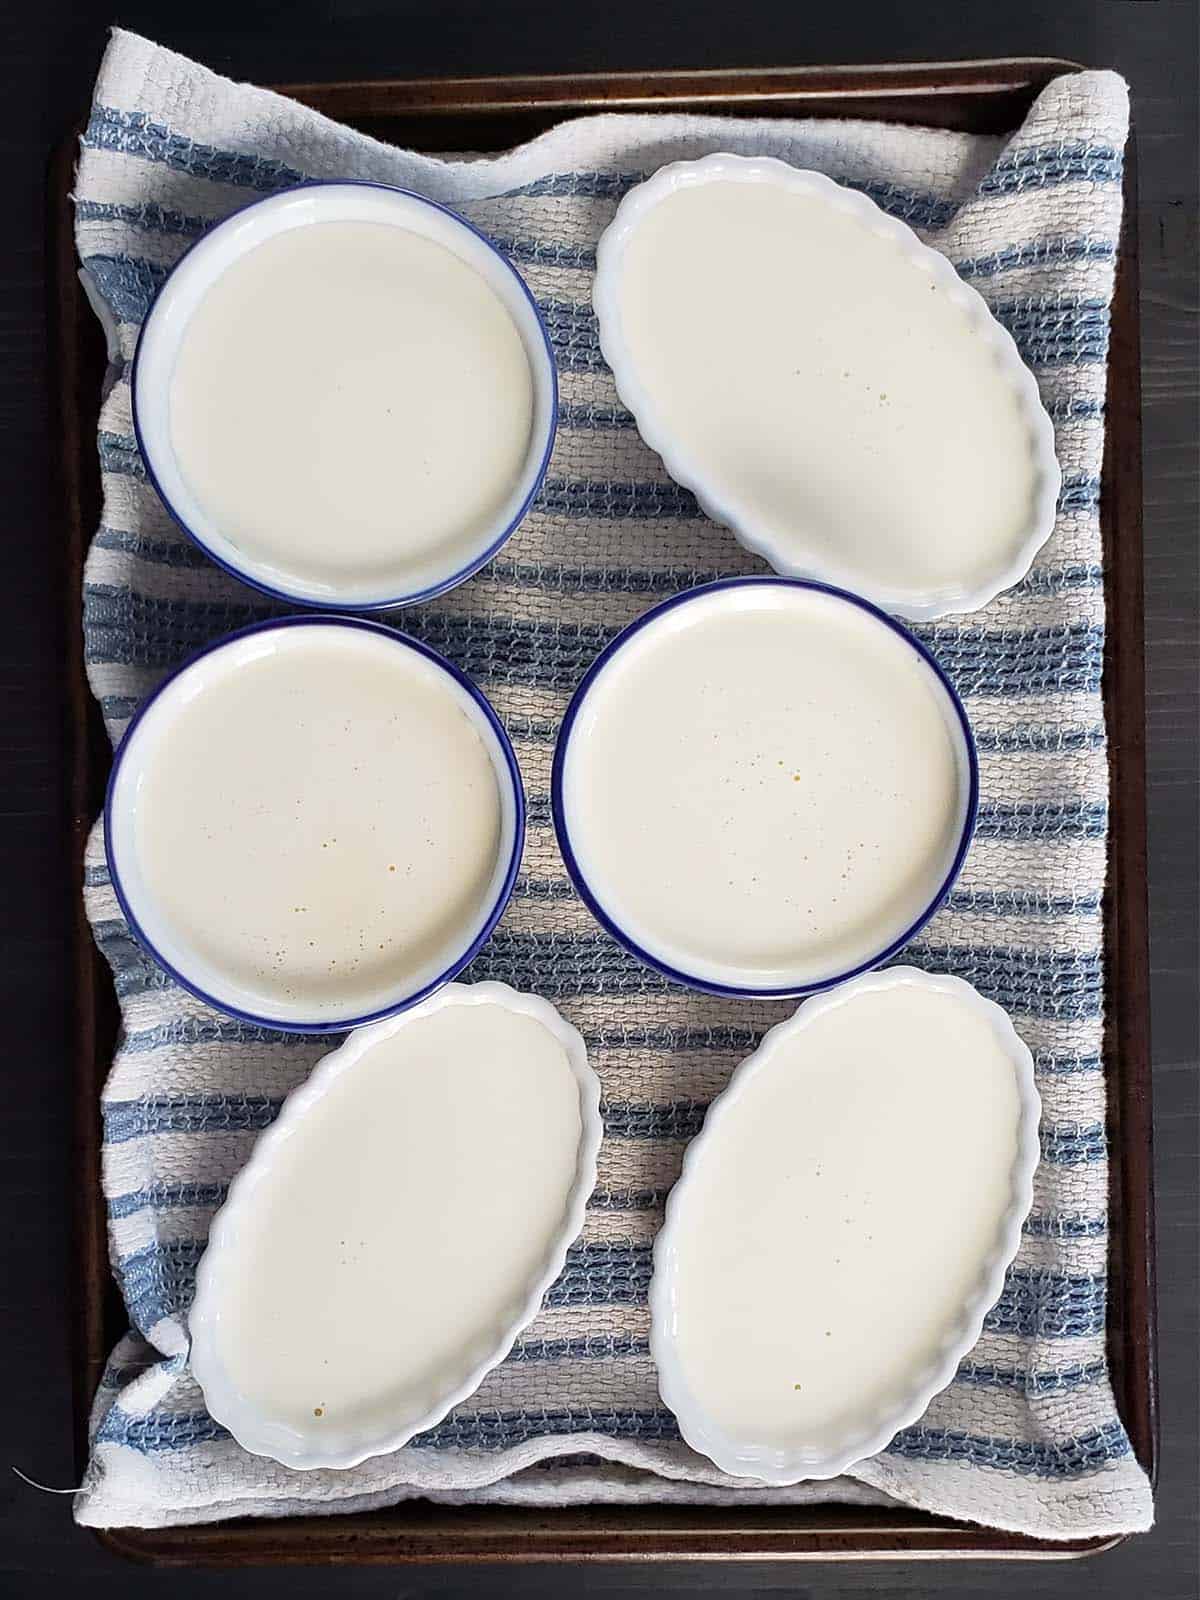
Step 4: Pour the custard into the ramekins.
Place the pan in the oven and then pour hot water into the pan being careful to not splash water into the ramekins. The water should come about halfway up the ramekins.
Bake for 20 to 30 minutes until the edges are set but the centers are still slightly jiggly. The baking time will vary depending upon the size of your ramekins.
Tip: If you want perfectly smooth creme brulee, use a spoon to skim off any bubbles from the top, or don't worry about it any imperfections will be covered by the burnt sugar crust.
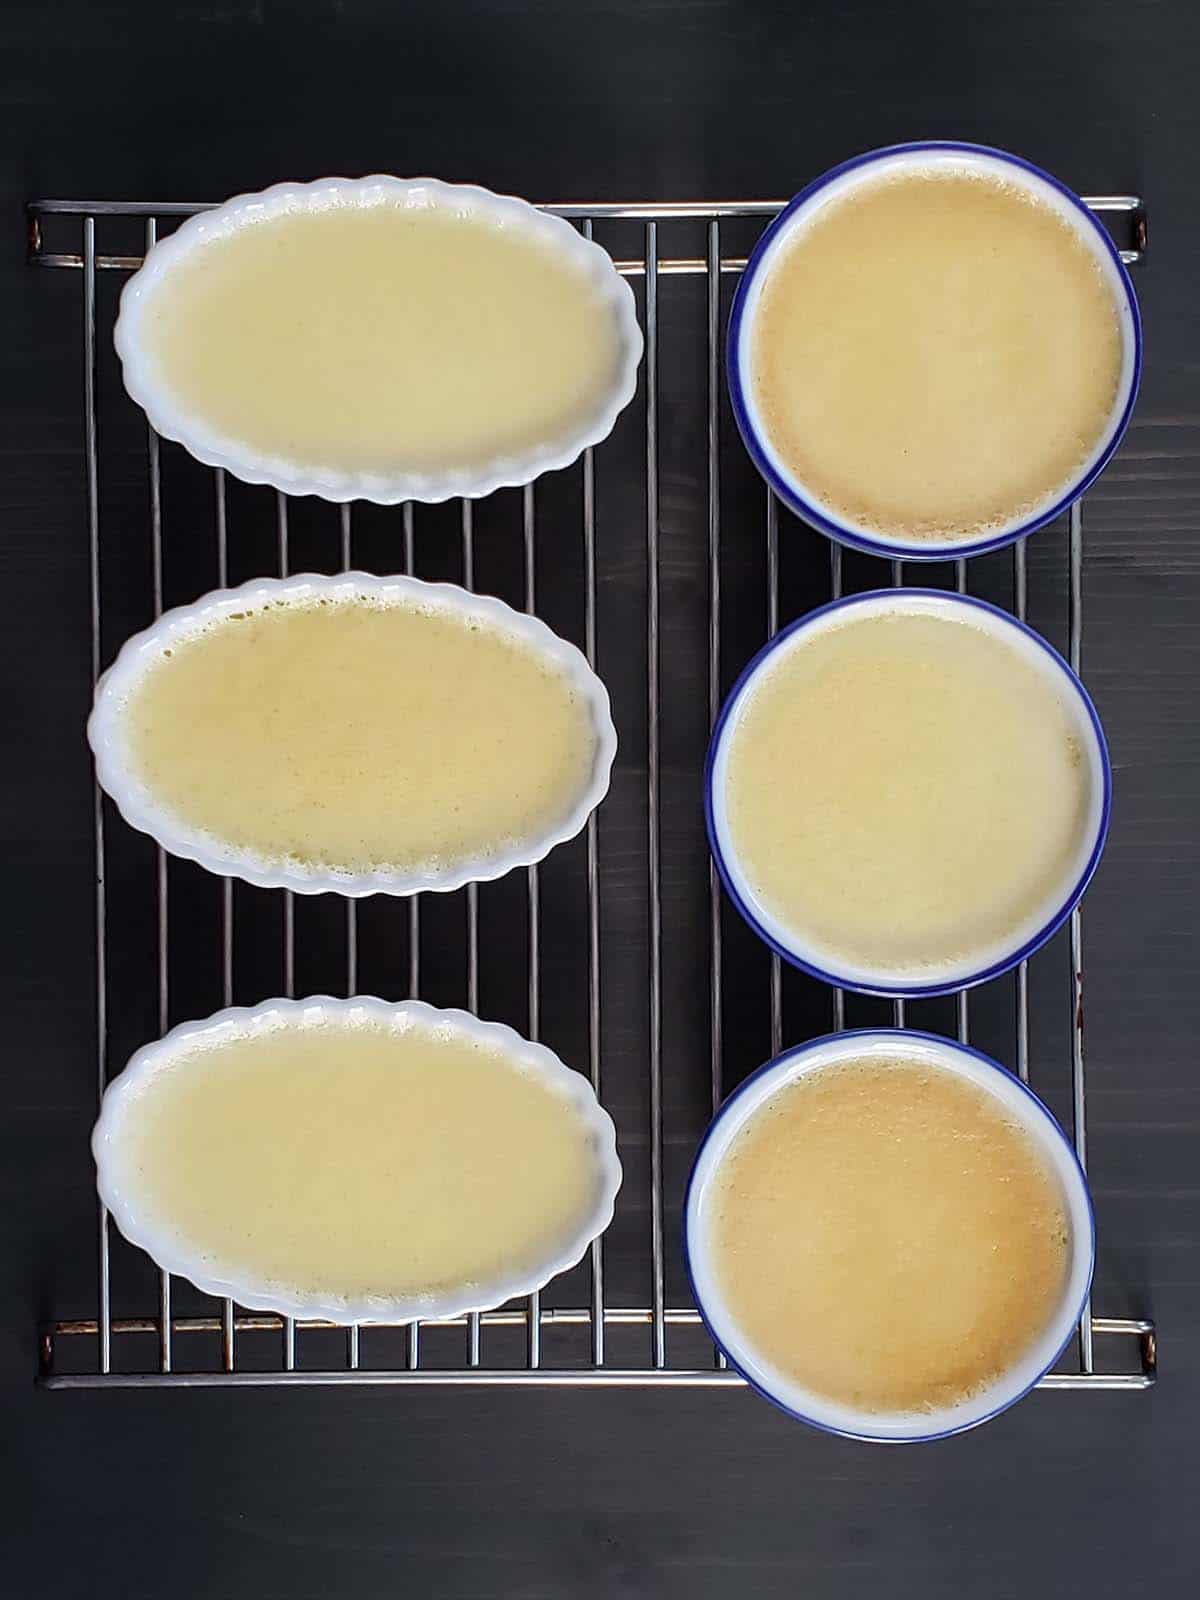
Step 5: Remove the baking dish from the oven and allow the custards to cool for approximately 15 minutes until you can safely pick up the ramekins and remove them from the water. Allow the custards to cool on the counter for an additional 15 minutes.
Cover each ramekin with plastic wrap and chill them in the refrigerator for at least four hours and up to four days.
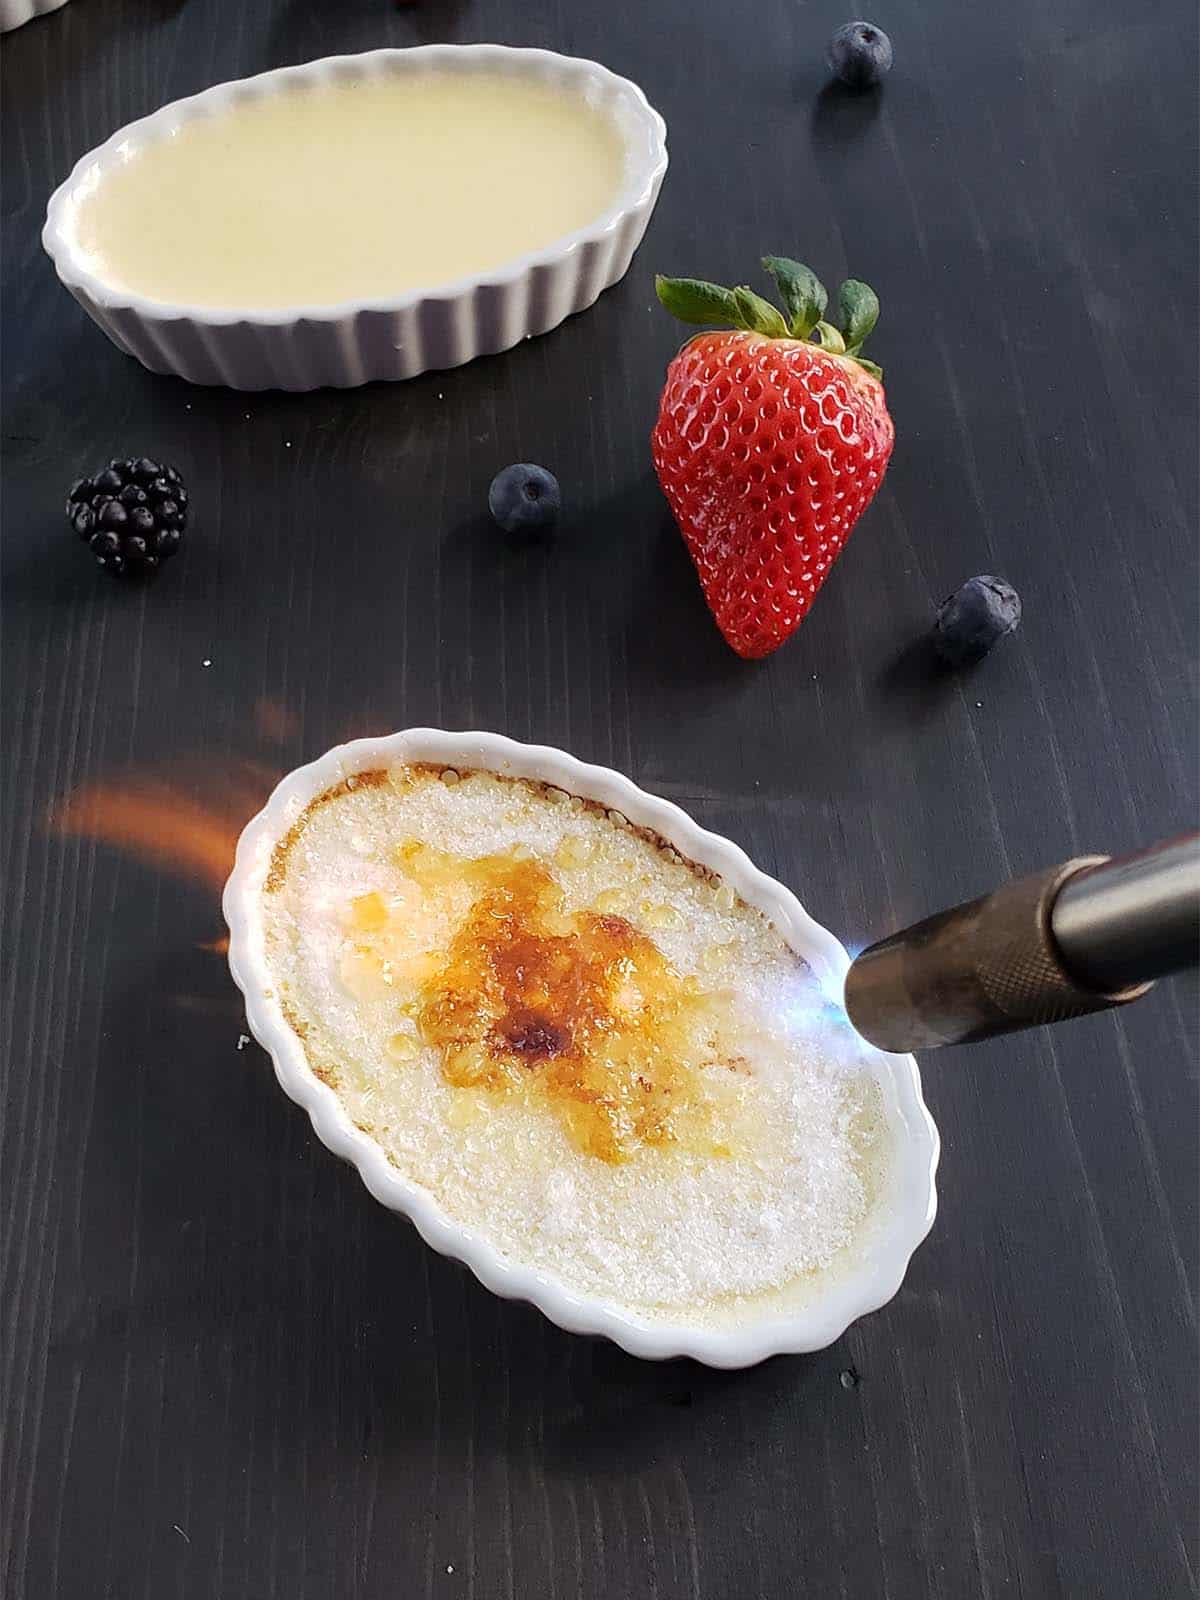
Step 6: Remove the custards from the refrigerator and evenly sprinkle each custard with 1 teaspoon of granulated sugar.
Ignite your torch and hold the flame about 4 inches from the surface of the custard. Using a circular motion heat the sugar until it browns and forms a crust.
Tip: A few months ago my brulee torch died. So I used my boyfriend's propane torch that has a detachable torch head instead. Those were the fastest brûlées I have ever made.
Tip: The longer you brulee the sugar, the darker, more caramelized, and bitter it will become. The bitterness contrasts nicely with the sweetness of the custard.
If you want a really thick crust sprinkle a second teaspoon of sugar evenly across each custard and brulee a second time.
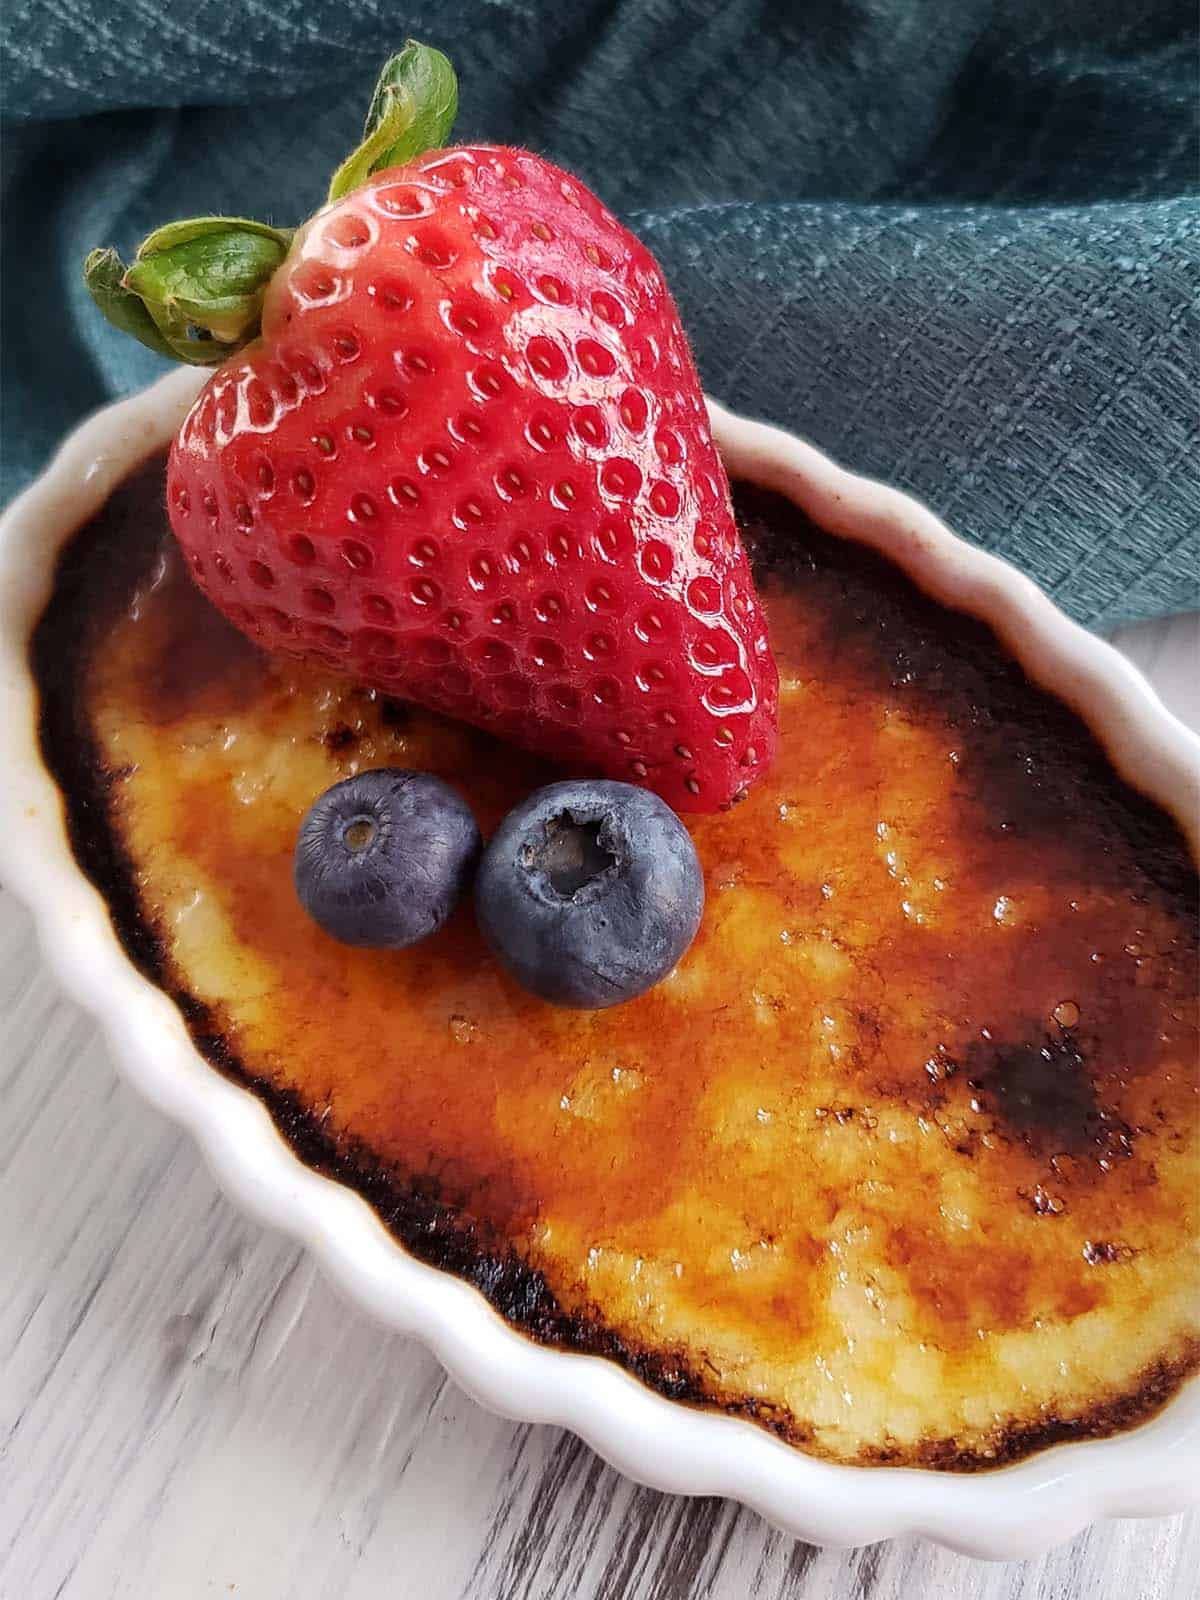
Step 7: Top with fresh fruit before serving.
Make-Ahead and Storage Instructions
Make-Ahead: Uncooked custard can be stored in the refrigerator for up to 5 days. It can either be stored all together in a storage container or you can divide it into individual ramekins and cover them with plastic wrap.
Storage: Cover the cooked and cooled creme brulees with plastic wrap and refrigerate them for up to four days. Wait to sprinkle with sugar and brulee until just before serving.
Recipe FAQs
Cooking the custards without using a water bath will allow them to heat up more quickly and potentially overcook curdling the eggs.
Cooking them in the oven for too long will also cause them to overcook and become rubbery.
Creme brulee is properly cooked when the edges are just set and the centers still have a slight wobble. The color should be smooth and glossy without any brown spots.
Yes. Uncooked custard can be stored in the refrigerator for up to 5 days. It can either be stored all together in a storage container or you can divide it into individual ramekins and cover them with plastic wrap.
You can also cover the cooked and cooled creme brulees with plastic wrap and refrigerate them for up to 4 days. Wait to brulee the sugar until just before serving.
If you don't have a kitchen torch you can still make creme brulee. You have a few options for bruleeing the sugar.
Stick Lighter: A lighter can be used to melt the sugar but it will take a really long time.
Heated Spoon: Carefully heat an old spoon (it will discolor) in the flame of your stove until it turns red. Remove the spoon from the flame and immediately place it on top of the creme brulee to caramelize the sugar. Repeat the process until all of the sugar has caramelized.
Broiler: You can also caramelize the sugar under a broiler. Move the oven rack to the top position and place the ramekins in the oven. turn on the broiler and closely monitor it to avoid burning the sugar.
This can be tricky because you want the sugar to caramelize without heating the custard. Alton Brown suggests putting the ramekins in a cold oven, then turning on the broiler to help keep the custard cool while getting the top crisp.
Expert Tips
- There is no need to purchase a special pan just use whatever you already own. The size of pan you use will depend on the size of ramekins you have. I have used cake pans, roasting pans, and jelly roll pans.
- Use a water bath when baking the creme brulees. The water helps to insulate the custard to prevent the outside from cooking too quickly before the centers have had time to set.
- Chill for at least 4 hours in the refrigerator before serving. Creme brulee is meant to be served chilled with a warm topping.
- To avoid burning the sugar, don't hold the flame too long over any one place.
- Serve immediately after caramelizing the sugar. If allowed to sit the sugar topping will become soggy instead of crunchy.
More Dessert Recipes
Thanks for Reading!
If you try this recipe, let me know! Leave a comment and rate it below! You can also snap a picture and post it on Facebook or Instagram be sure to tag me @RaspberriesandKohlrabi.
Subscribe to get more recipes and tips by email.
📖 Recipe

Vanilla Creme Brulee with Fruit
Equipment
- shallow pan
Ingredients
- 3 egg yolks
- ½ cup granulated sugar
- ⅛ teaspoon kosher salt
- 2 cups heavy whipping cream
- 1 teaspoon vanilla extract
Instructions
- Move an oven rack to the middle position and preheat the oven to 325°F (165°C).
- In a medium-sized bowl whisk together the 3 egg yolks, ½ cup granulated sugar, and ⅛ teaspoon kosher salt until smooth and the egg yolks start to lighten in color.2 cups heavy whipping cream
- Stir in the 2 cups heavy whipping cream and 1 teaspoon vanilla extract.
- Lay a towel across the bottom of a pan and arrange your ramekins on top. Pour the custard into the ramekins.
- Place the pan in the oven and then pour hot water into the pan being careful to not splash water into the ramekins. The water should come about halfway up the ramekins. Bake for 20 to 30 minutes until the edges are set but the centers are still slightly jiggly. The baking time will vary widely depending upon the size and shape of your ramekins.
- Remove the baking pan from the oven and allow the custards to cool for approximately 15 minutes until you can safely pick up the ramekins and remove them from the water. Allow the custards to cool on the counter for an additional 15 minutes. Cover each ramekin with plastic wrap and chill them in the refrigerator for at least four hours and up to four days.
- Remove the custards from the refrigerator and evenly sprinkle each custard with 1 teaspoon of granulated sugar. Ignite your torch and hold the flame about 4 inches from the surface of the custard. Using a circular motion heat the sugar until it browns and forms a crust. For a thicker crust sprinkle a second teaspoon of sugar evenly across each custard and brûlée a second time.
- Top with fresh fruit before serving.


Comments
No Comments